


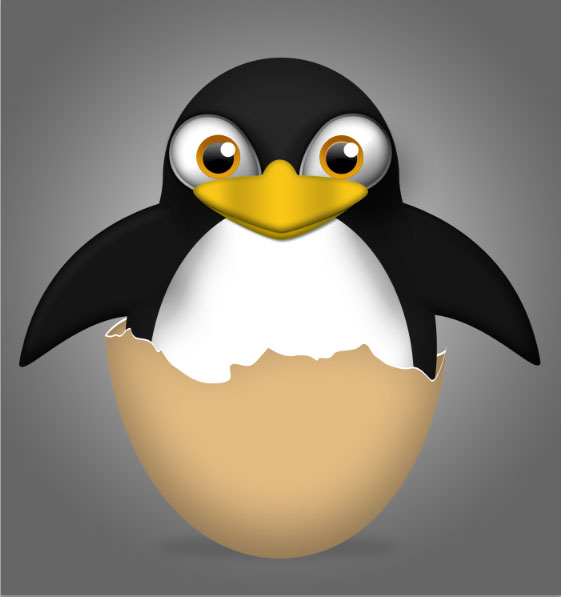
Hello everybody, in this tutorial, we will create a little penguin character with simple technique. Mostly, we will using the Ellipse Tool, the Direct Selection Tool, the Path Selection Tool and effect on the blending options. So, you should know the basic’s of shape and path..
What We’ll Be Creating
Step 1
Create new document (Ctrl + N), i’m using size 1400×1700px.

Step 2
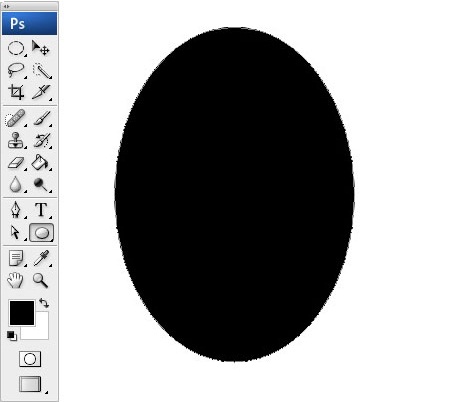
With the Ellipse Tool, create an ellipse circle to make the part of penguin’s body.
Step 3
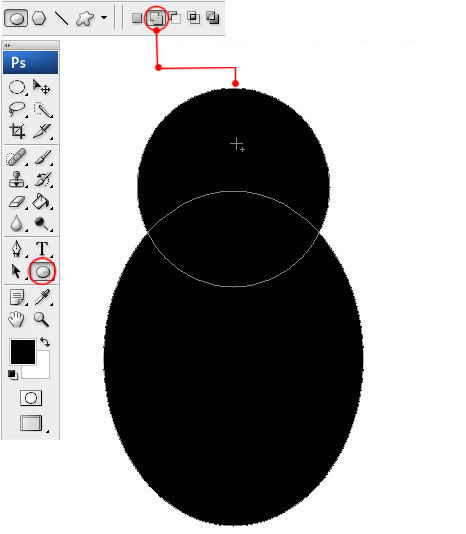
Now, we will make the part of penguin’s head. Lets select the Ellipse Tool, and then select “Add to shape area”, to tacks on the parts of penguin’s head with body. Add a small circle on the up of the penguin’s body.
Step 4
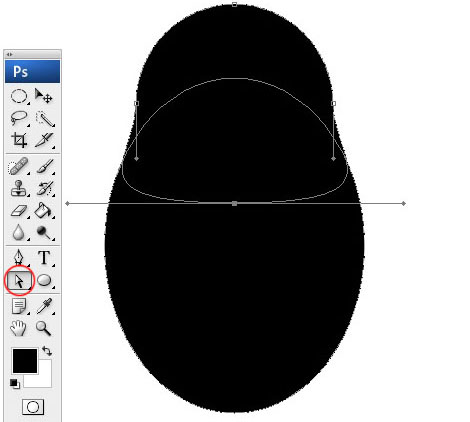
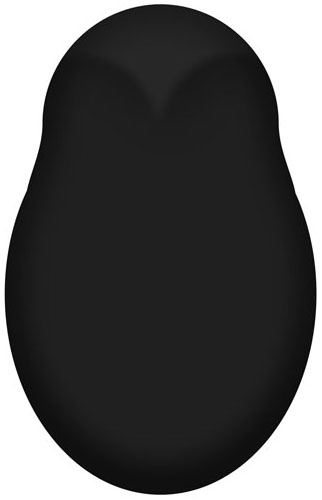
With the Direct selection tool, we will make the part of penguin’s head and body more proportional. Take the bottom curve of the circle to the edges to make the parts of head and body looked tacks on.
Step 5
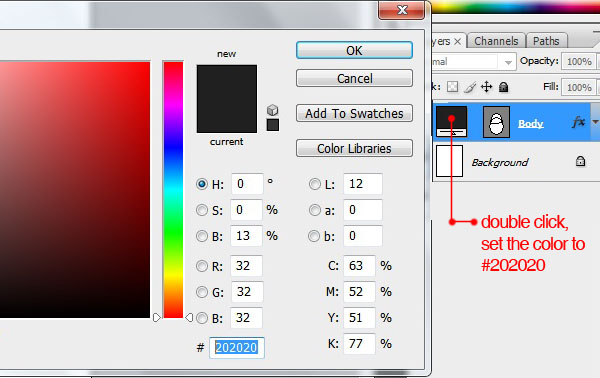
Change color entirely body becomes #202020 by double clicking thumbnail color at layer pane.
Step 6
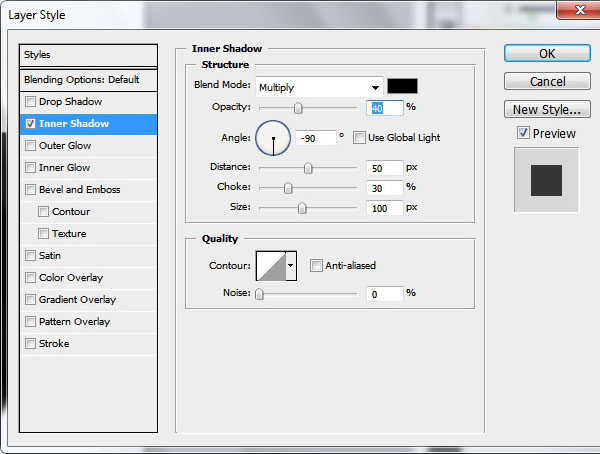
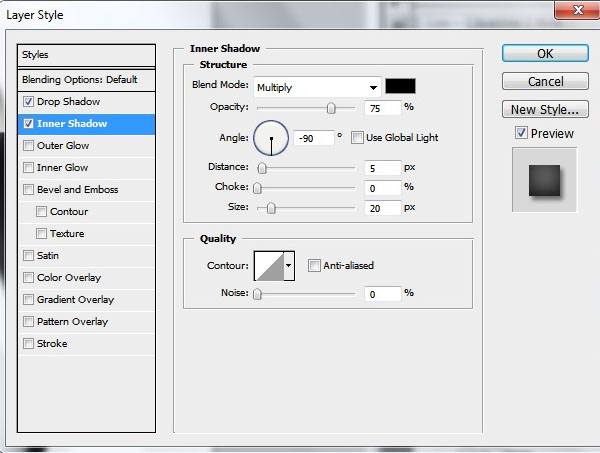
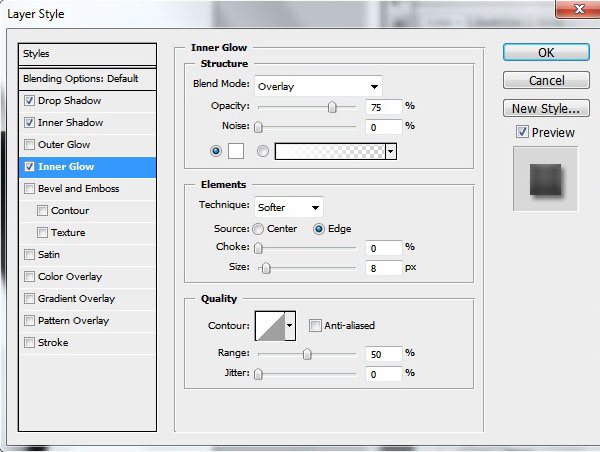
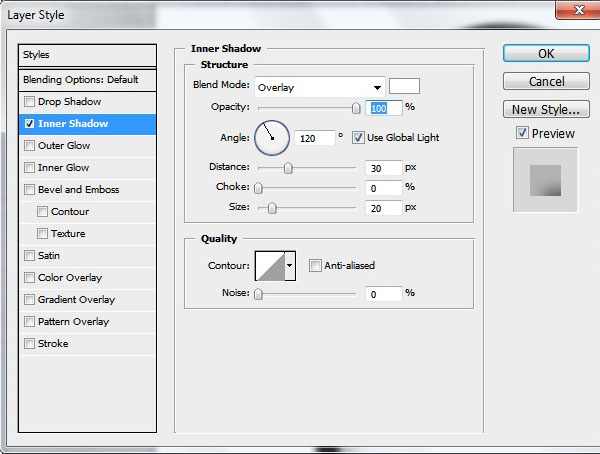
Double click the shape layer and add this layer style.
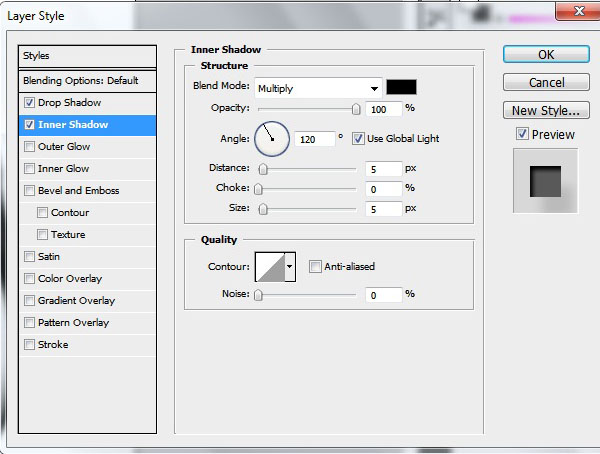
Inner Shadow :
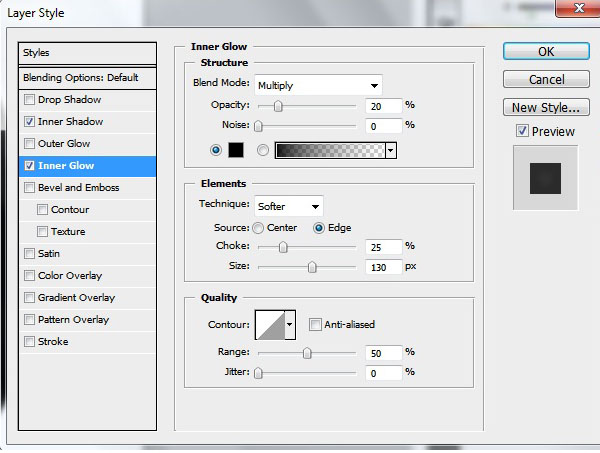
Inner Glow :
Step 7
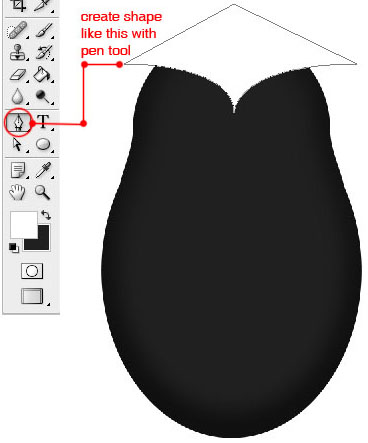
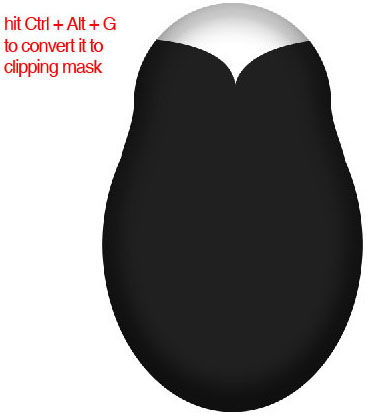
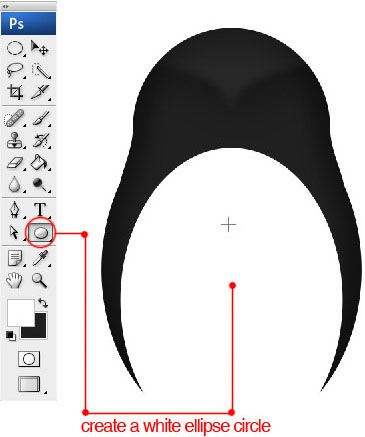
Now, we will make the head light. With the Pen Tool, create shape like the following image.
Step 8
Hit Ctrl + Alt + G to convert it to clipping mask.
Step 9
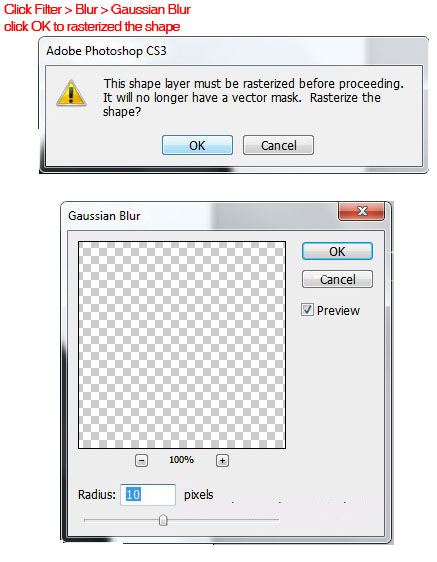
Now, add Gaussian Blur. Go to Filter>Blur>Gaussian Blur. The layer still get shape’s form, so it must be razterized, therefore click OK to razterizing it. Set the radius becomes 10px.
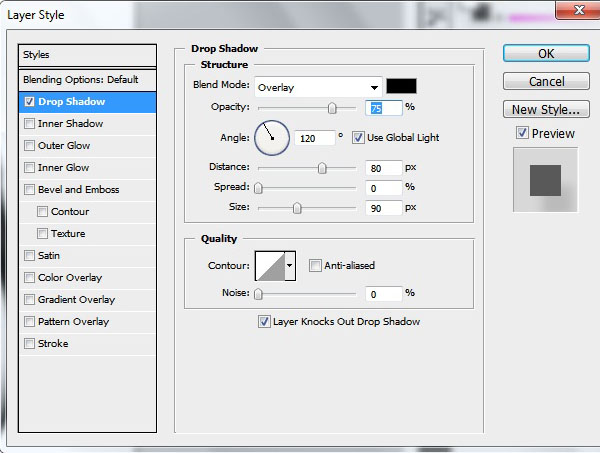
Step 10
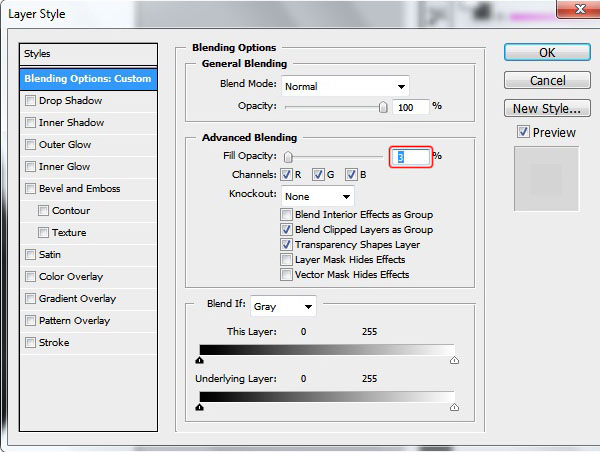
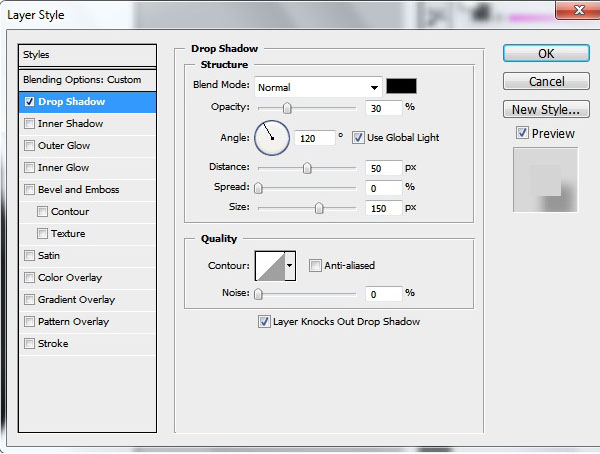
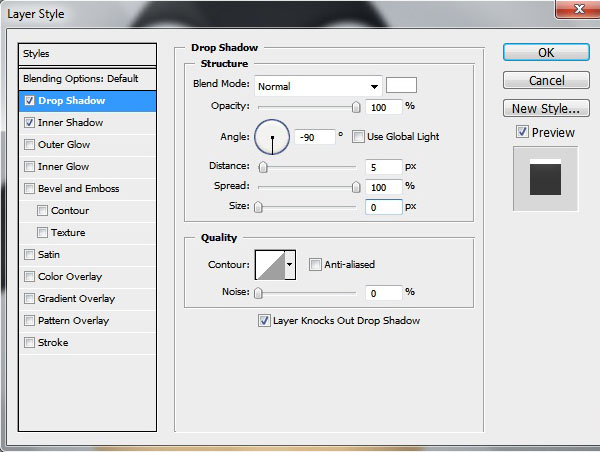
Double click the layer, set Fill Opacity to 3 % and add the following Drop Shadow.
Drop Shadow :
You should have image like this.
Step 11
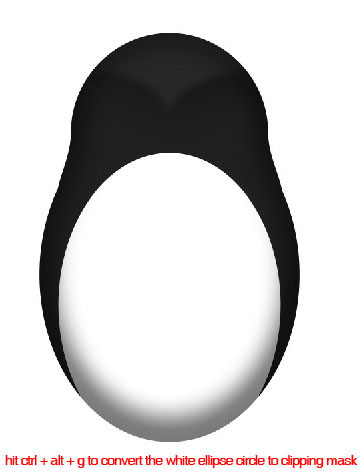
With the Ellipse Tool, create a white ellipse circle.
Step 12
Hit Ctrl + Alt + G to convert it to clipping mask.
Step 13
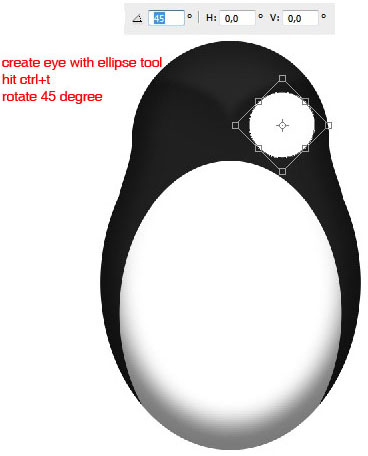
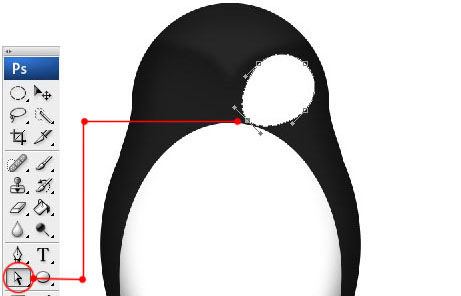
Create a white circle with the Ellipse Tool, then hit Ctrl + T to transform it, and then rotate to 45 degree.
Step 14
With the direct selection tool, move the bottom anchor point to bottom left until gotten an image like this.
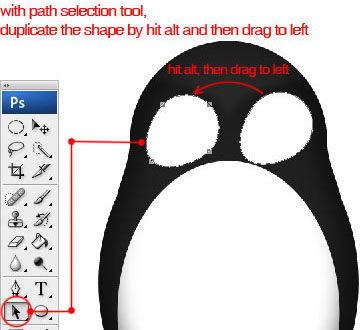
Step 15
With the Path Selection Tool, duplicate the shape by holding down Alt key and then drag to left.
Step 16
Still with the Path Selection Tool, hit Ctrl + T, right click and then go to Flip Horizontal.
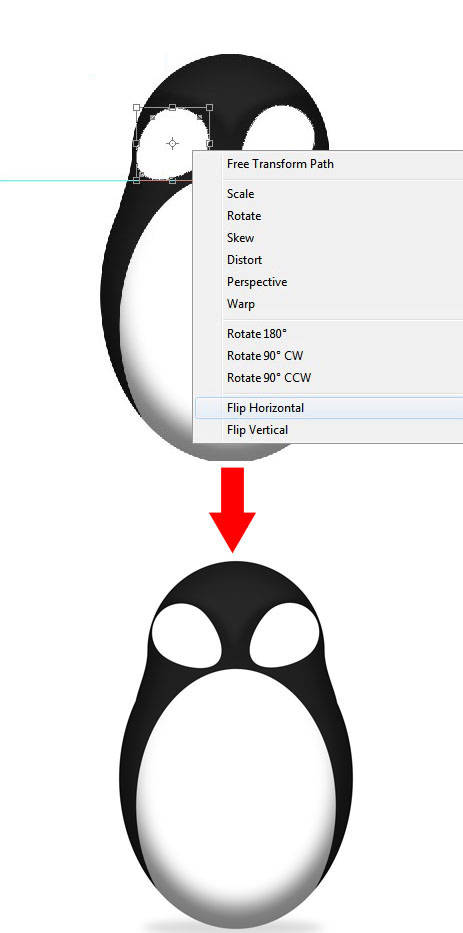
Step 17
Now, add the following layer styles by double clicking the layer.
Drop Shadow :
Inner Shadow :
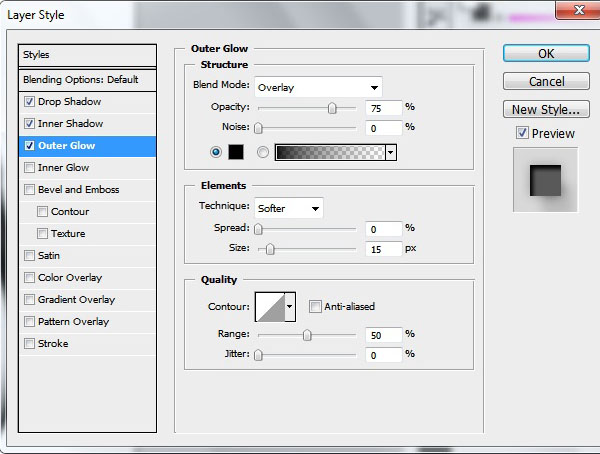
Outer Glow :
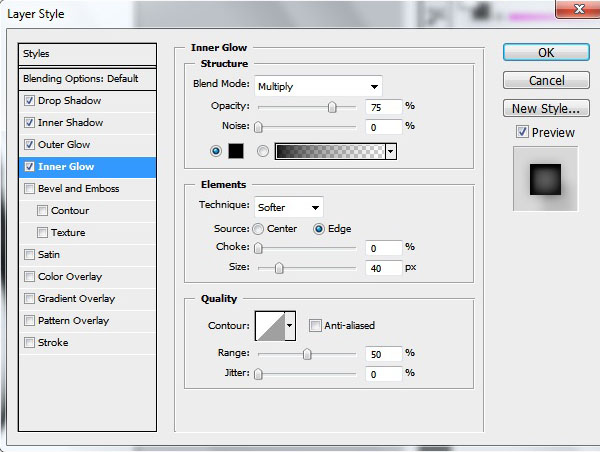
Inner Glow :
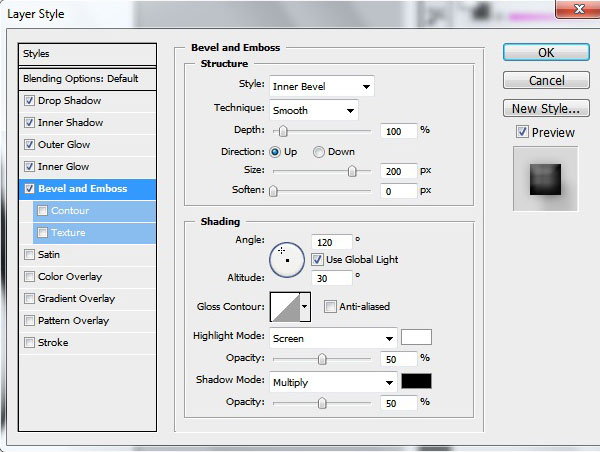
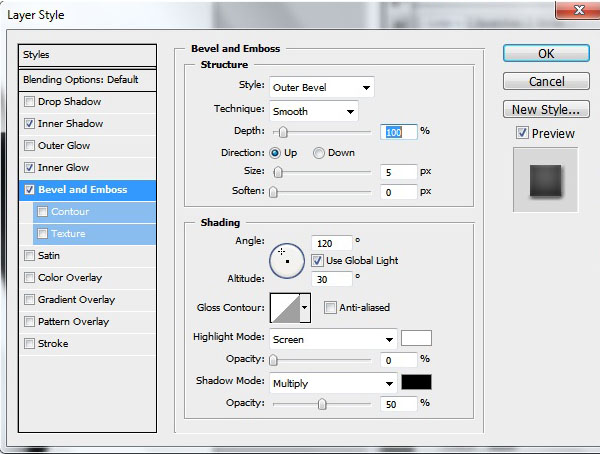
Bevel and Emboss
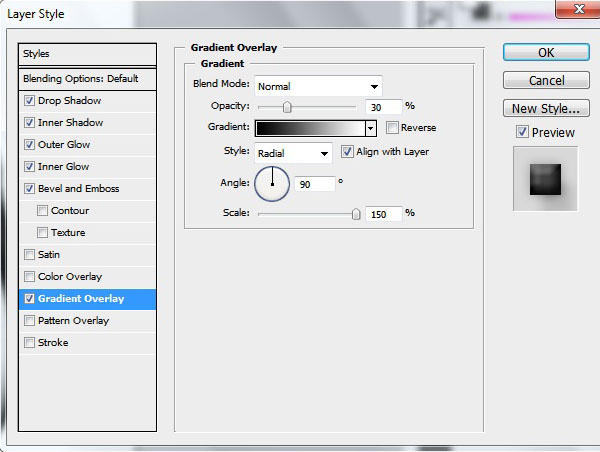
Gradient Overlay :
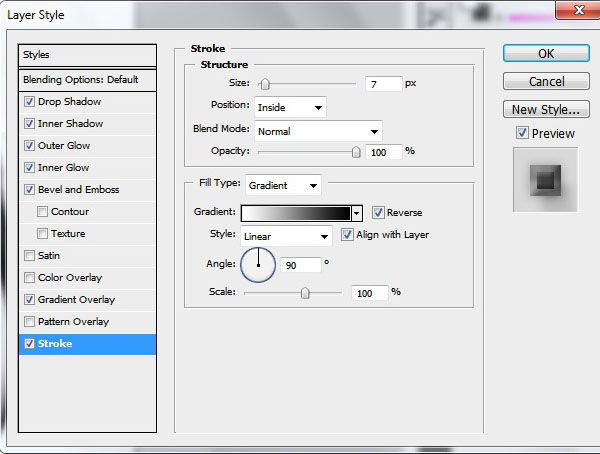
Stroke :
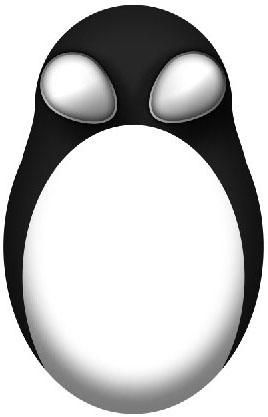
You should have image like this.
Step 18
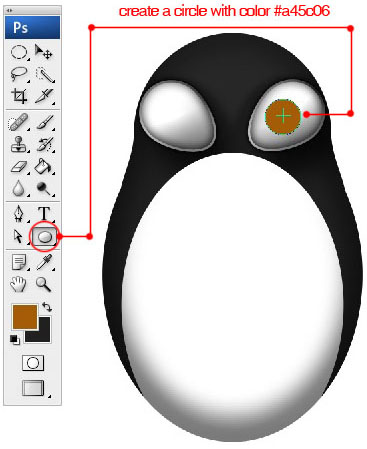
Change the foreground colour to #a45c06, create a circle with the Ellipse Tool, and then positioned to the center of the white part.
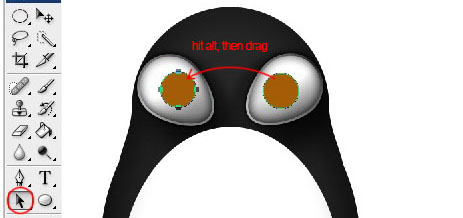
Step 19
With the Path Selection Tool, duplicate the brown eye by holding down Alt key, and then drag to left.
Step 20
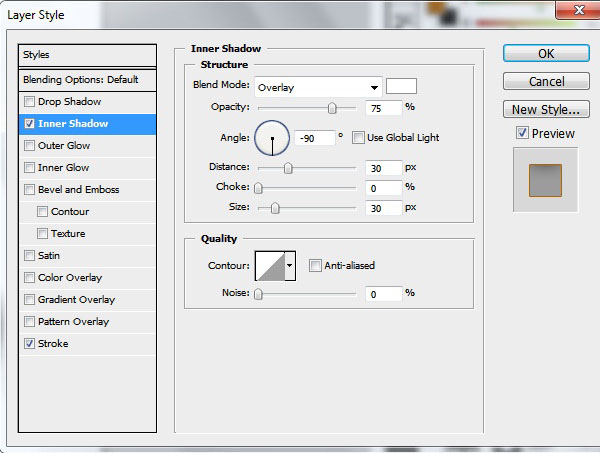
Now, add the following layer styles.
Inner Shadow :
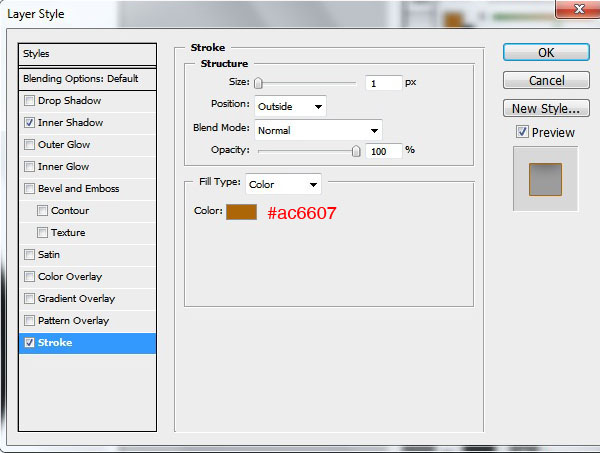
Stroke :
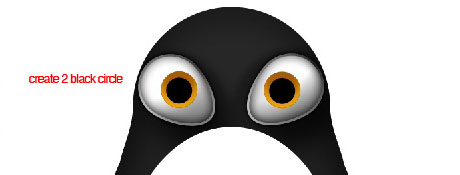
Step 21
With the Ellipse Tool, create 2 (two) black circles on the brown eye.
Step 22
Create 2 (two) white circles and then positioned like image below.
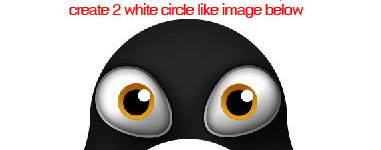
Step 23
Now, we will create a white circle to make light reflection eye. Lets create it with Ellipse Tool, and then move the bottom anchor point onto with the Direct Selection Tool.
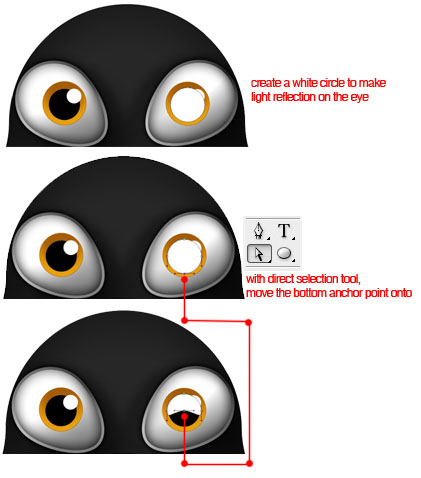
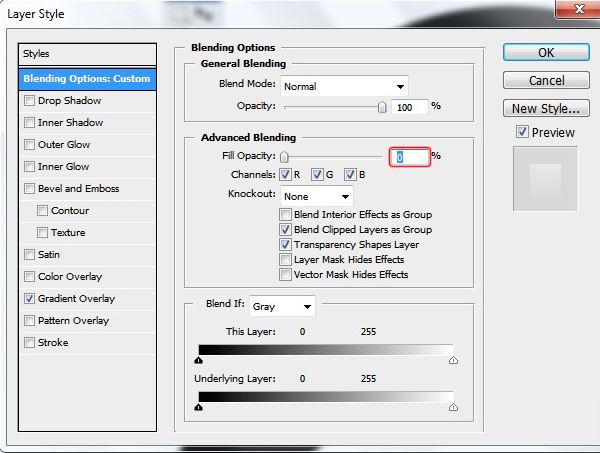
Step 24
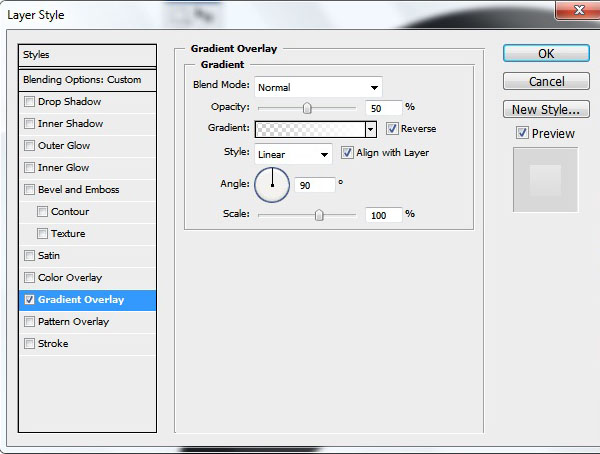
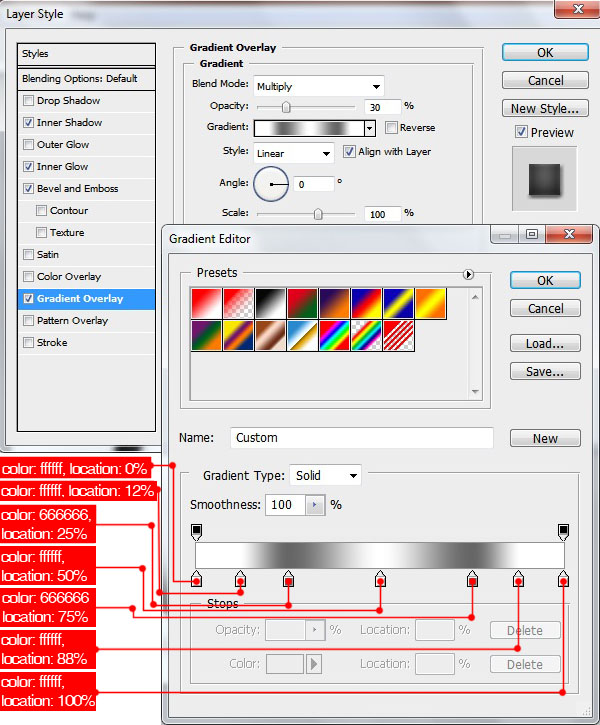
Double clicks the layer, set Fill Opacity to 0 % and then add the following Gradient Overlay.
Gradient Overlay :
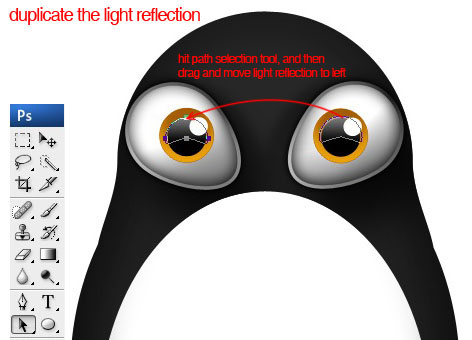
Step 25
Duplicate the light reflection by drag and move it to left with the Path Selection Tool.
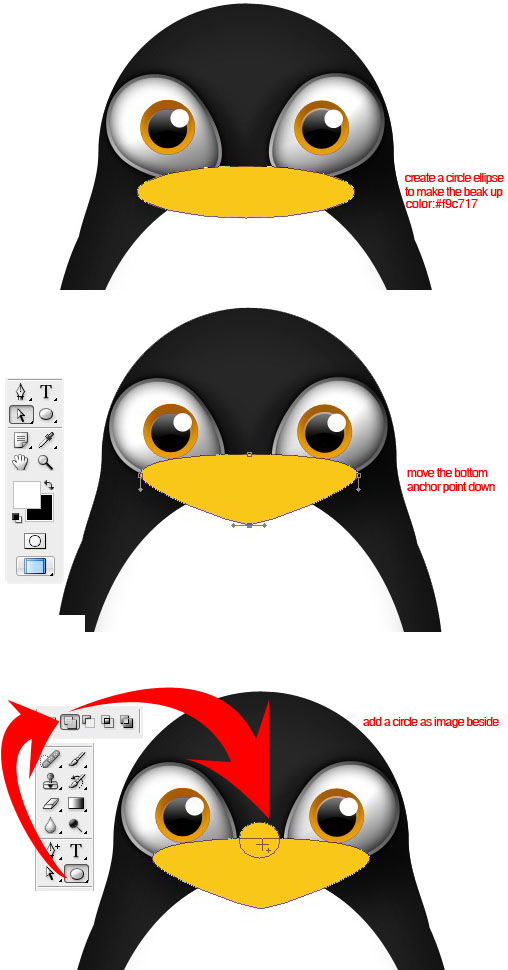
Step 26
Now, we will make the penguin’s beak. Lets create an ellipse circle with the Ellipse Tool and then change the color to #f9c717. Afterwards, move the bottom anchor point down with the Direct Selection Tool. To make more beautiful, add circle on the up of the beak with the Ellipse Tool and select “Add to shape area” to merge the circle with the beak.
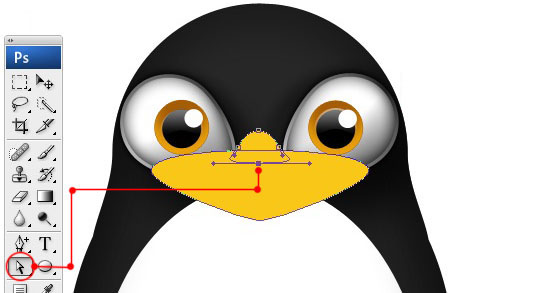
Step 27
To make looked more tacks on, take the bottom curve of the circle to the edges with the Direct Selection Tool.
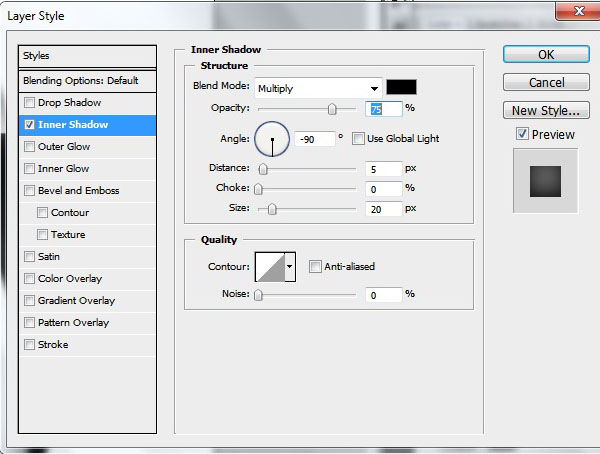
Step 28
Add the following layer styles by double clicking the beak’s layer.
Inner Shadow :
Inner Glow :

Bevel and Emboss :
Gradient Overlay :
Step 29
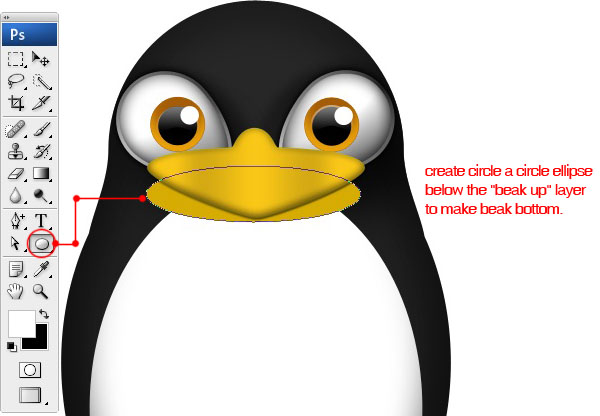
Now, we will create the beak bottom. Lets create an ellipse circle (color = #d7ac02) under the “beak on” layer.
Step 30
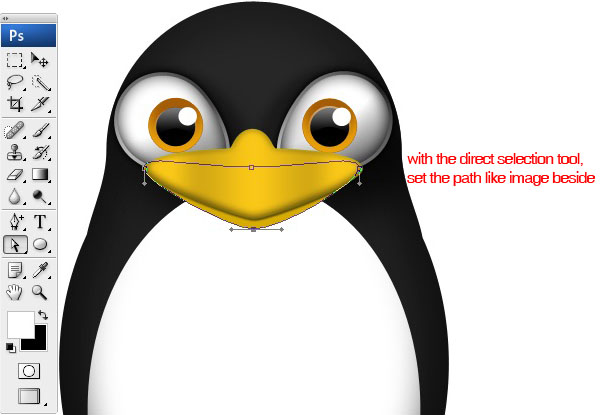
With the Direct Selection Tool, set the path like image below.
Step 31
Add the following layer styles.
Drop Shadow :

Inner Shadow :
Inner Glow:
Step 32
Now, we will create the penguin’s hand. Create shape below the “body” layer as image below.
Step 33
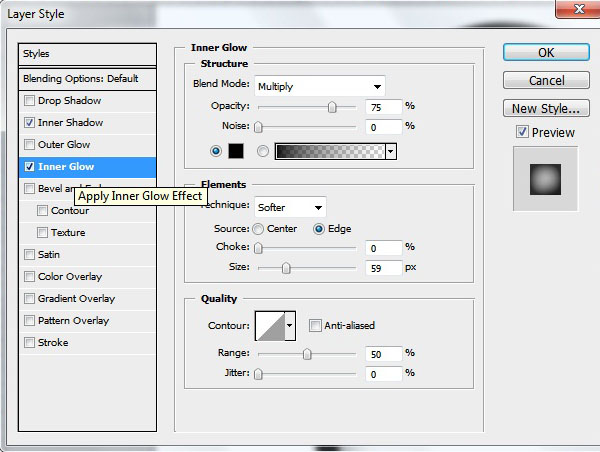
Add the following layer styles.
Inner Glow :
Inner Shadow :
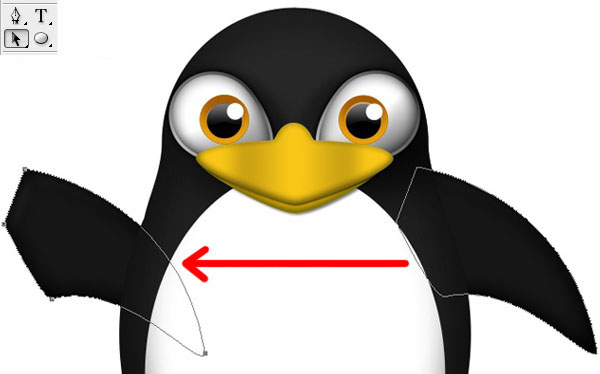
Step 34
With the Path Selection Tool, duplicate the hand by holding down Alt key, and then move the it to left.
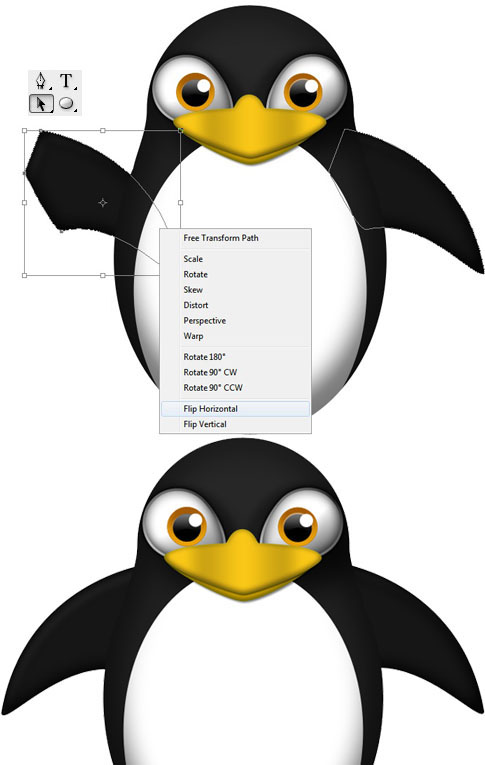
Step 35
After duplicated, hit Ctrl + T, right click and then go to Flip Horizontal.
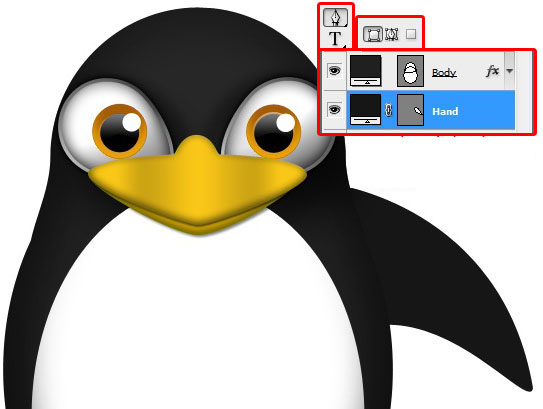
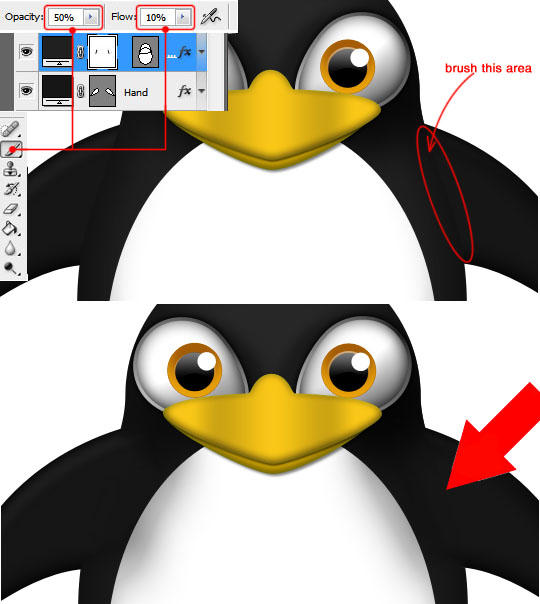
Step 36
Now, we will make the hand and the body looked tacks on. Add layer mask on the “body” layer. Click the Brush Tool, and then set the brush opacity to 50% and Flow to 10%. Brush area between the part of body and the hand. Don’t forget to change the foreground color to black (hit D).
Step 37
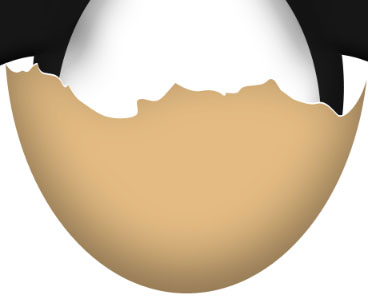
With the Ellipse Tool, create an ellipse circle to make the egg (color = #e4bb83).
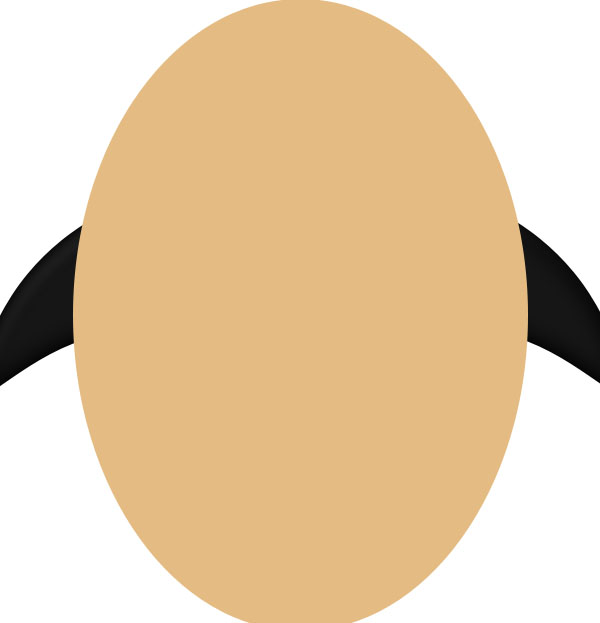
Step 38
We now need to subtract the egg to looked like crack egg, select the “Pen Tool” (P) then select “Subtract From Path Area”. Create path like image below.
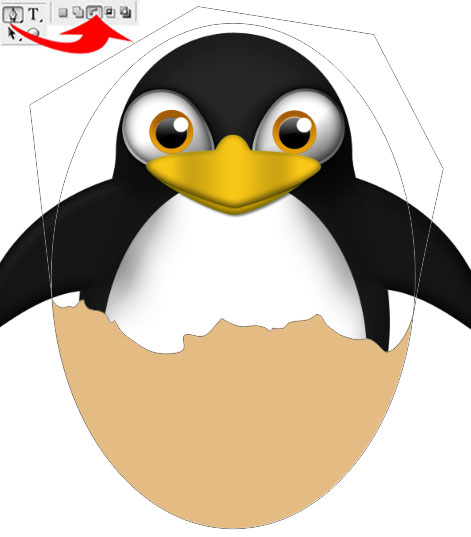
Step 39
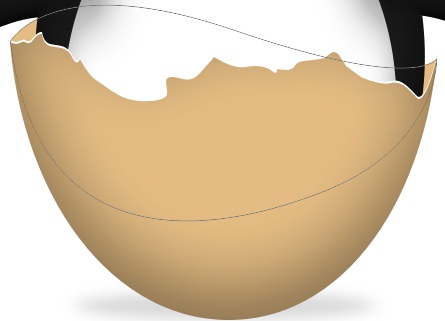
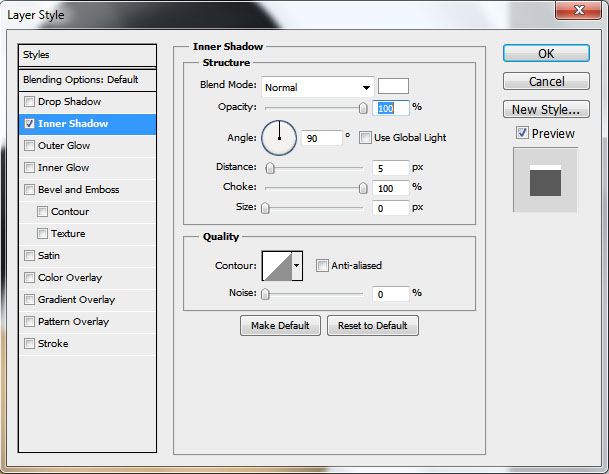
Add the following layer styles.
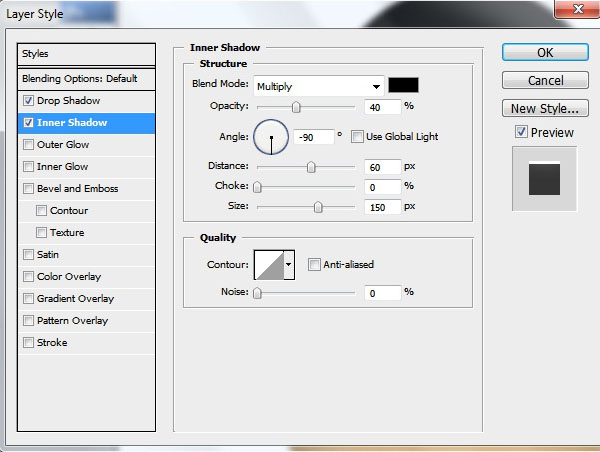
Inner Shadow :
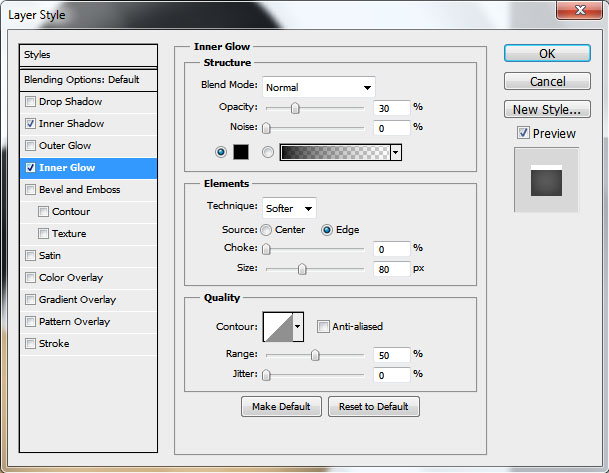
Inner Glow :
You should have image like this.
Step 40
Create shape with the Pen Tool under the egg layer to make inner egg (color = #e4bc83).
Step 41
Add the following layer styles.
Inner Shadow :
Inner Glow :
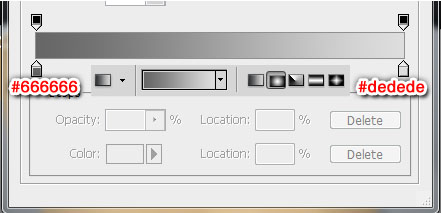
Step 42
And the last step is adding gradient to background layer. With Gradient Tool (G), select radial gradient, and then set the color from #666666 to #dedede.
Conclusion
Yeah, now you can create a little penguin character with simple technics
About The Author : Muhammad Wildan

Muhammad Wildan is a young man from Banjarnegara, Indonesia who loves all about digital arts. He often watch movie and sleep at his spare time. For more information about him, you can Follow him on Twitter or bring him smile on Facebook.

This cute Penguin fits very well, good enough for my love to draw in Photoshop, but I still have to manage well the tool, now I’ll draw another penguin with the guidance you give us.
Please guide.
Awesome, great job!
Awesome tutorial. The eyes penguin is very sharp.. Nice work.
Nice tutorial.. good one.