In the following steps I will show you how to create a nice audio speaker in Adobe Illustrator. You will only need a simple circle. Using the Appearance panel, seventeen fills, five stroke plus numerous effects you will reach the result shown in the image below. Give it a try and you might be impressed by the power of the Appearance panel.
Tutorial Details
- Difficulty: Intermediate
- Estimated Completion Time: 1 hour 30 minutes
- Number of Steps: 20
This is What You’ll Be Creating
Step 1
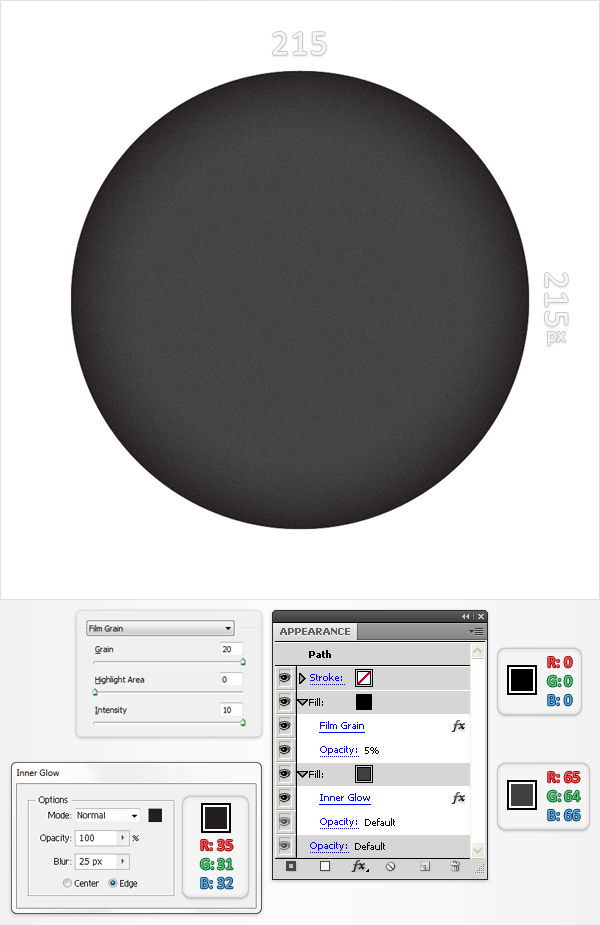
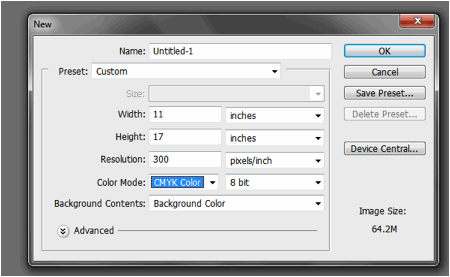
Create a 300 by 300, RGB document then pick the Ellipse Tool(L). Click on your artboard, enter 215 in the width and height boxes then click OK. This will create a 215 by 215px shape. Fill it with R=65 G=64 B=66 then open the fly-out menu of the Appearance panel and click on Add New Fill. This will add a second fill for your shape. Select it from the Appearance panel and make it black. Return to the first fill, select it and go to Effect > Stylize > Inner Glow. Enter the data shown below, click OK then move to the second fill. First, lower its opacity to 5% then go to Effect > Artistic > Film Grain. Enter the data shown and click OK. Now, your shape should look like in the image below.
Step 2
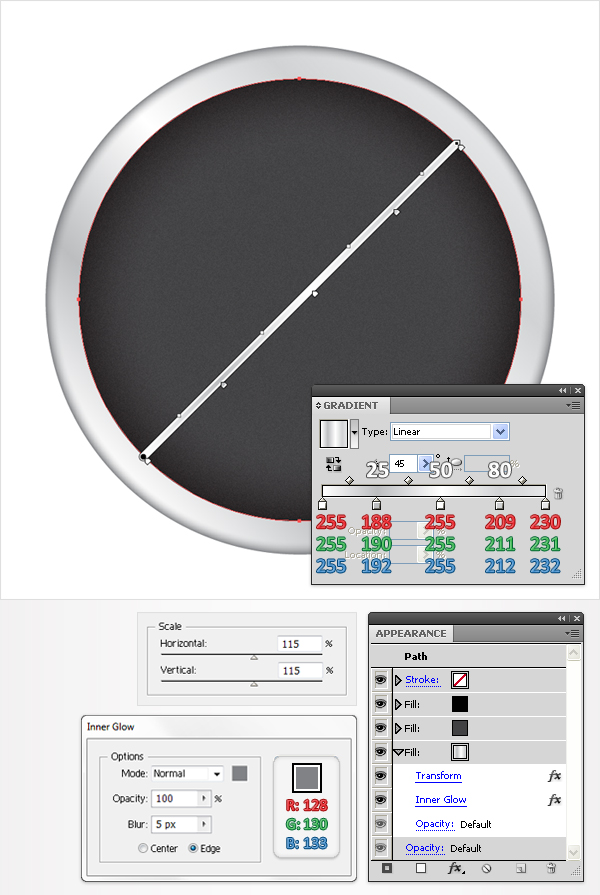
Add a third fill for your shape. Select it from the Appearance panel, move it below the existing fills and use the linear gradient shown below. The white numbers from the gradient image stands for Location percentage. With this fill selected go to Effect > Distort&Transform > Transform. Drag the Scale-Horizontal and the Scale-Vertical sliders to 115%, click OK then go to Effect > Stylize > Inner Glow. Enter the data shown in the following image then click OK.
Step 3
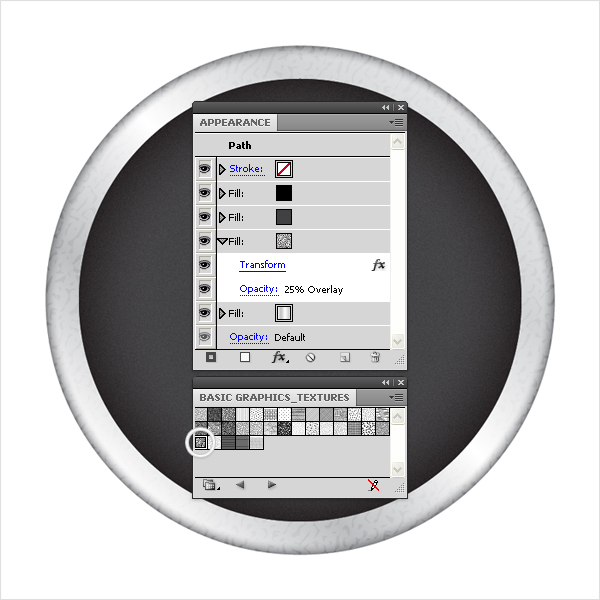
Select the fill made in the previous step and click on the Duplicate Selected Item button from the bottom of the Appearance panel. Obviously, this will duplicate the fill made in the previous step. Select this copy, remove the Inner Glow effect then lower its opacity to 25% and change the blending mode to Overlay. Next, you will need a nice pattern for this fill. Open the fly-out menu of the Swatches panel and go to Open Swatch Library > Pattern > Basic Graphics > Basic Graphics_Textures. A new window with a group of cool patterns should open. Make sure that the newest fill is selected and click on the USGS 21 Intraticate Surface pattern. Now, your shape should look like in the image below.
Step 4
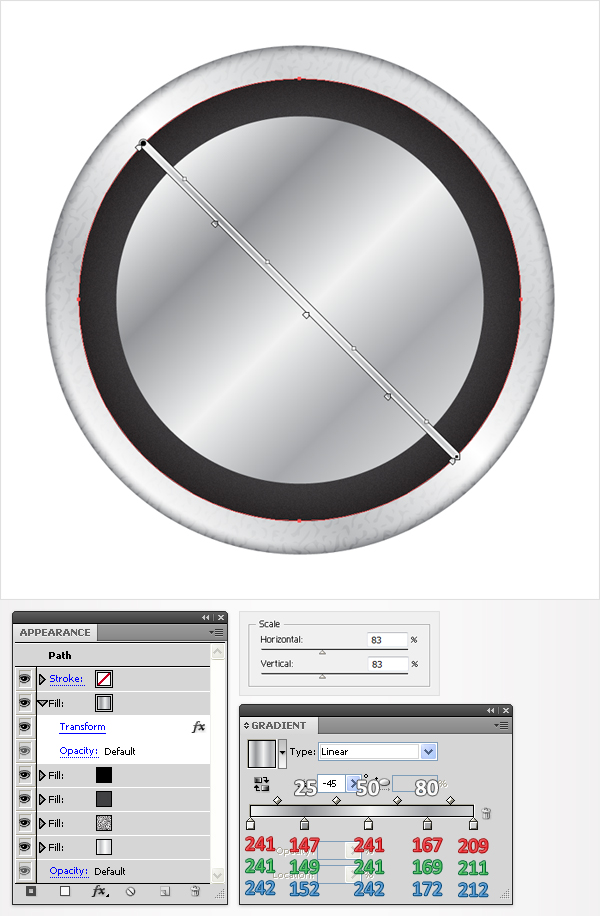
Add a new fill for your shape and make sure that it is placed in the top of the Appearance panel, above all other fills. Select it, use the linear gradient shown below then go to Effect > Distort&Transform > Transform. Drag the Scale-Horizontal and the Scale-Vertical sliders to 83% and click OK.
Step 5
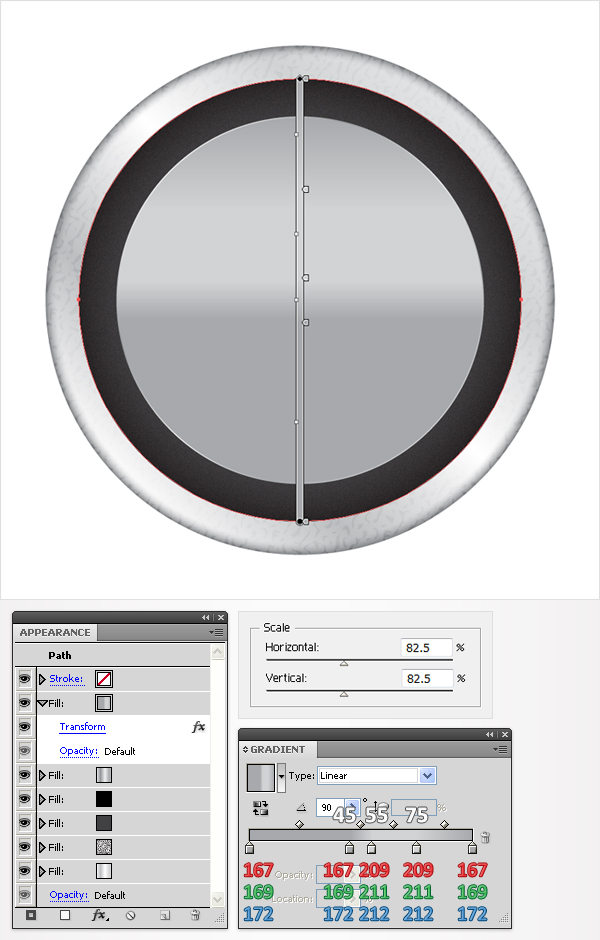
Duplicate the fill made in the previous step. Select this new fill. Replace the exiting gradient with the one shown in the following image then open the Transform effect (from the Appearance panel) and drag the slider to 82,5%.
Step 6
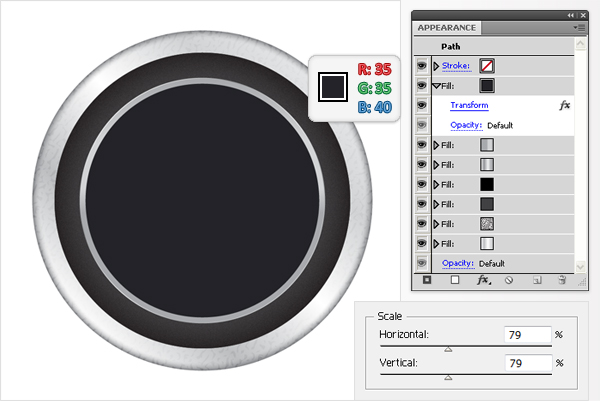
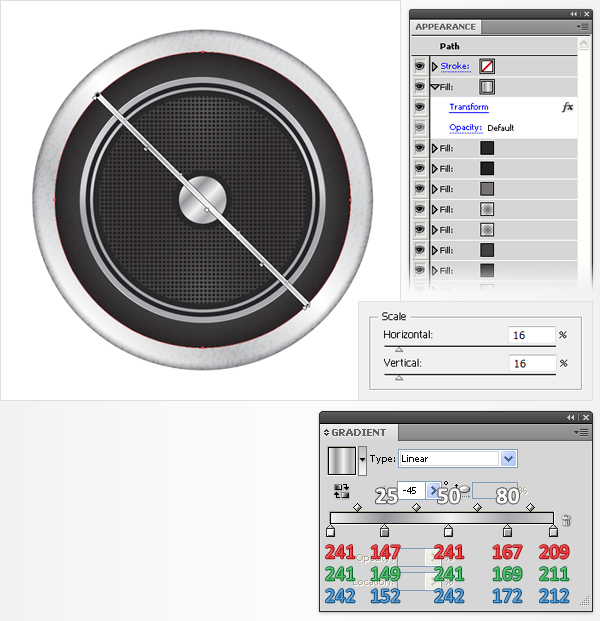
Again, duplicate the fill made in the previous step. Select this new fill, replace the linear gradient with the color shown below (R=35 G=35 B=40) then open the Transform effect and drag the sliders to 79%.
Step 7
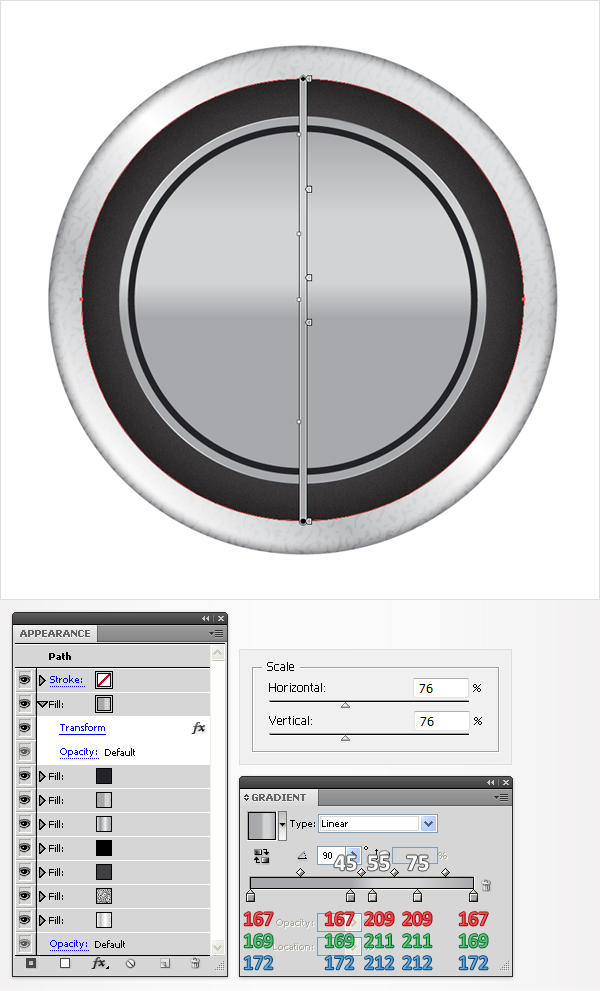
Once again, duplicate the fill made in the previous step. Select this new fill, replace the color with the linear gradient shown below then open the Transform effect and drag the sliders to 76%.
Step 8
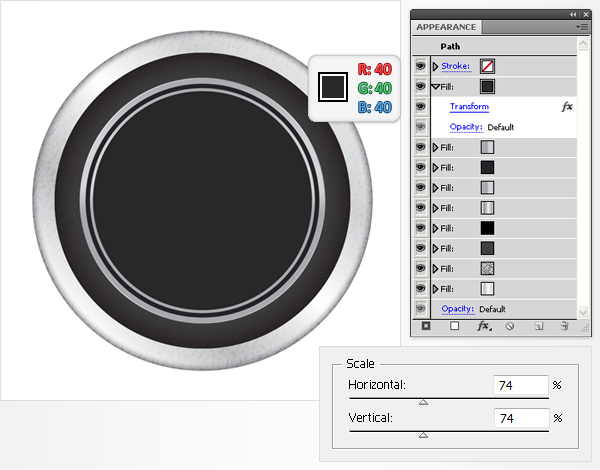
One more time, duplicate the fill made in the previous step. Select this copy, replace the gradient with the color shown below (R=40 G=40 B=40) then open the Transform effect and drag the sliders to 74%.
Step 9
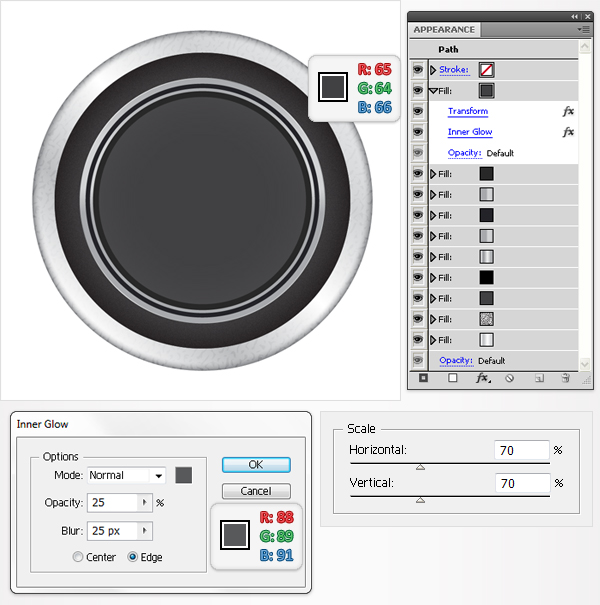
One last time, duplicate the fill made in the previous step. Select this fresh fill, set its color at R=65 G=64 B=66 then open the Transform effect. Drag the sliders to 70%, click OK then go to Effect > Stylize > Inner Glow and enter the data shown below.
Step 10
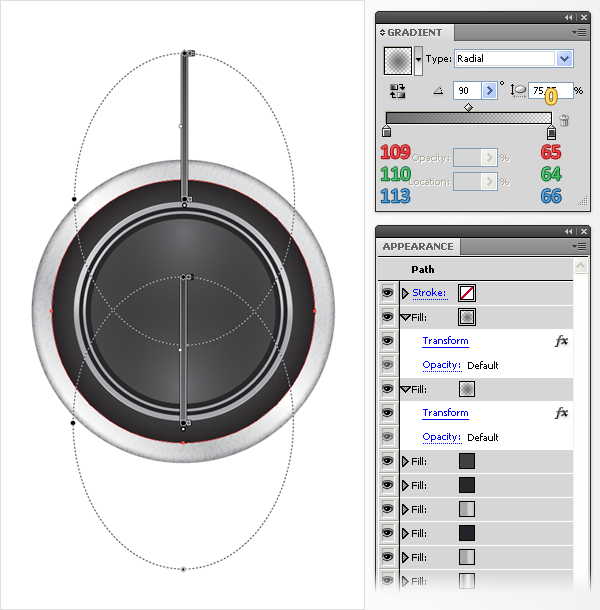
Make two copies of the fill made in the previous step. Select each of these new fills, remove the Inner Glow effect then use the radial gradient shown below. The yellow aero from the gradient image stands for Opacity percentage.
Step 11
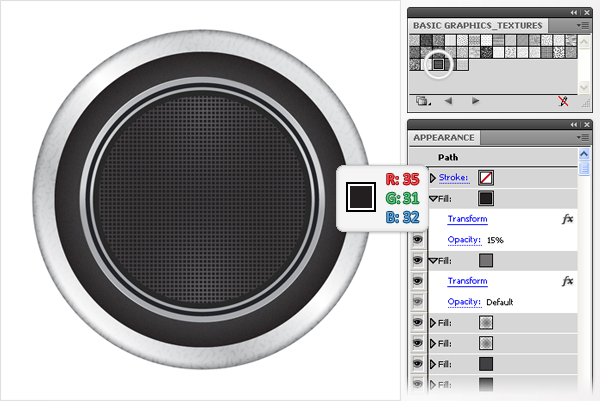
Duplicate one of the fills made in the previous step. Select this new fill, replace the gradient with the USGS 7 Vineyard pattern then duplicate it. Select this new fill, lower its opacity to 15% and replace the pattern with the color shown below (R=35 G=31 B=32).
Step 12
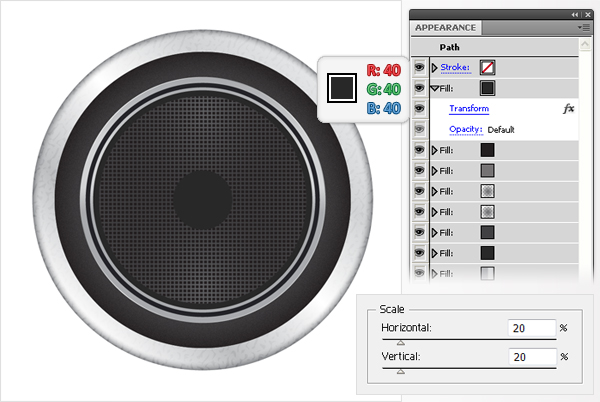
Duplicate the first fill made in the previous step (the one with the pattern). Select this new fill, move it in the top of the Appearance panel, replace the pattern with the color shown in the following image (R=40 G=40 B=40) then open the Transform effect and drag the sliders at 20%.
Step 13
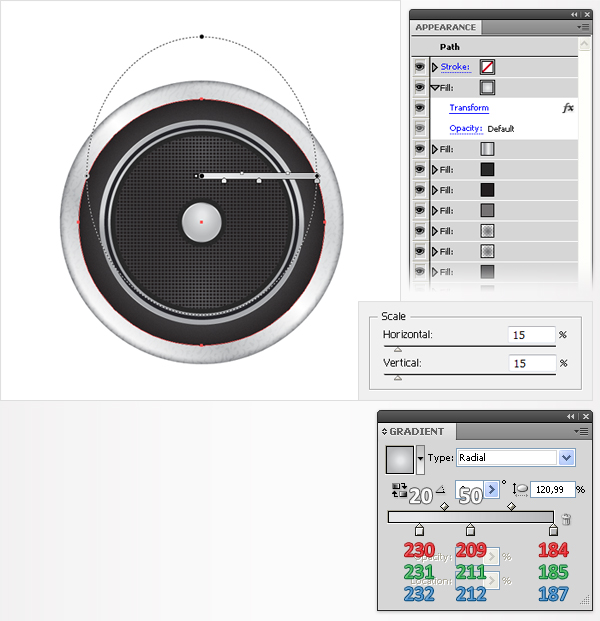
Again, duplicate the fill made in the previous step. Select this fresh fill, replace the color with the linear gradient shown below then open the Transform effect and drag the sliders at 16%.
Step 14
Once again, duplicate the fill made in the previous step. As usual, open the Transform effect and drag the sliders to 15% then replace the existing gradient with the one shown in the following image.
Step 15
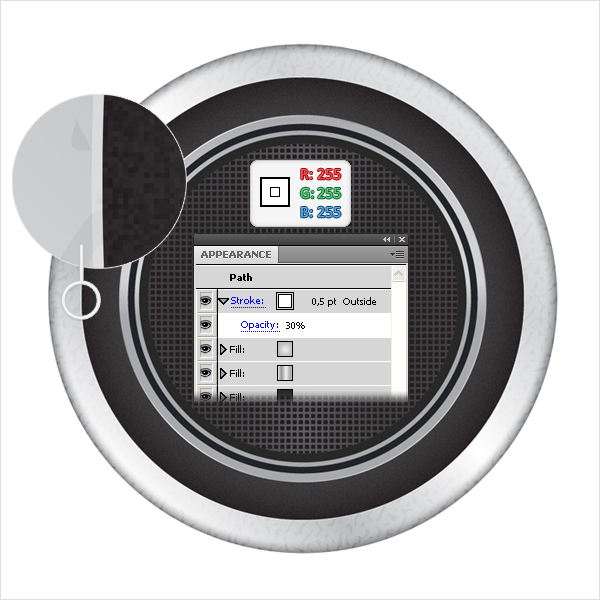
Now, it’s time to add some strokes. Add a 0.5pt, white stroke. Lower its opacity to 30% then open the Stroke panel (Window > Stroke) and click on the Align to Outside button.
Step 16
Select your shape, open the fly-out menu of the Appearance panel and click on Add New Stroke. This will add a new stroke for your shapes. Select it and set the color at R=128 G=130 B=133. Align it to outside, lower its opacity to 50% then go to Effect > Distort&Transform > Transform. Enter 100,5 in the Scale-Horizontal and Scale-Vertical boxes then click OK. Select this fresh stroke and click on the Duplicate Selected Item button from the bottom of the Appearance panel. Obviously, this will create a copy of the selected stroke. Select it, raise its opacity to 100%, set the color at R=147 G=149 B=152 then open the Transform effect and drag the sliders to 114%.
Step 17
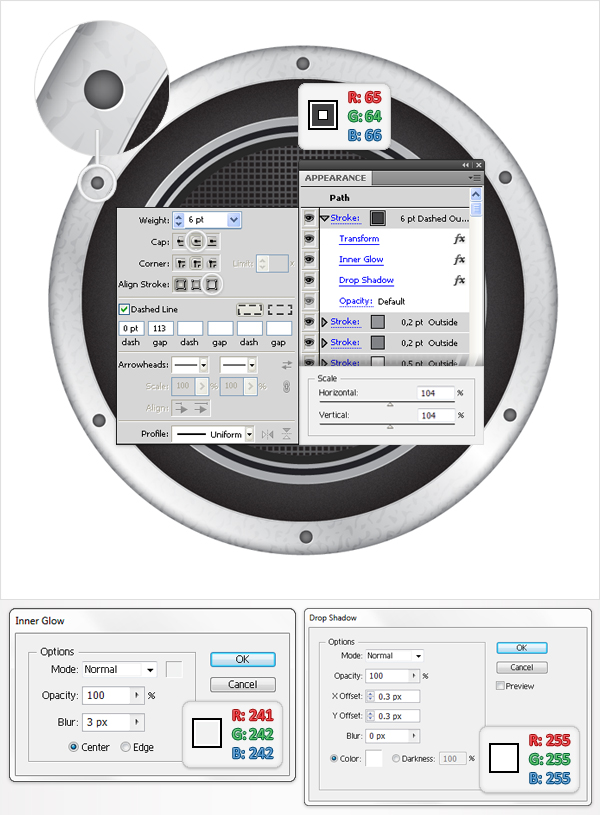
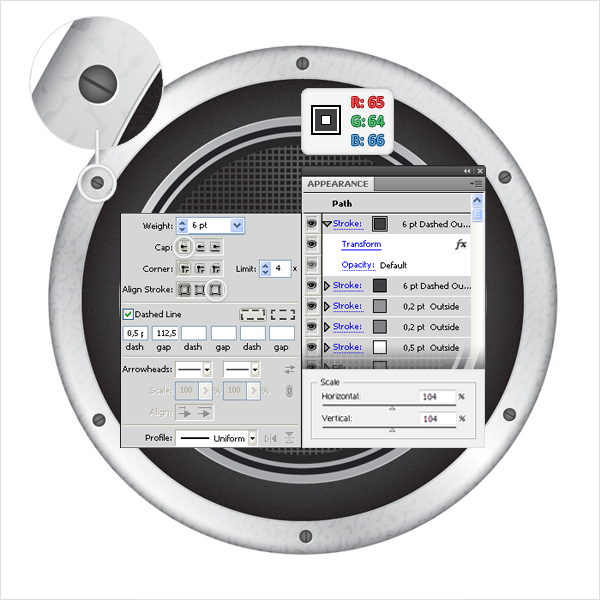
Duplicate the last stroke made in the previous step. Select this fresh stroke and make it 6pt wide. Set the color at R=65 G=64 B=66 then open the Transform effect and drag the sliders at 104%. Next, open the Stroke panel. Click on the Round Cap and Align to Outside buttons then check the Dashed Line box and enter 0 in the dash box and 113 in the gap box. With this stroke still selected add the Inner Glow (Effect > Stylize > Inner Glow) and the Drop Shadow (Effect > Stylize > Drop Shadow) effects shown below.
Step 18
Duplicate the stroke made in the previous step. Select this new stroke. Remove the Inner Glow and the Drop Shadow effect then go to the Stroke panel. Enter 0,5 in the dash box and 112,5 in the gap box. Now, it should look like in the image below.
Step 19
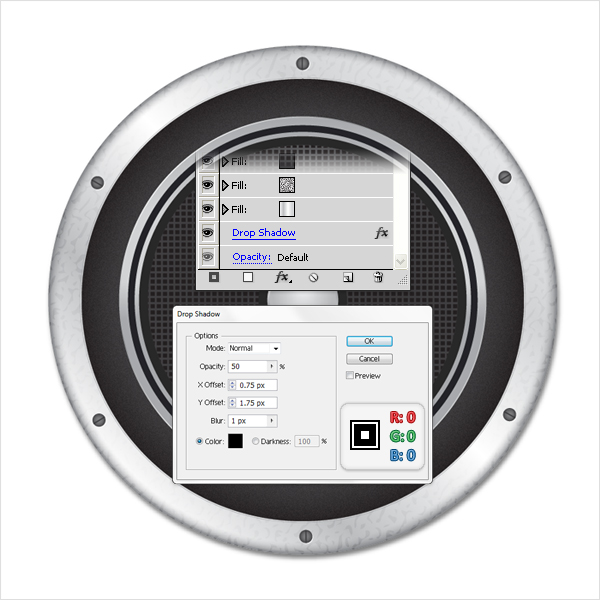
Reselect the entire path and go to Effect > Stylize > Drop Shadow. Enter the data shown below then click OK.
Step 20
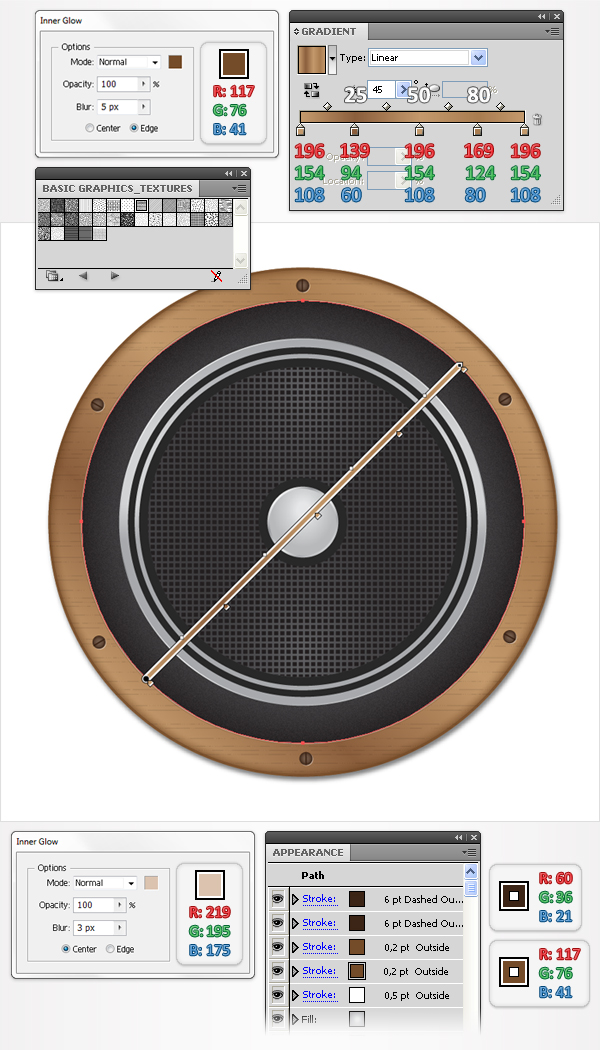
Finally you can replace the steel frame with a wooden one. All you need to do is replace some patterns, colors and effects as shown in the following image.
Conclusion
Now your work is done. Here is how it should look like.




A lot of steps, but very effective.
Your tutorials are a lot of fun. Thanks a lot.
nice details ! thanks!
Great tut.
Easy to follow, except showing which fill to choose at the last step, and not telling the pattern name for the wood (though I figured it out).
Even a beginner could follow this!
simple design
Fantastic tutorial, i like the way you explain!
thanks for this nice tips! would be useful :)
Great tutorial! this is such a interesting tutorial! i will try to make mine design by using this one! thanks for sharing:)
Very useful tutorial
thanks for sharing it
:)