


Hi again, I’m back with another fun tutorial. Today, we’ll create an awesome futuristic logo. Designing a logo is always fun and exciting but this time we’ll use Photoshop instead of illustrator. And learn how to create an amazing result using quite simple Photoshop techniques.
So let’s have a look at our final result before we start:-

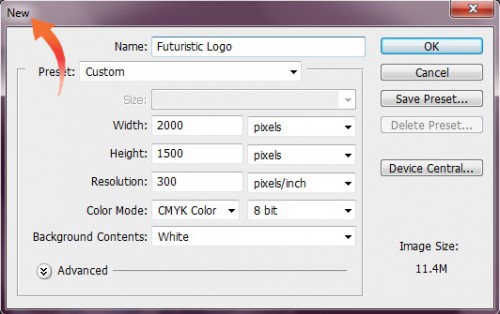
Step 1:-
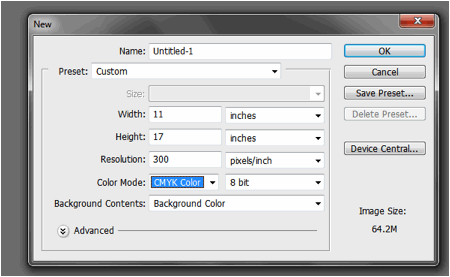
Open the famous Photoshop and create a new file with 2000 px width and 1500px height.
Step 2:-
Now select the “Gradient Tool” and use a dark gradient on our background layer.
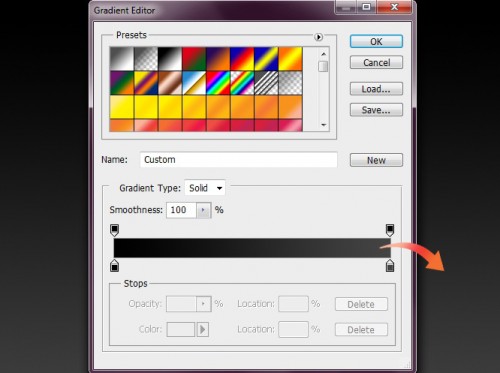
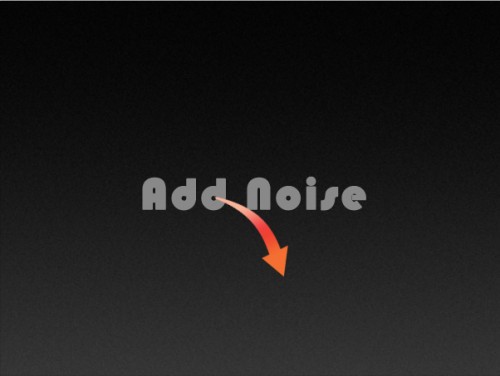
Step 3:
I’ve added a bit noise to our background. So click on Filter> Noise> Add Noise.
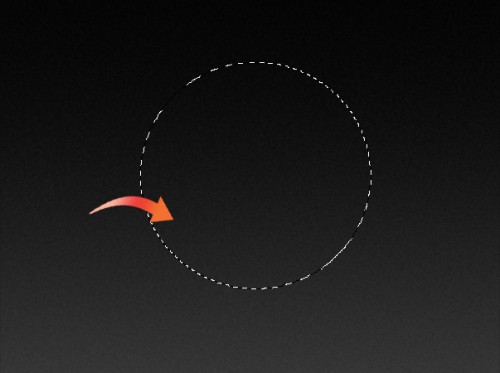
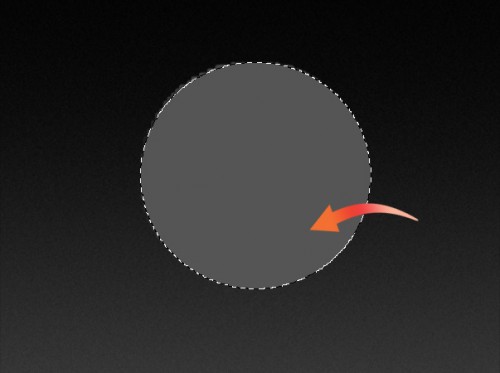
Step 4:-
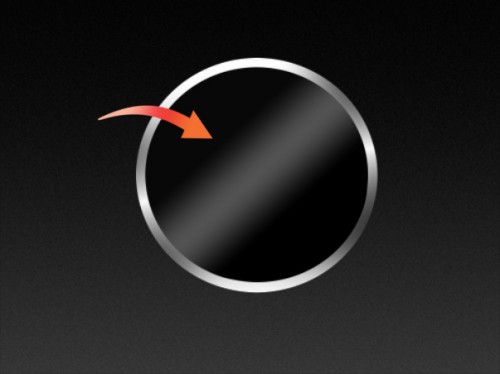
Now our background is ready, so let’s start with the logo. First create a new layer, for this click on Layer> New> Layer. Then click on “Elliptical Marquee Tool” and create a nice circle in the middle.
Step 5:-
Now click on “Paint bucket Tool” and fill the background with color # 555555.
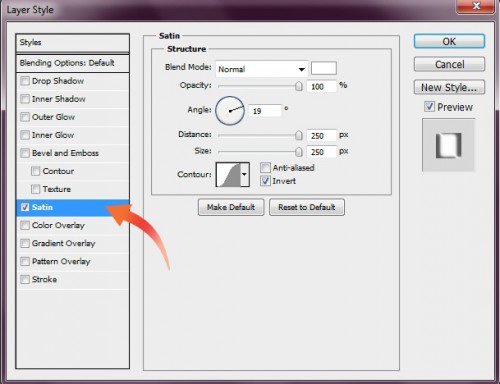
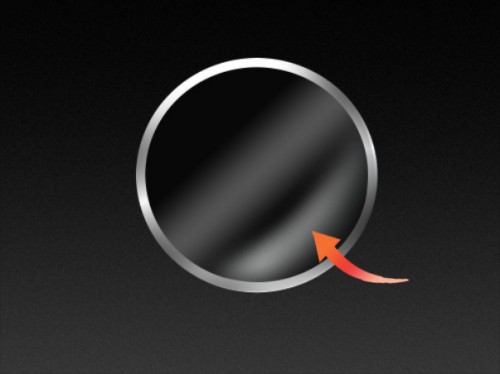
Step 6:-
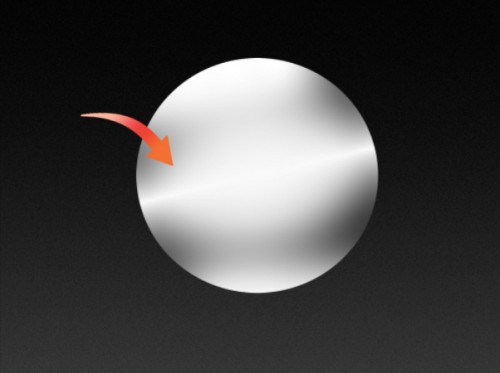
Click on Layer> Layer style> Satin and change the color to # ffffff.
Step 7:-
Now use soft round brush here and there with color # ffffff to complete the metallic effect.
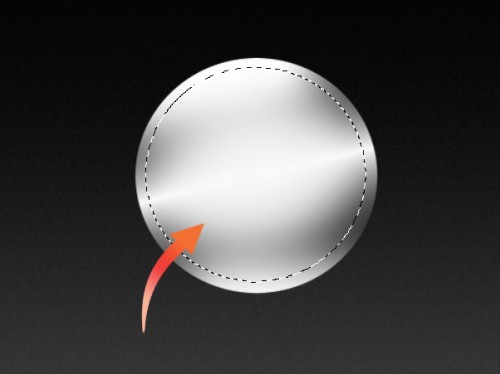
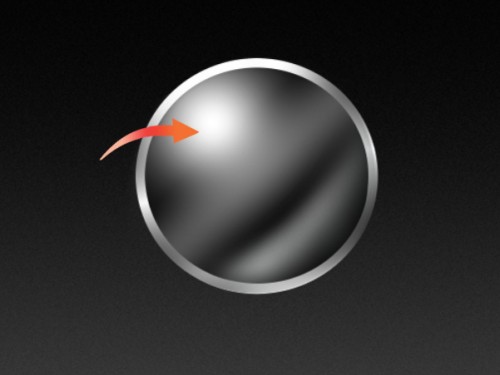
Step 8:-
Once again select the “Elliptical Marquee Tool” and create a small circle within our metallic round.
Step 9:-
Now click on Layer> Layer style> Gradient Overlay. And add black gradient to our inner circle.
Step 10:-
Select the Soft Round brush and use it on the lower right side of the inner circle with foreground color # ffffff, and then reduce the opacity to 70%.
Step 11:-
Again use the “Soft round brush” with color # ffffff on the upper left corner.
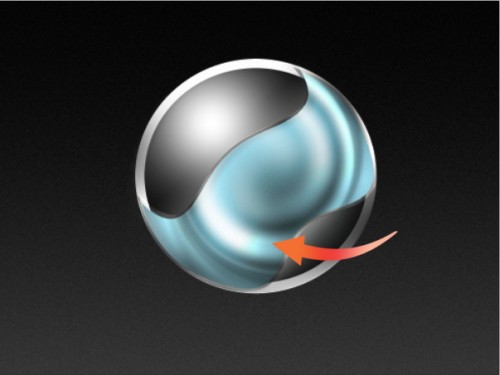
Step 12:-
Now select the pen tool and create a “w” kind of shape.

Step 13:-
Now right click on the path and click on “Make selection”. Then fill the selection with color # aee3f0 and add “Satin” with color # oooooo, opacity 44% and size 250px. Then add “Stroke” with color # 262626, size 9 px and opacity 45%.

Step 14:-
Once again select the pen tool and create another shape same as before. Then right click on the path and click on “Make selection”, fill it half with color # ffffff and other half with #898989. Now click on Filter> Liquify> Twirl Clockwise Tool. Now use it on our shape till we get nice twirl. Then change the blending mode of the layer to “Overlay”.
Step 15:-
Now simply add the text. You can also add a bit of shadow using ellipse tool and then using Gaussian blur on it.

And we are done. Our futuristic logo is ready. Hope you guys enjoyed the tutorial and learned something new. I’ll be back with some more fun tutorials, till then take care and keep designing!

Nice tutorial. Thanks for sharing :)
nice tutorial great job
good outcome
Amazing tutorial who start first time to create logo. Thanks for sharing.. keep updating the more tutorials like this..
nice tutorial
was this for CS5? NOTHING works out the way you show on your site. Details are shady at best. What about our junior people just starting off? Would be nice if you filled in the blanks. GO try doing this to the letter, and you will see that the logo looks COMPLETELY diffrent.