


An easy Photoshop tutorial for beginners on how to colorize a black and white image.
Colors bring life out of bleakness. The same goes to black and white photos: colors make it more lively and realistic. Colorizing vintage and historical photographs adds a tinge of dramatic effect to it as well.
Here’s a simple tutorial on how to put color to your vintage black and white photos.
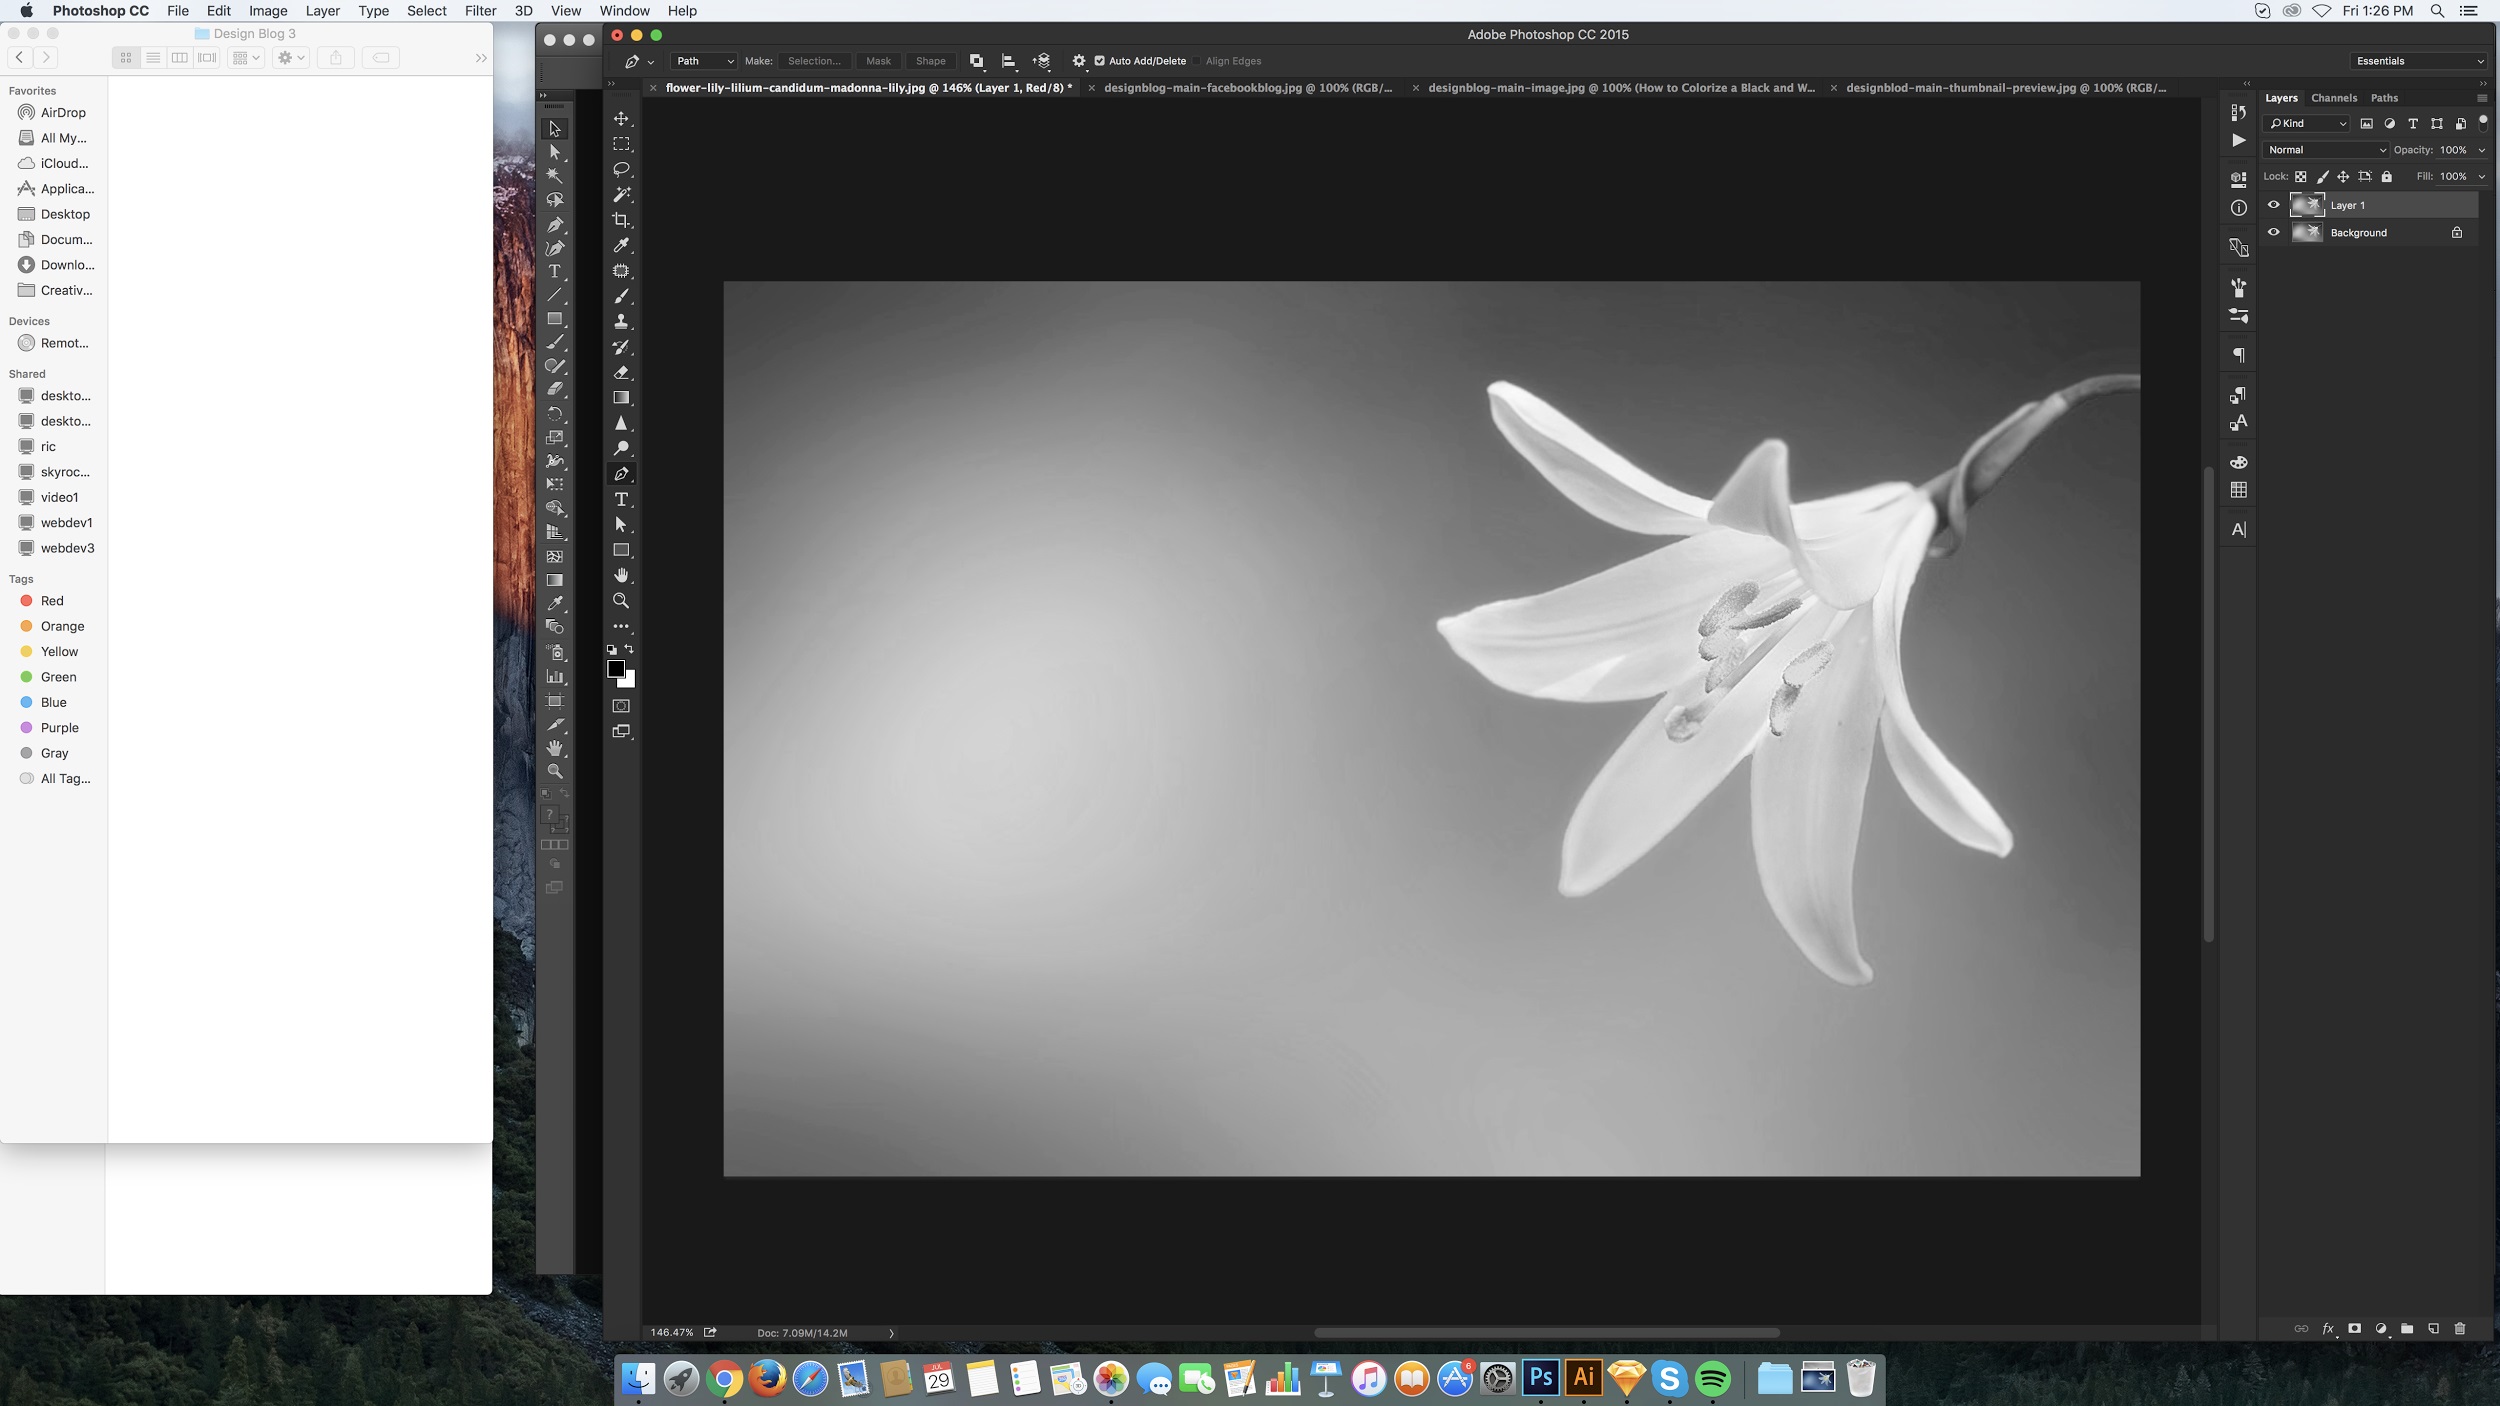
1. Open a black and white or grayscale photo in Adobe Photoshop.
2. Duplicate the image, just incase you have to go back to the original image.
The keyboard shortcut for duplicating an image is Ctrl+J. Select the image layer from the Layers Panel and then press Ctrl+J together.

3. After duplicating, use the Pen Tool to trace the image as seen above.
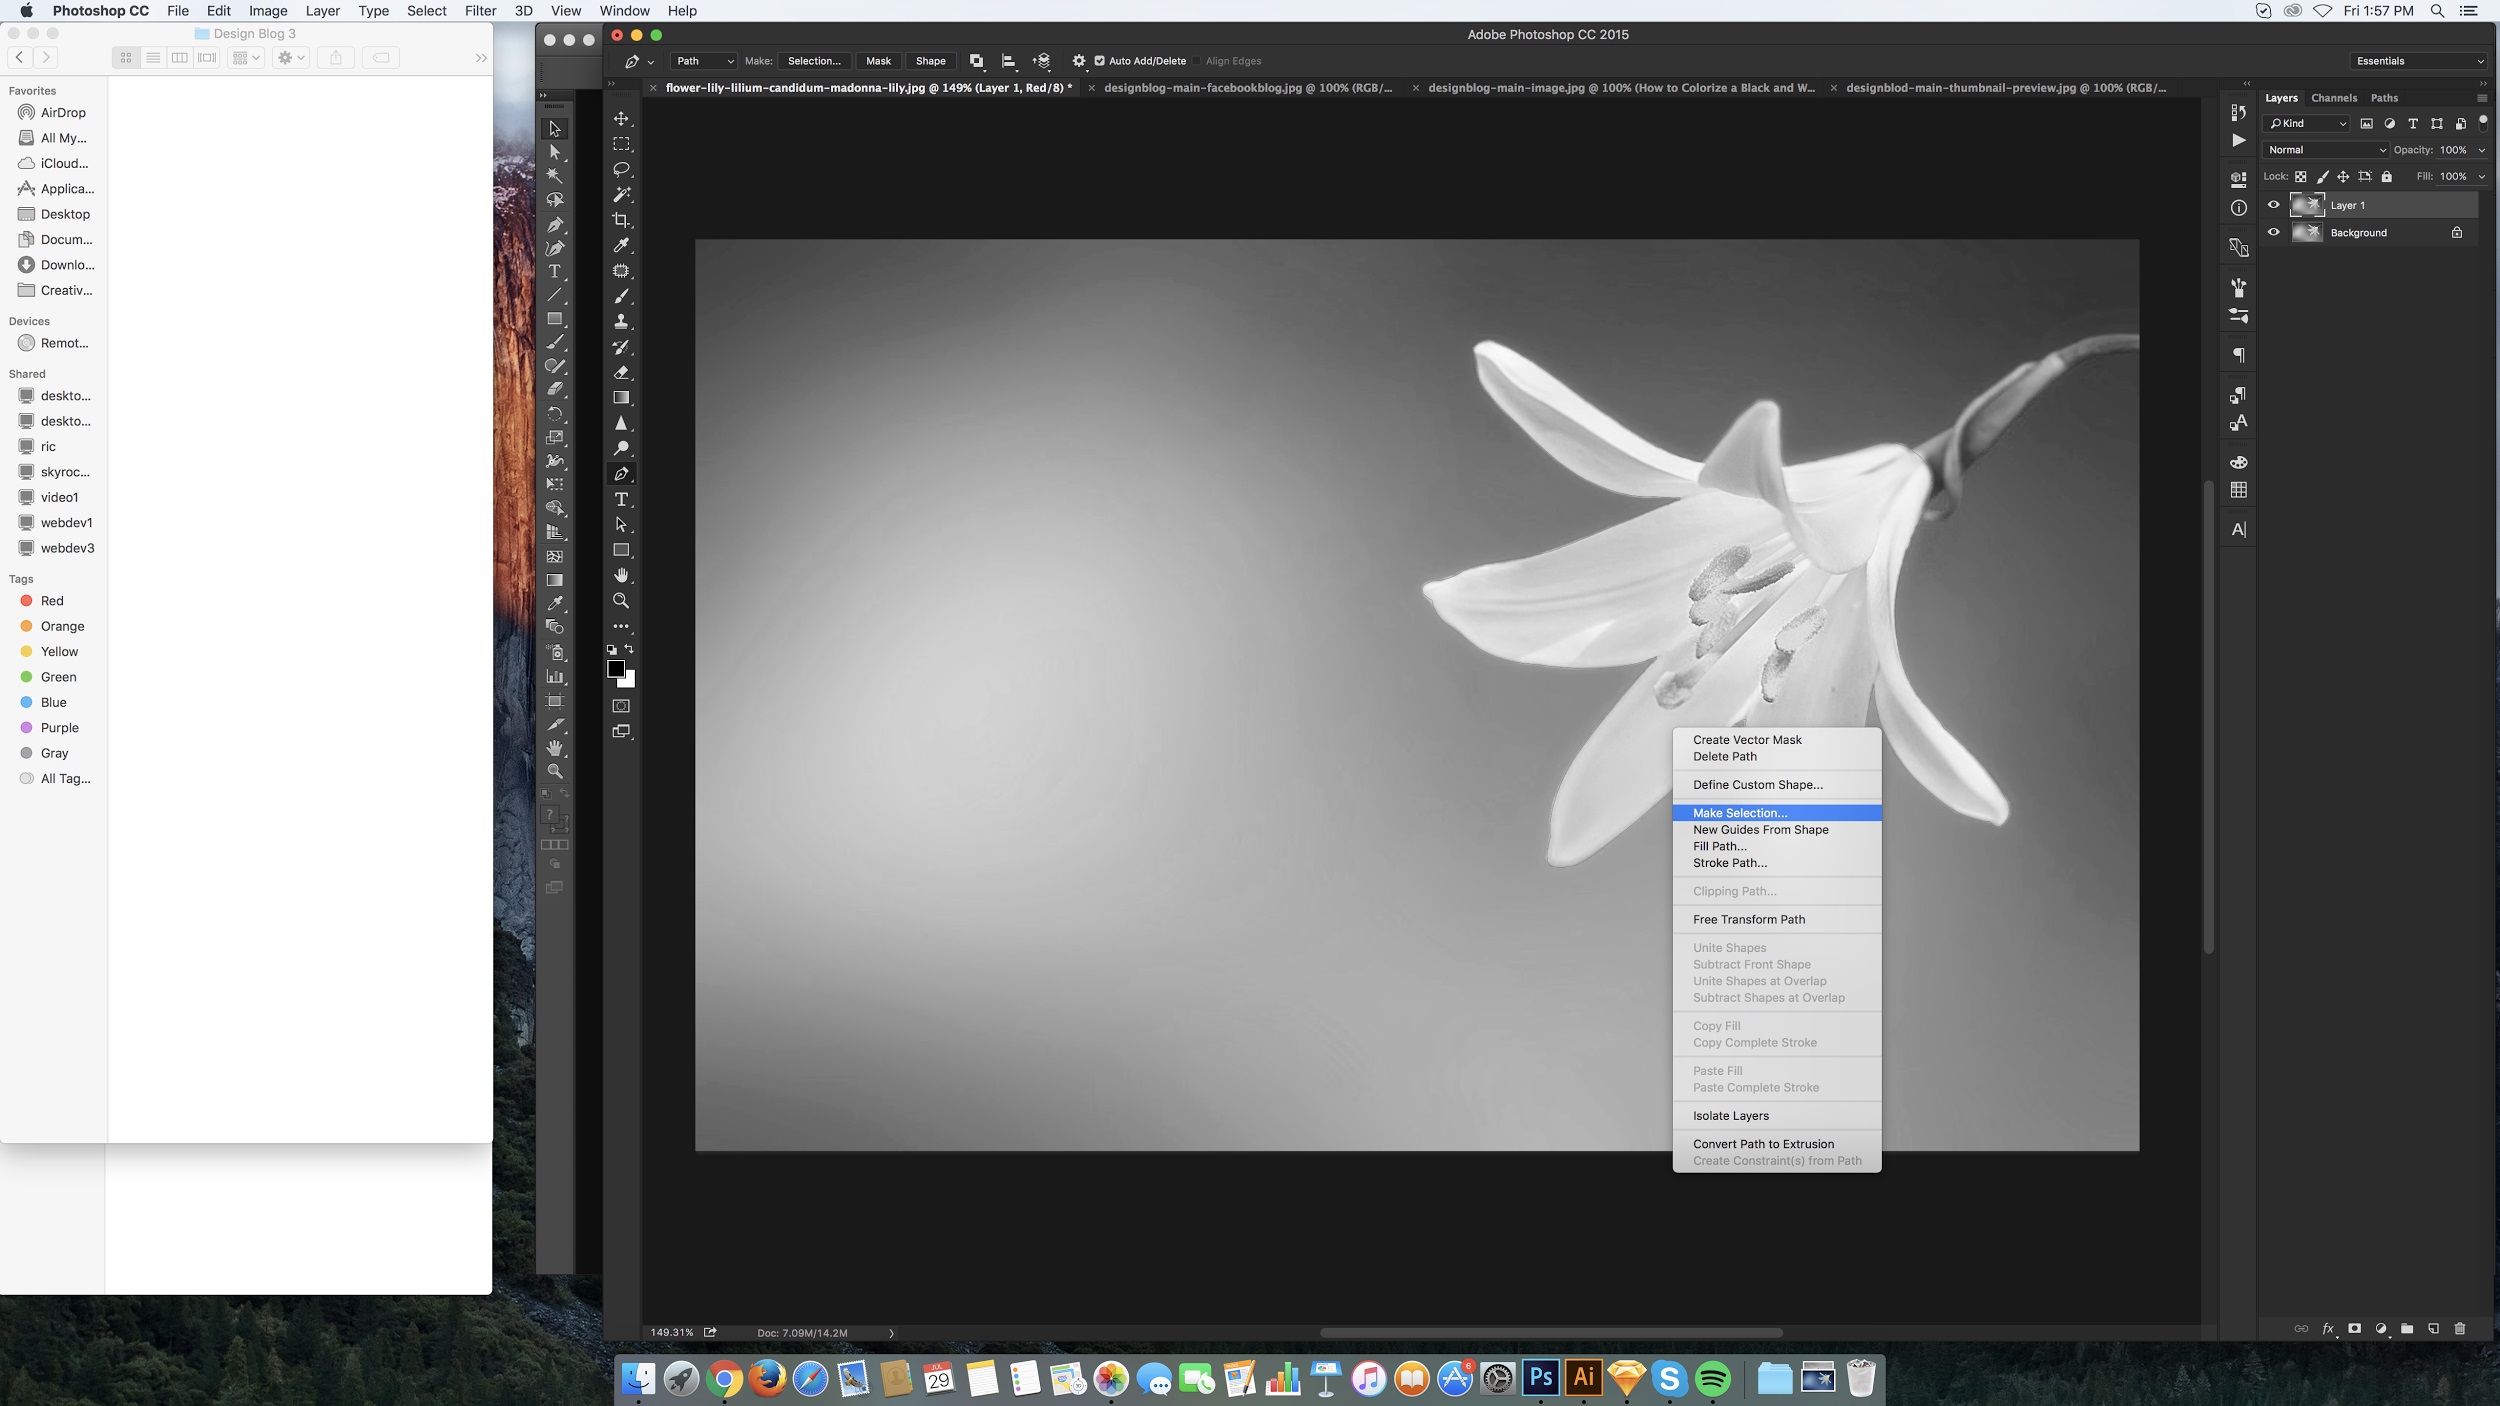
4. After tracing the object using the Pen Tool, right-click and select Make Selection. Then, under Rendering, input 0 for Feather Radius. Tick/check New Selection, then click OK.
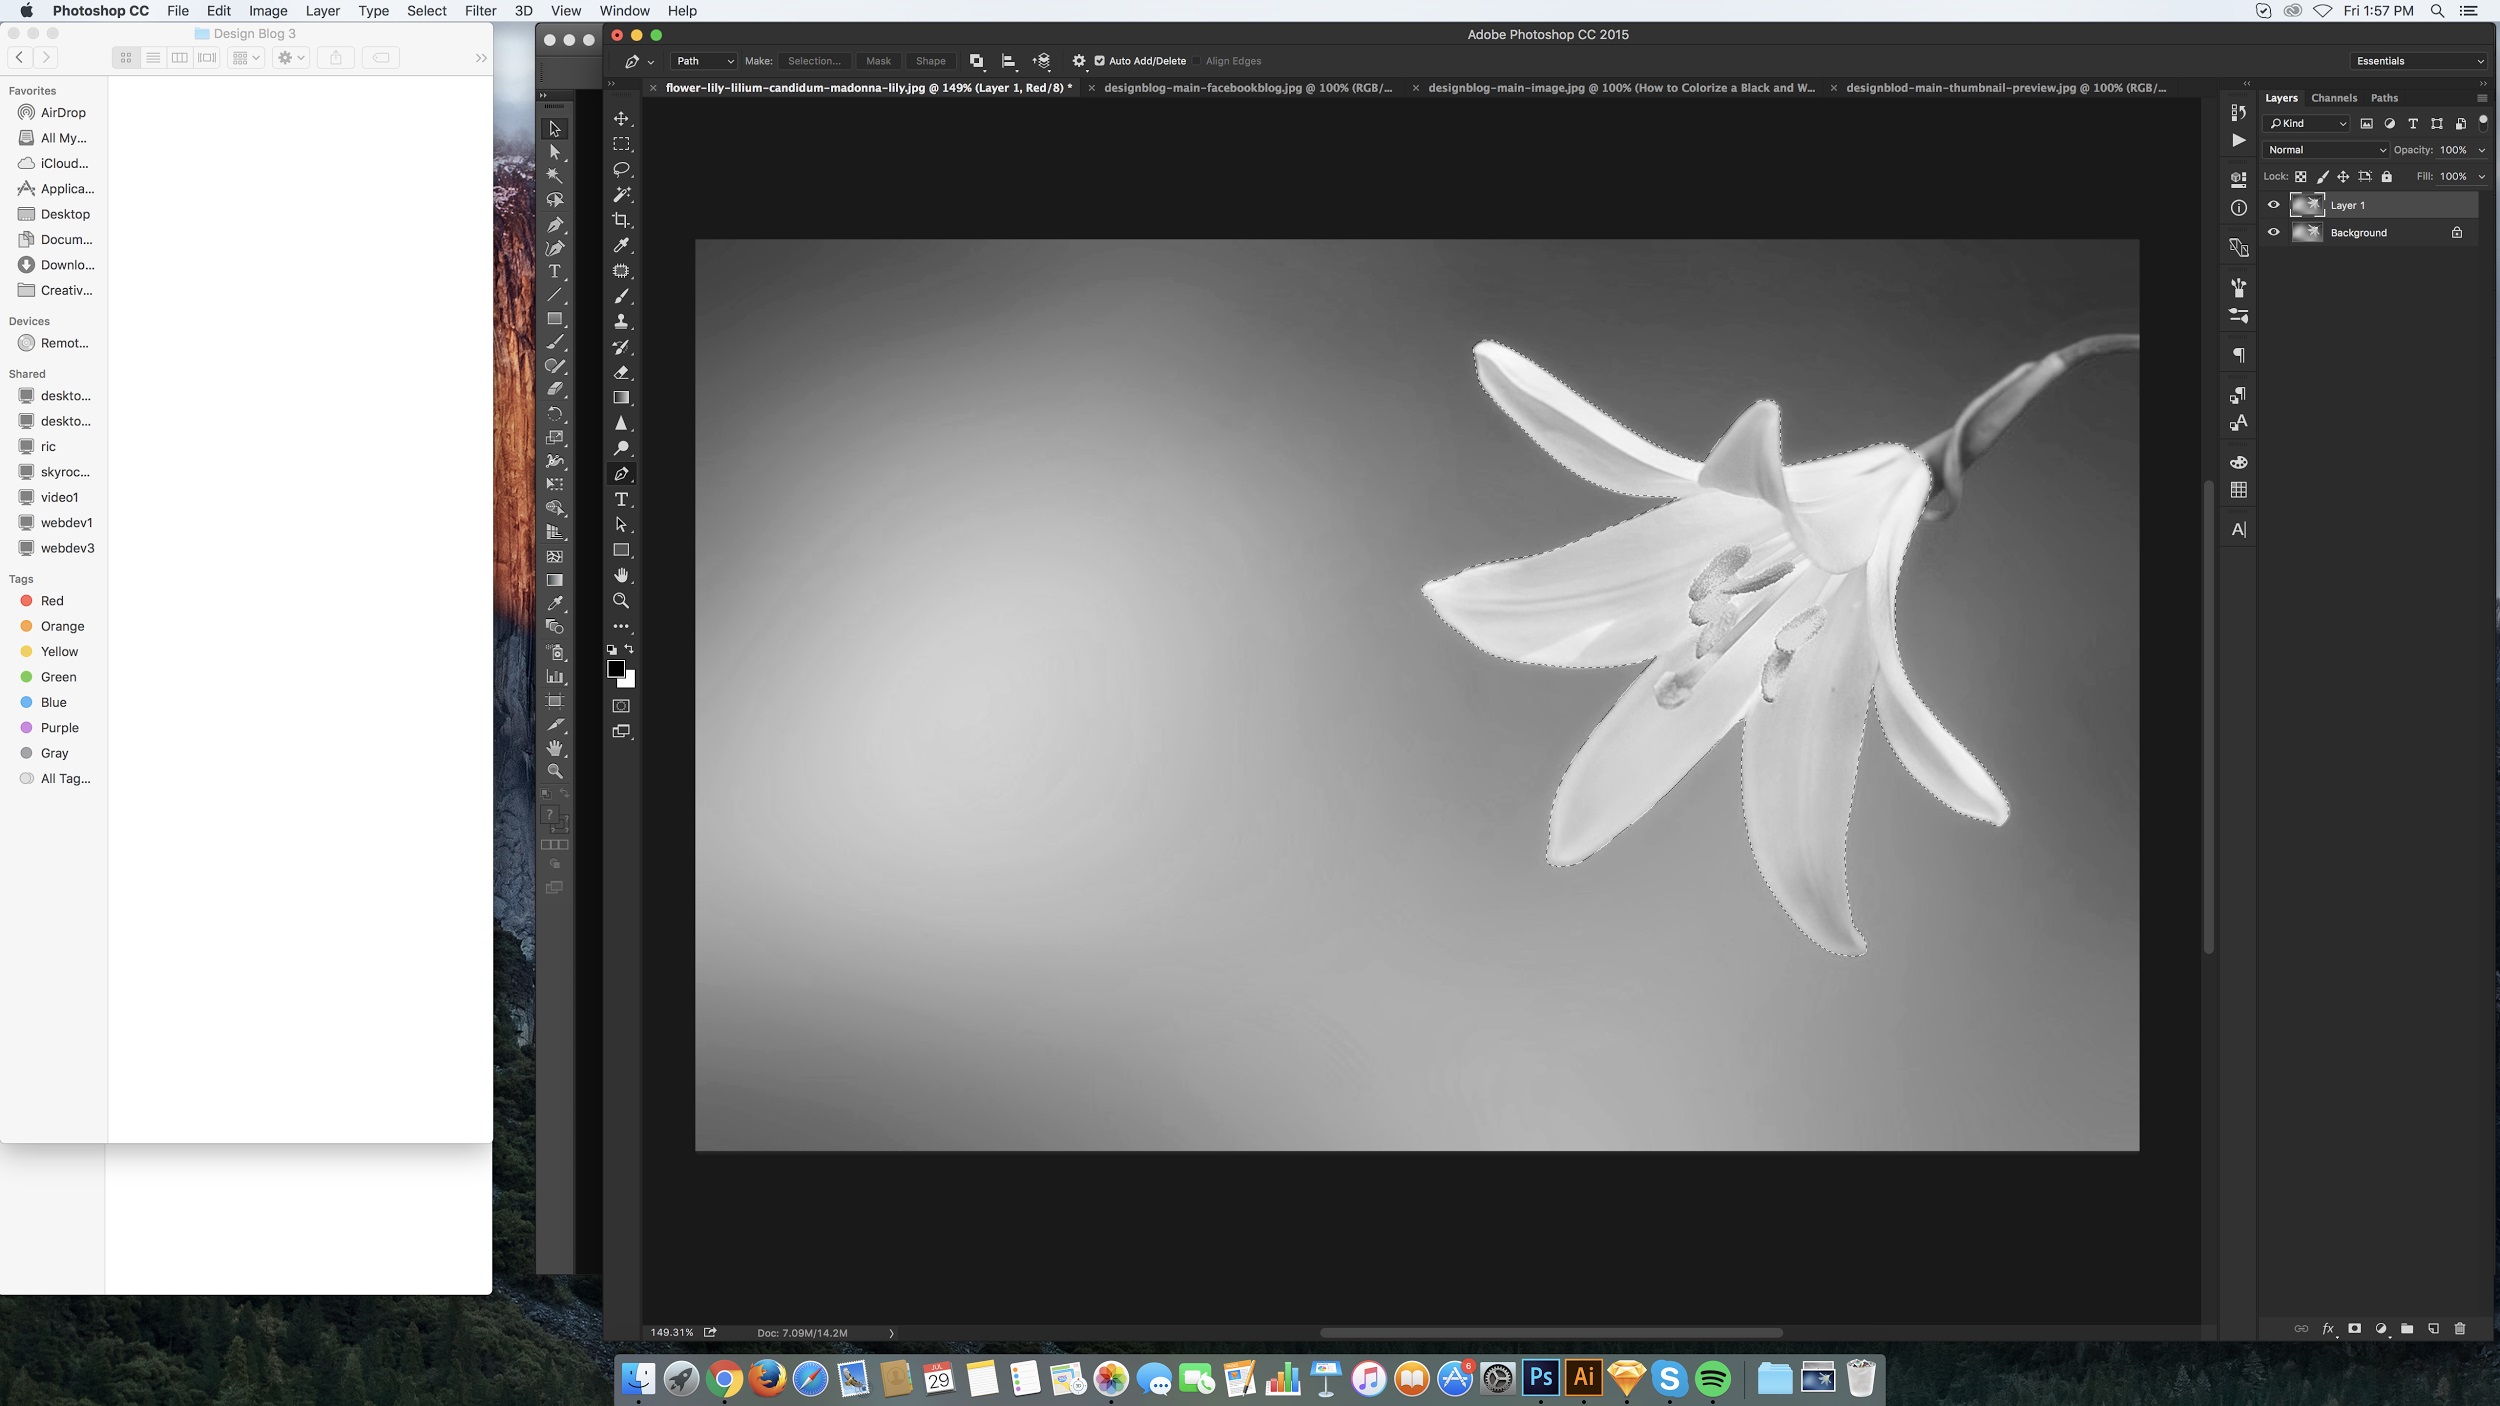
5. Copy and Paste the selected image to a New Layer. Repeat the process on the object needed to be colorized. In the sample image above, we are going to colorize the Flower Petal, Stem, Pollen, Pollen Stem, and the Background.
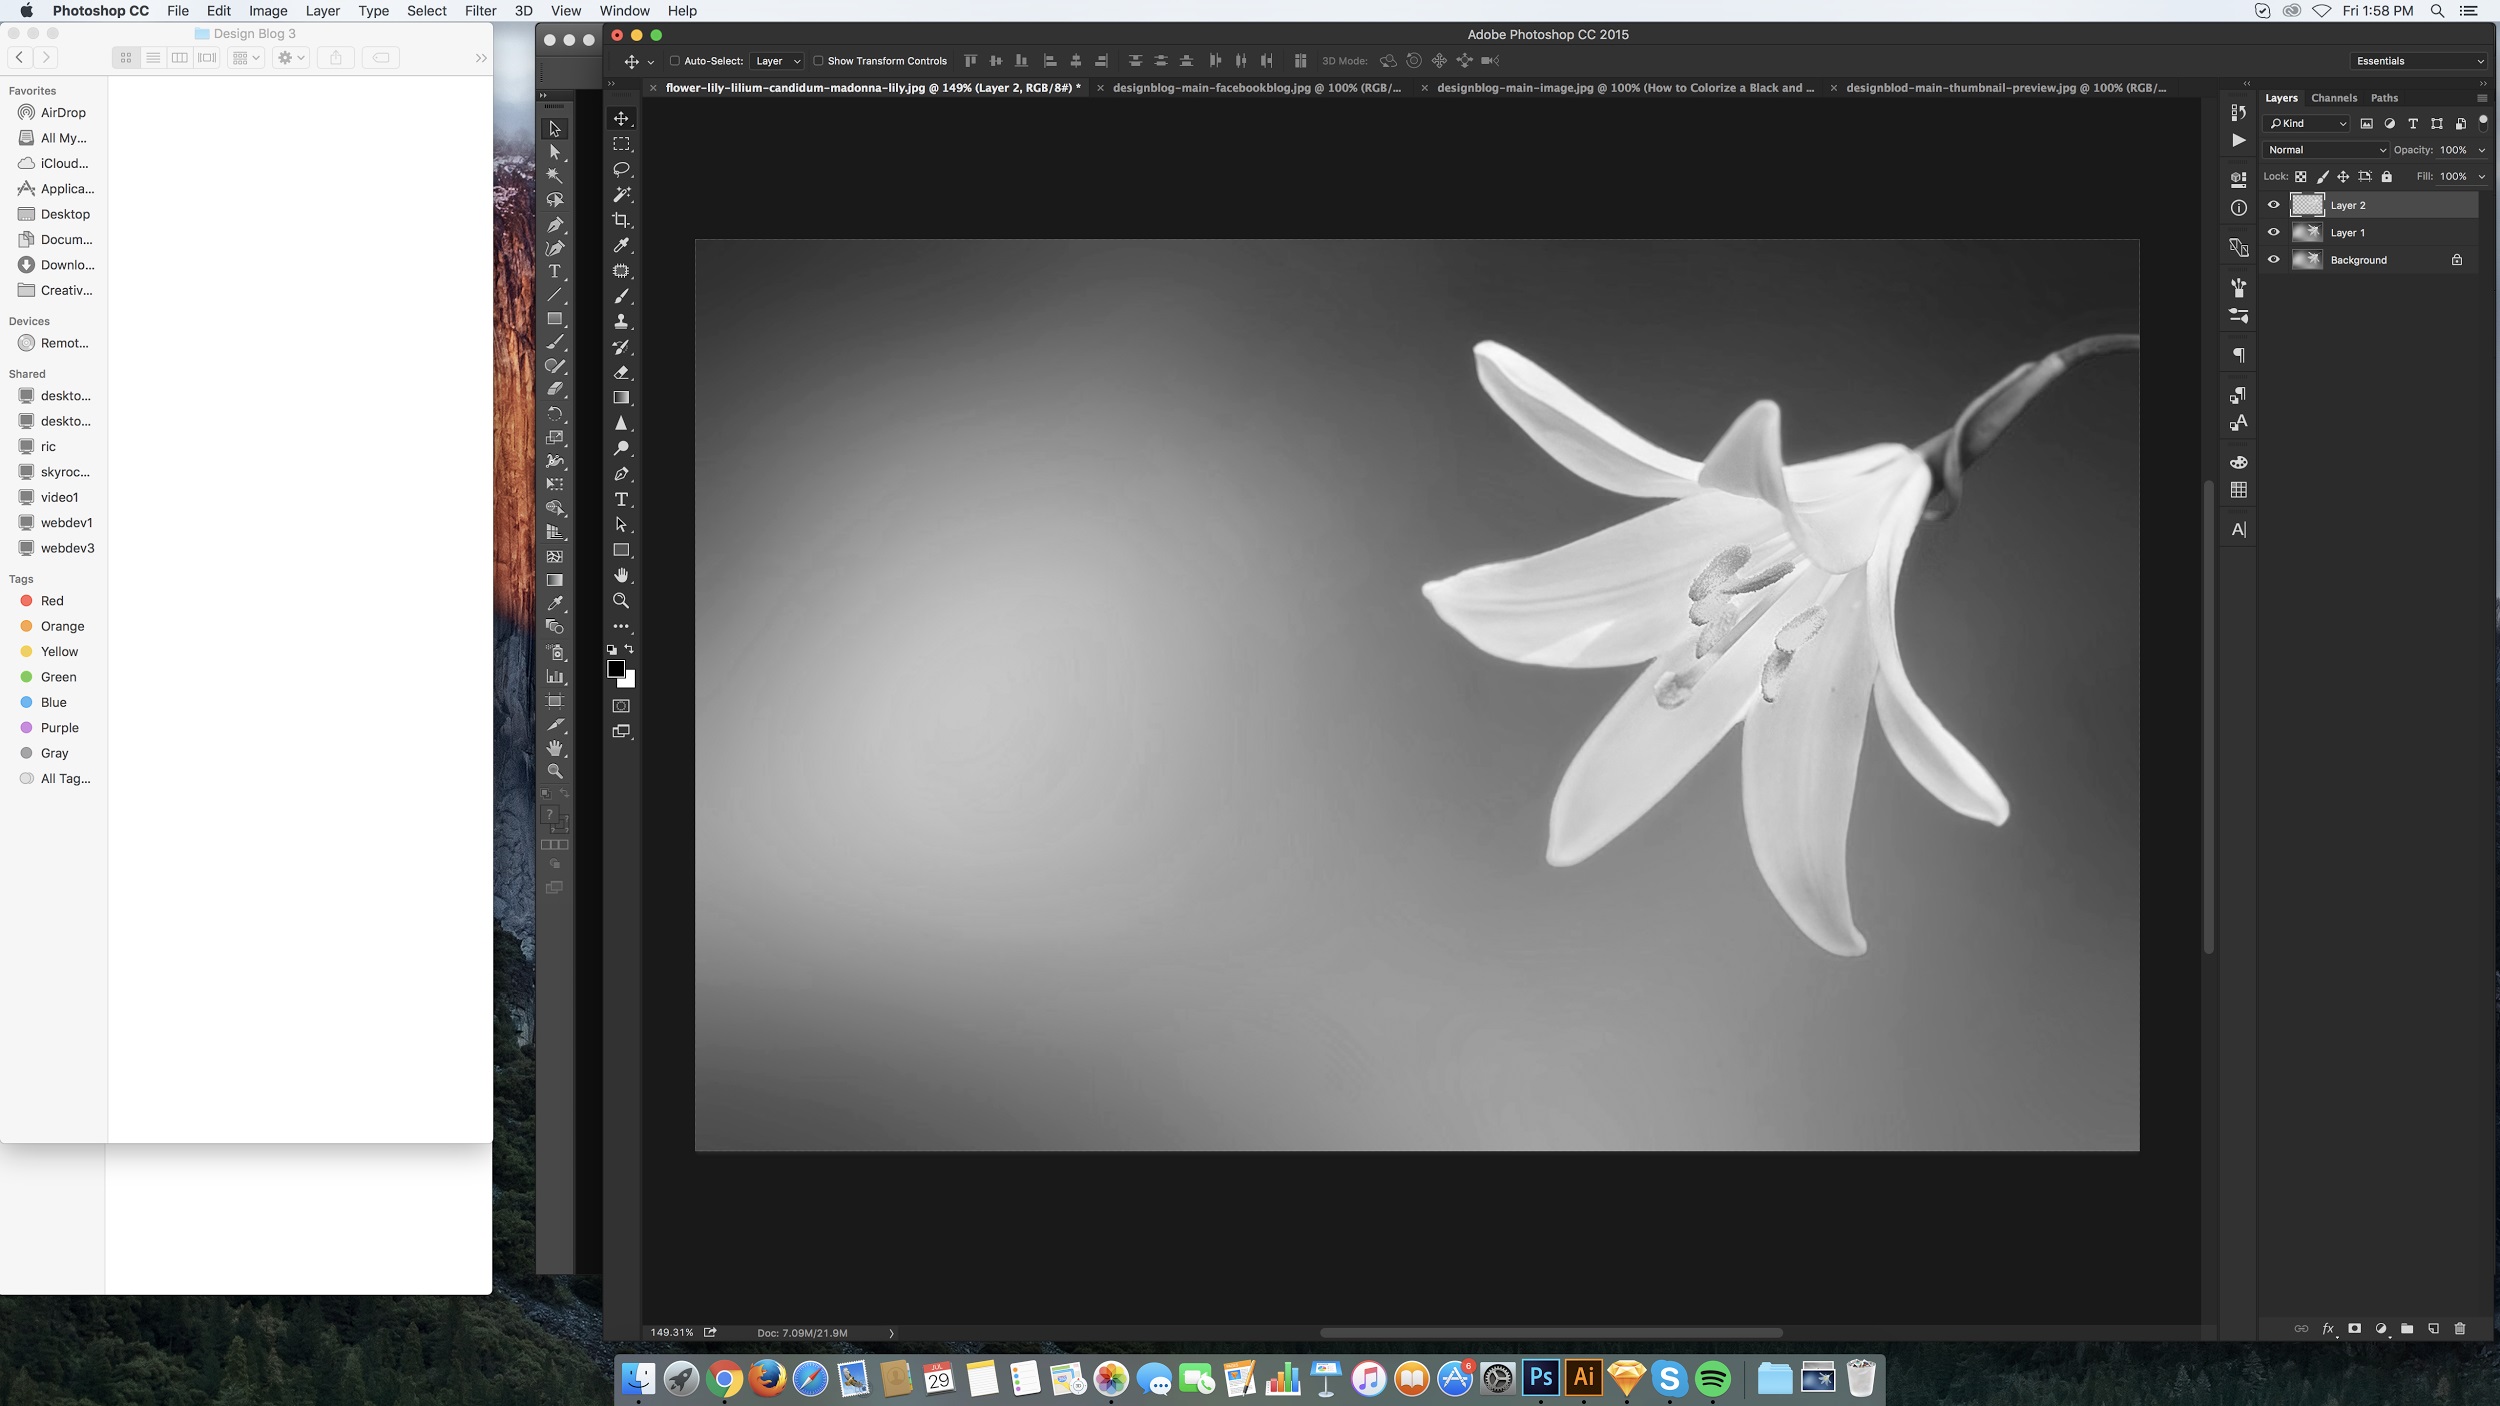
6. After selecting the object that is needed to be colorized and with their own Layers, it is time to add in color!
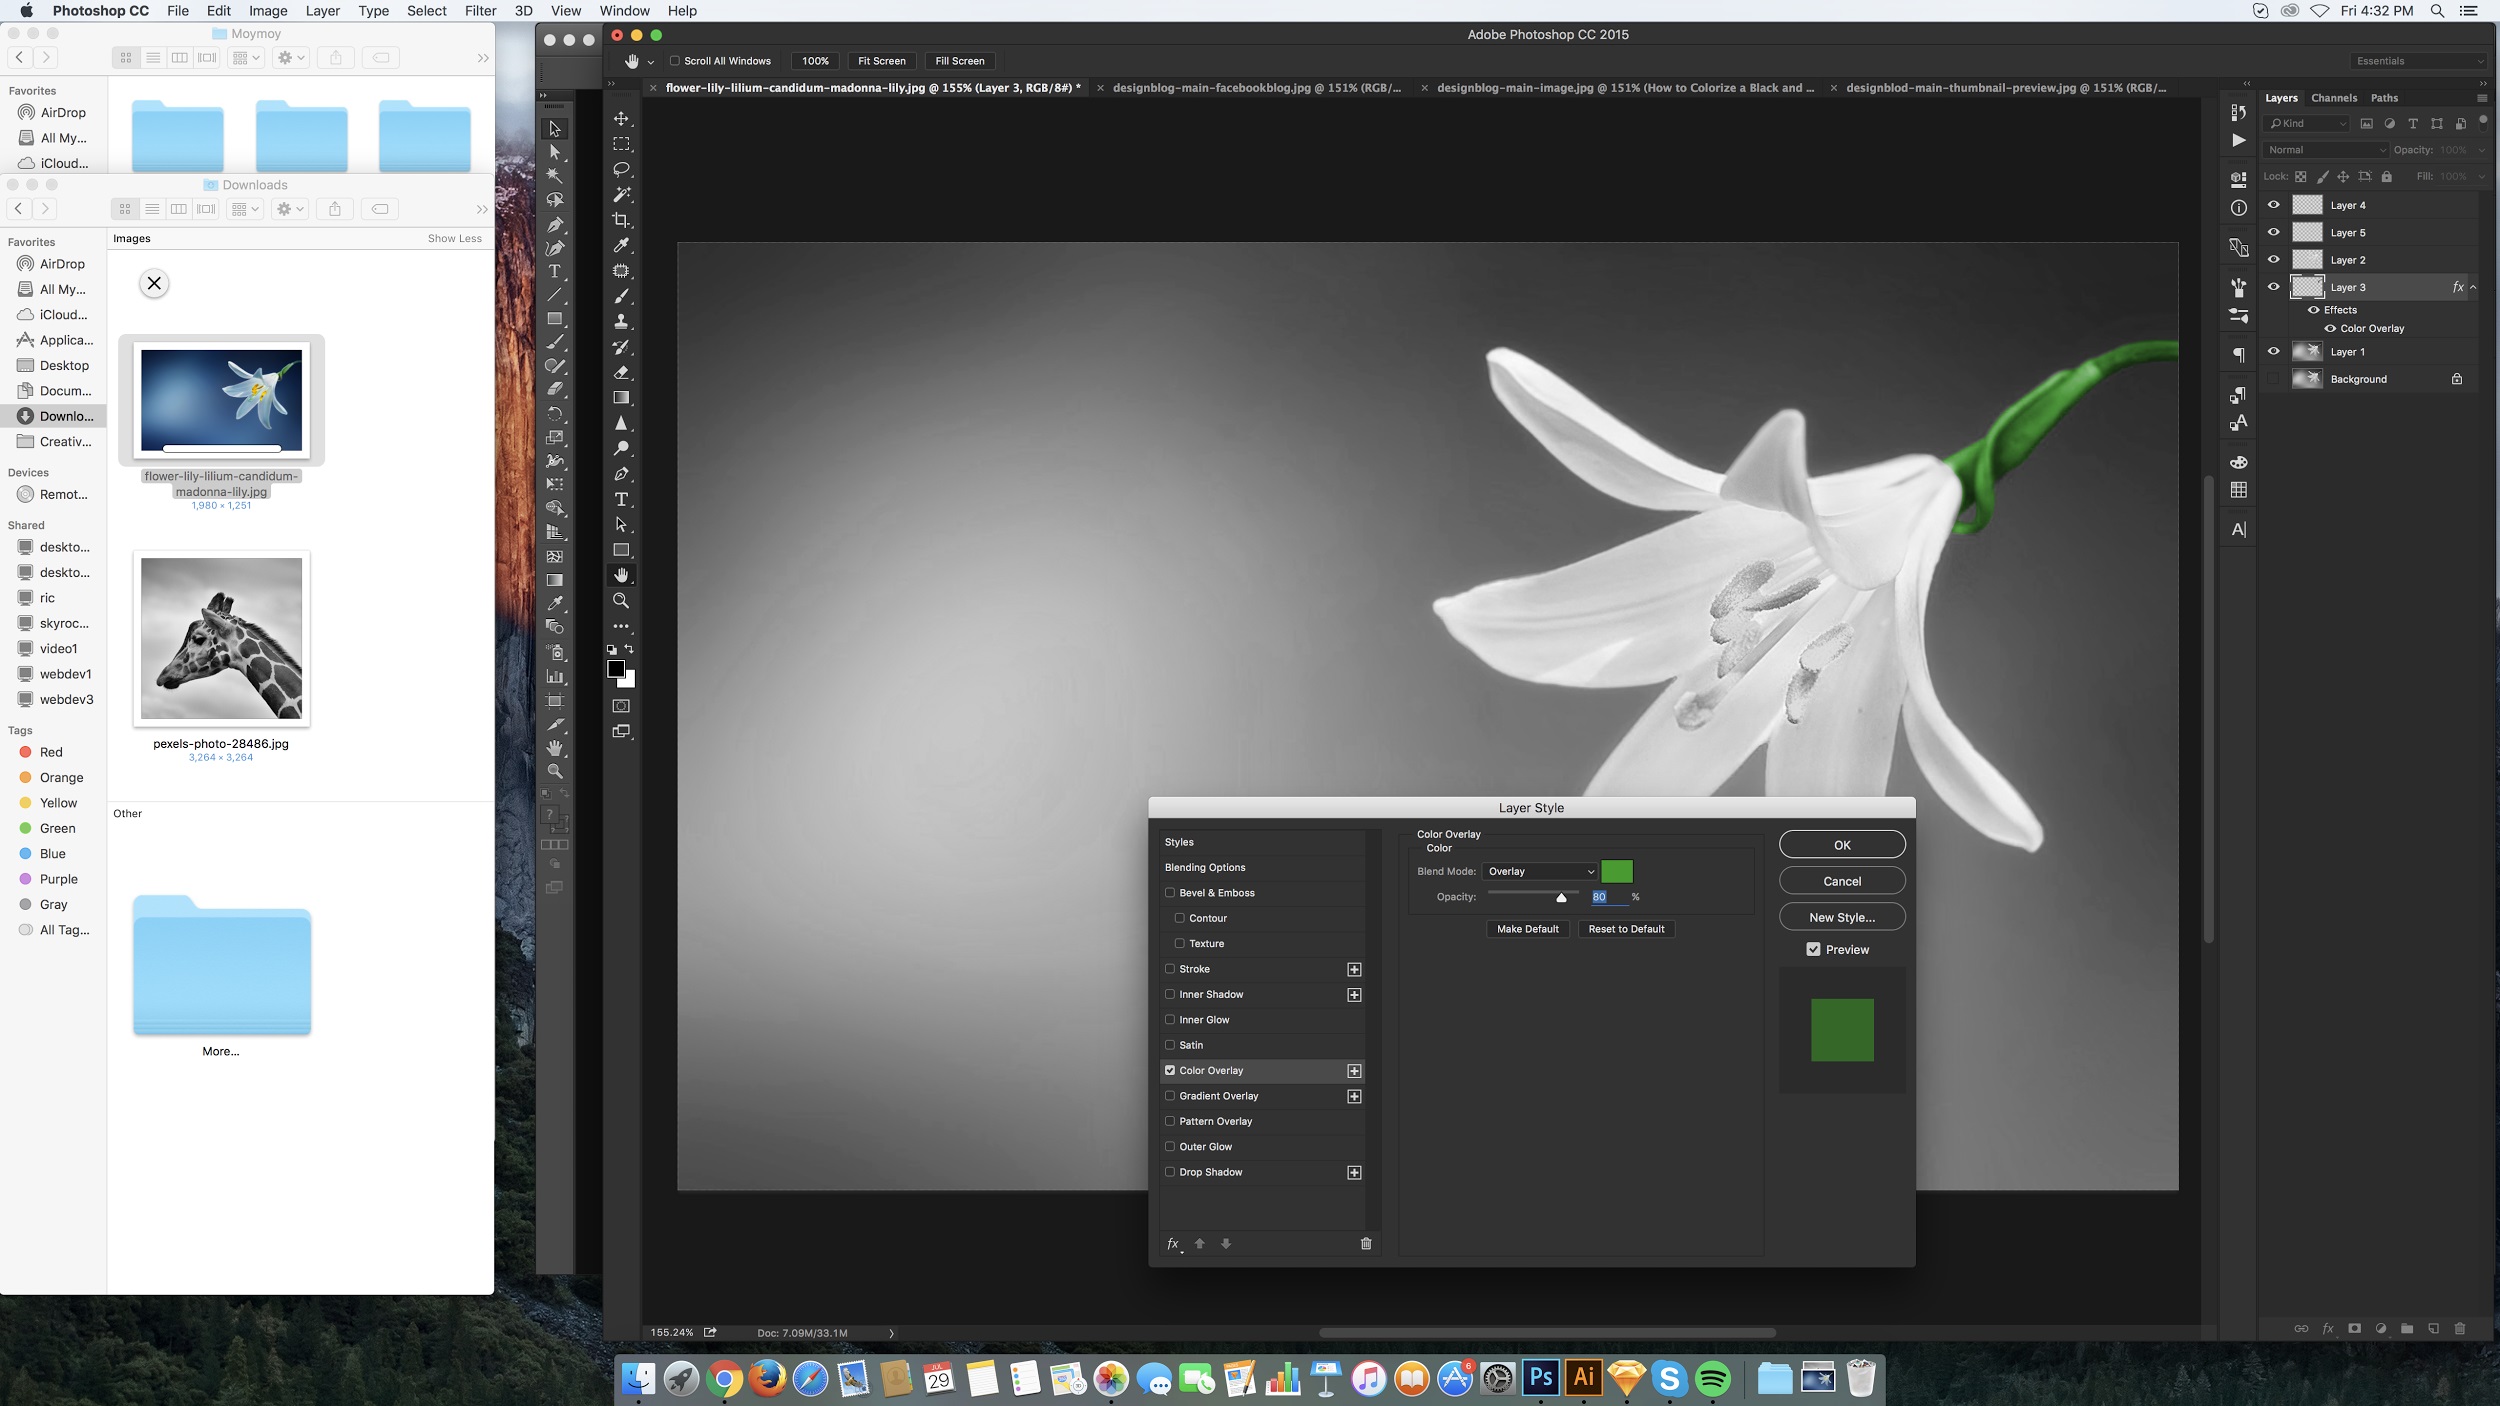
7. On the Layers Panel, select the layer containing the Stem. Right-click and select Blending Options ? Color Overlay. Set Blend Mode to Overlay (Green) and Opacity at 80%.
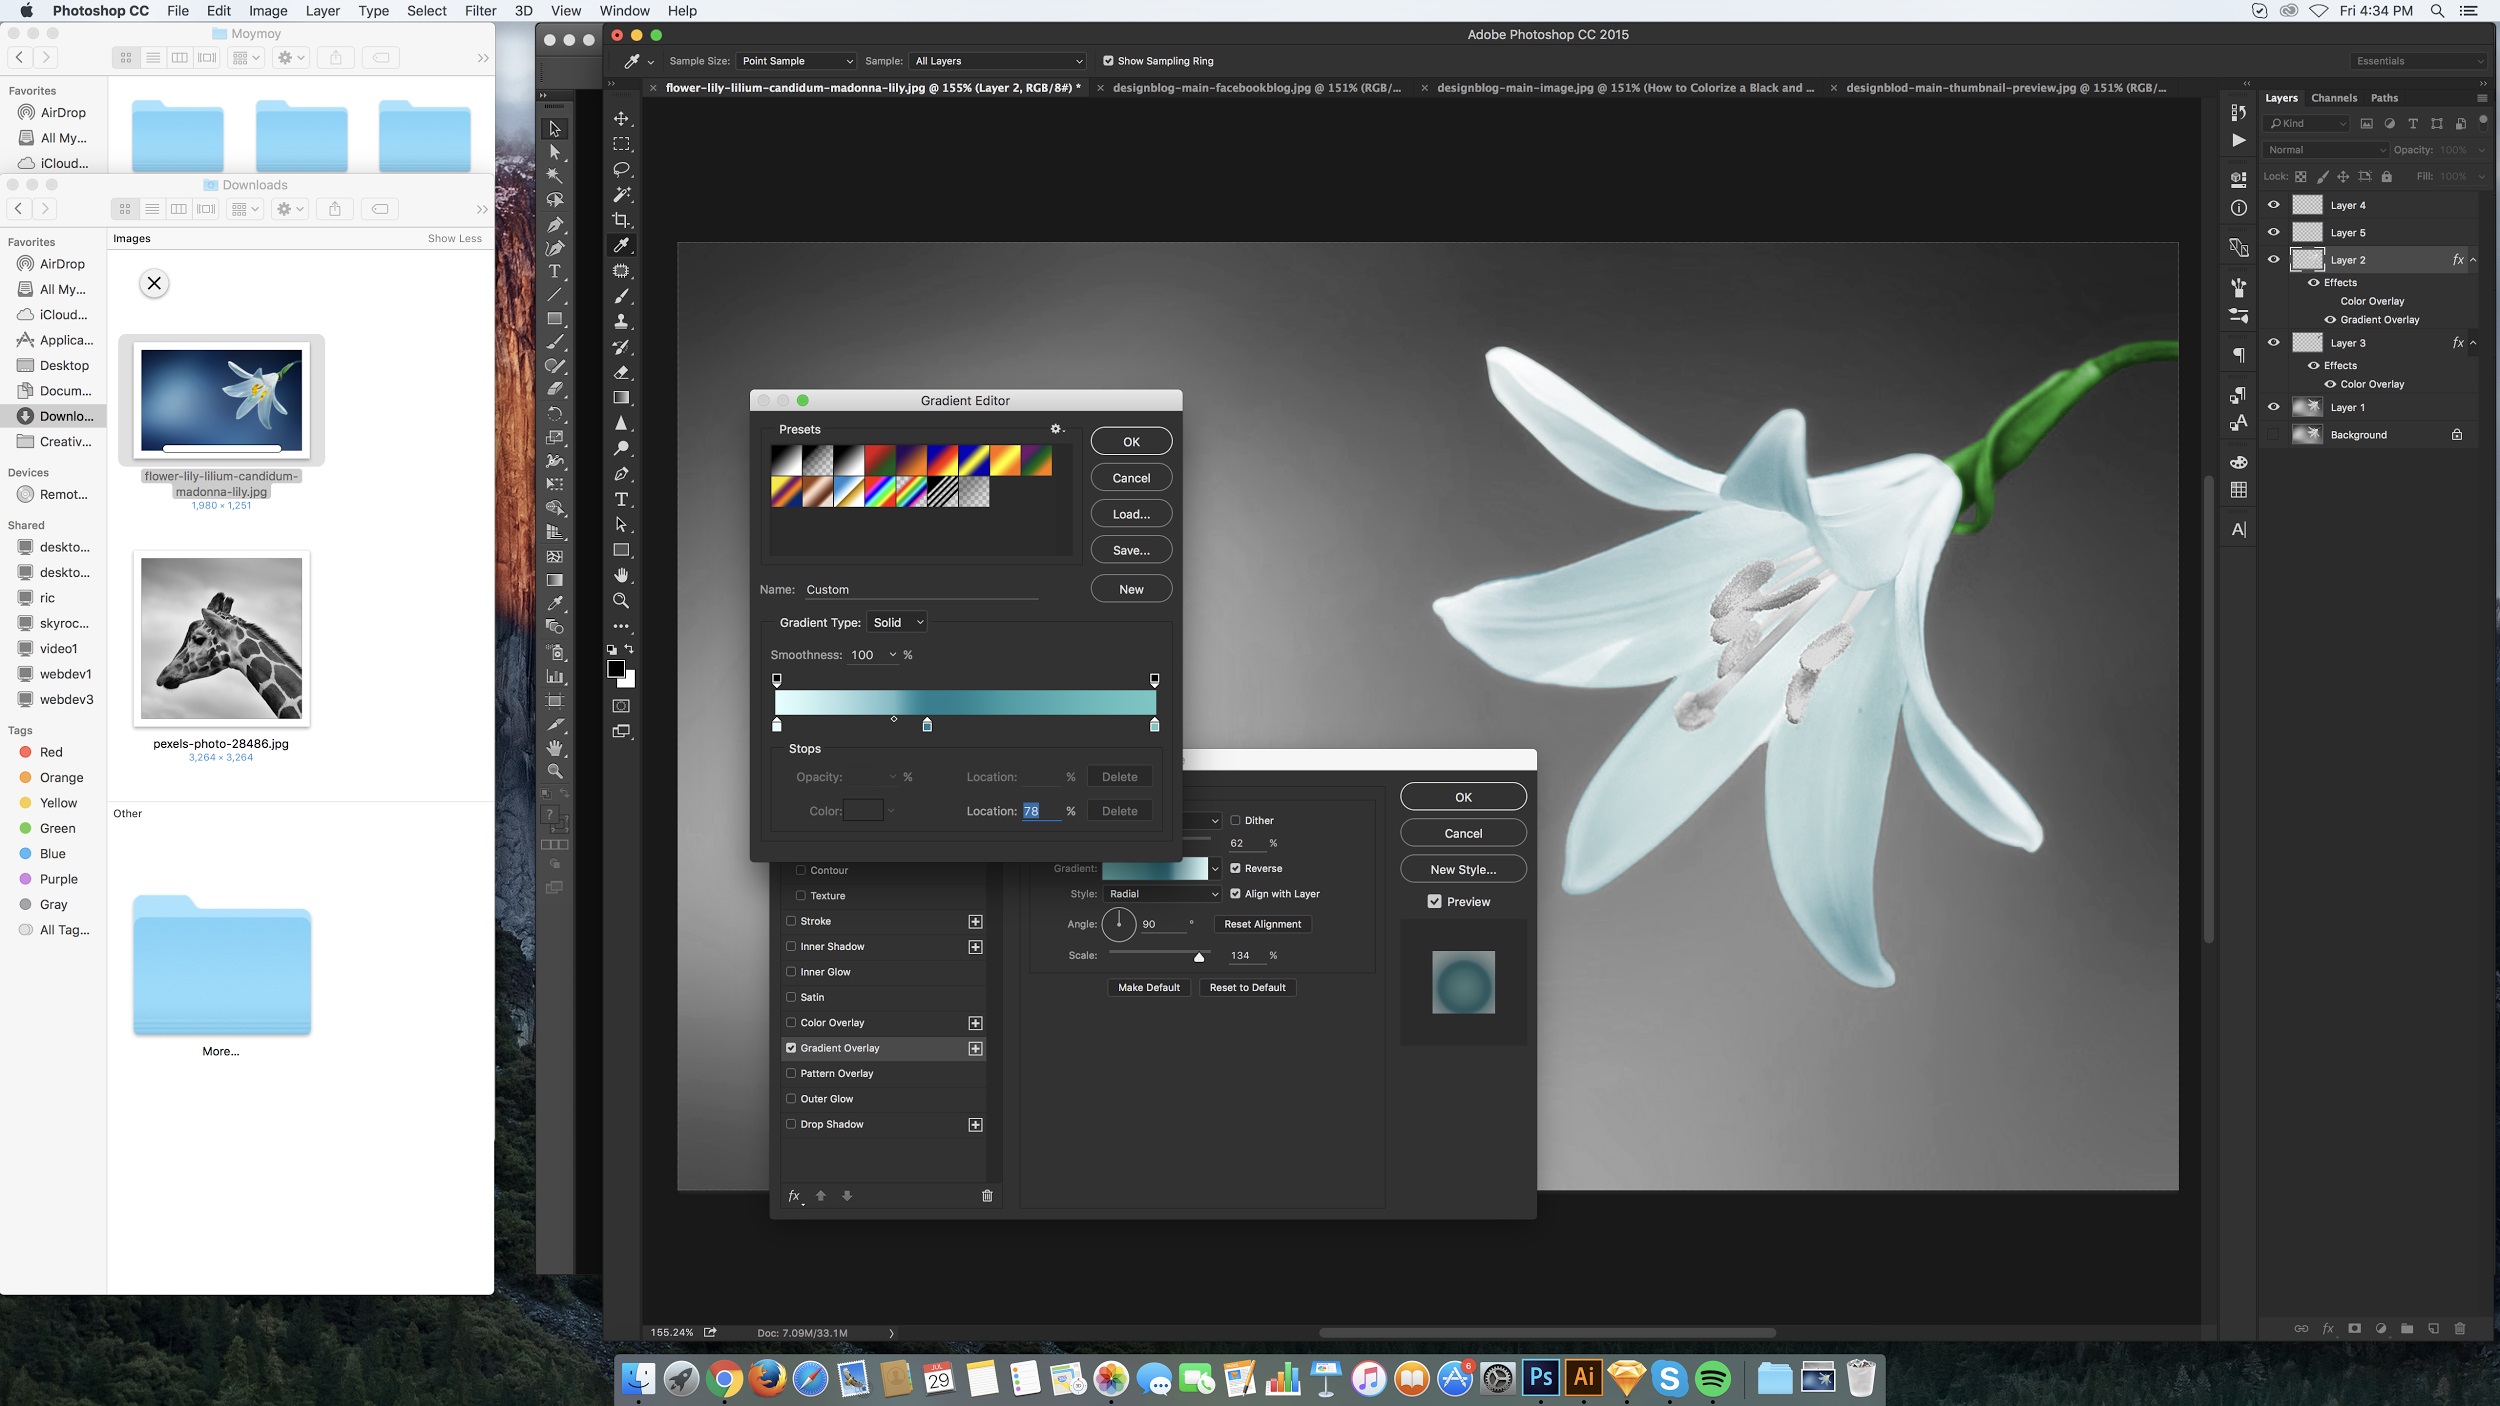
8. Select the layer with the Flower Petal on the Layers Panel. Right-click and select Blending Options ? Gradient Overlay. Set Blend Mode to Overlay (Gradient Blue) and Opacity at 62%.
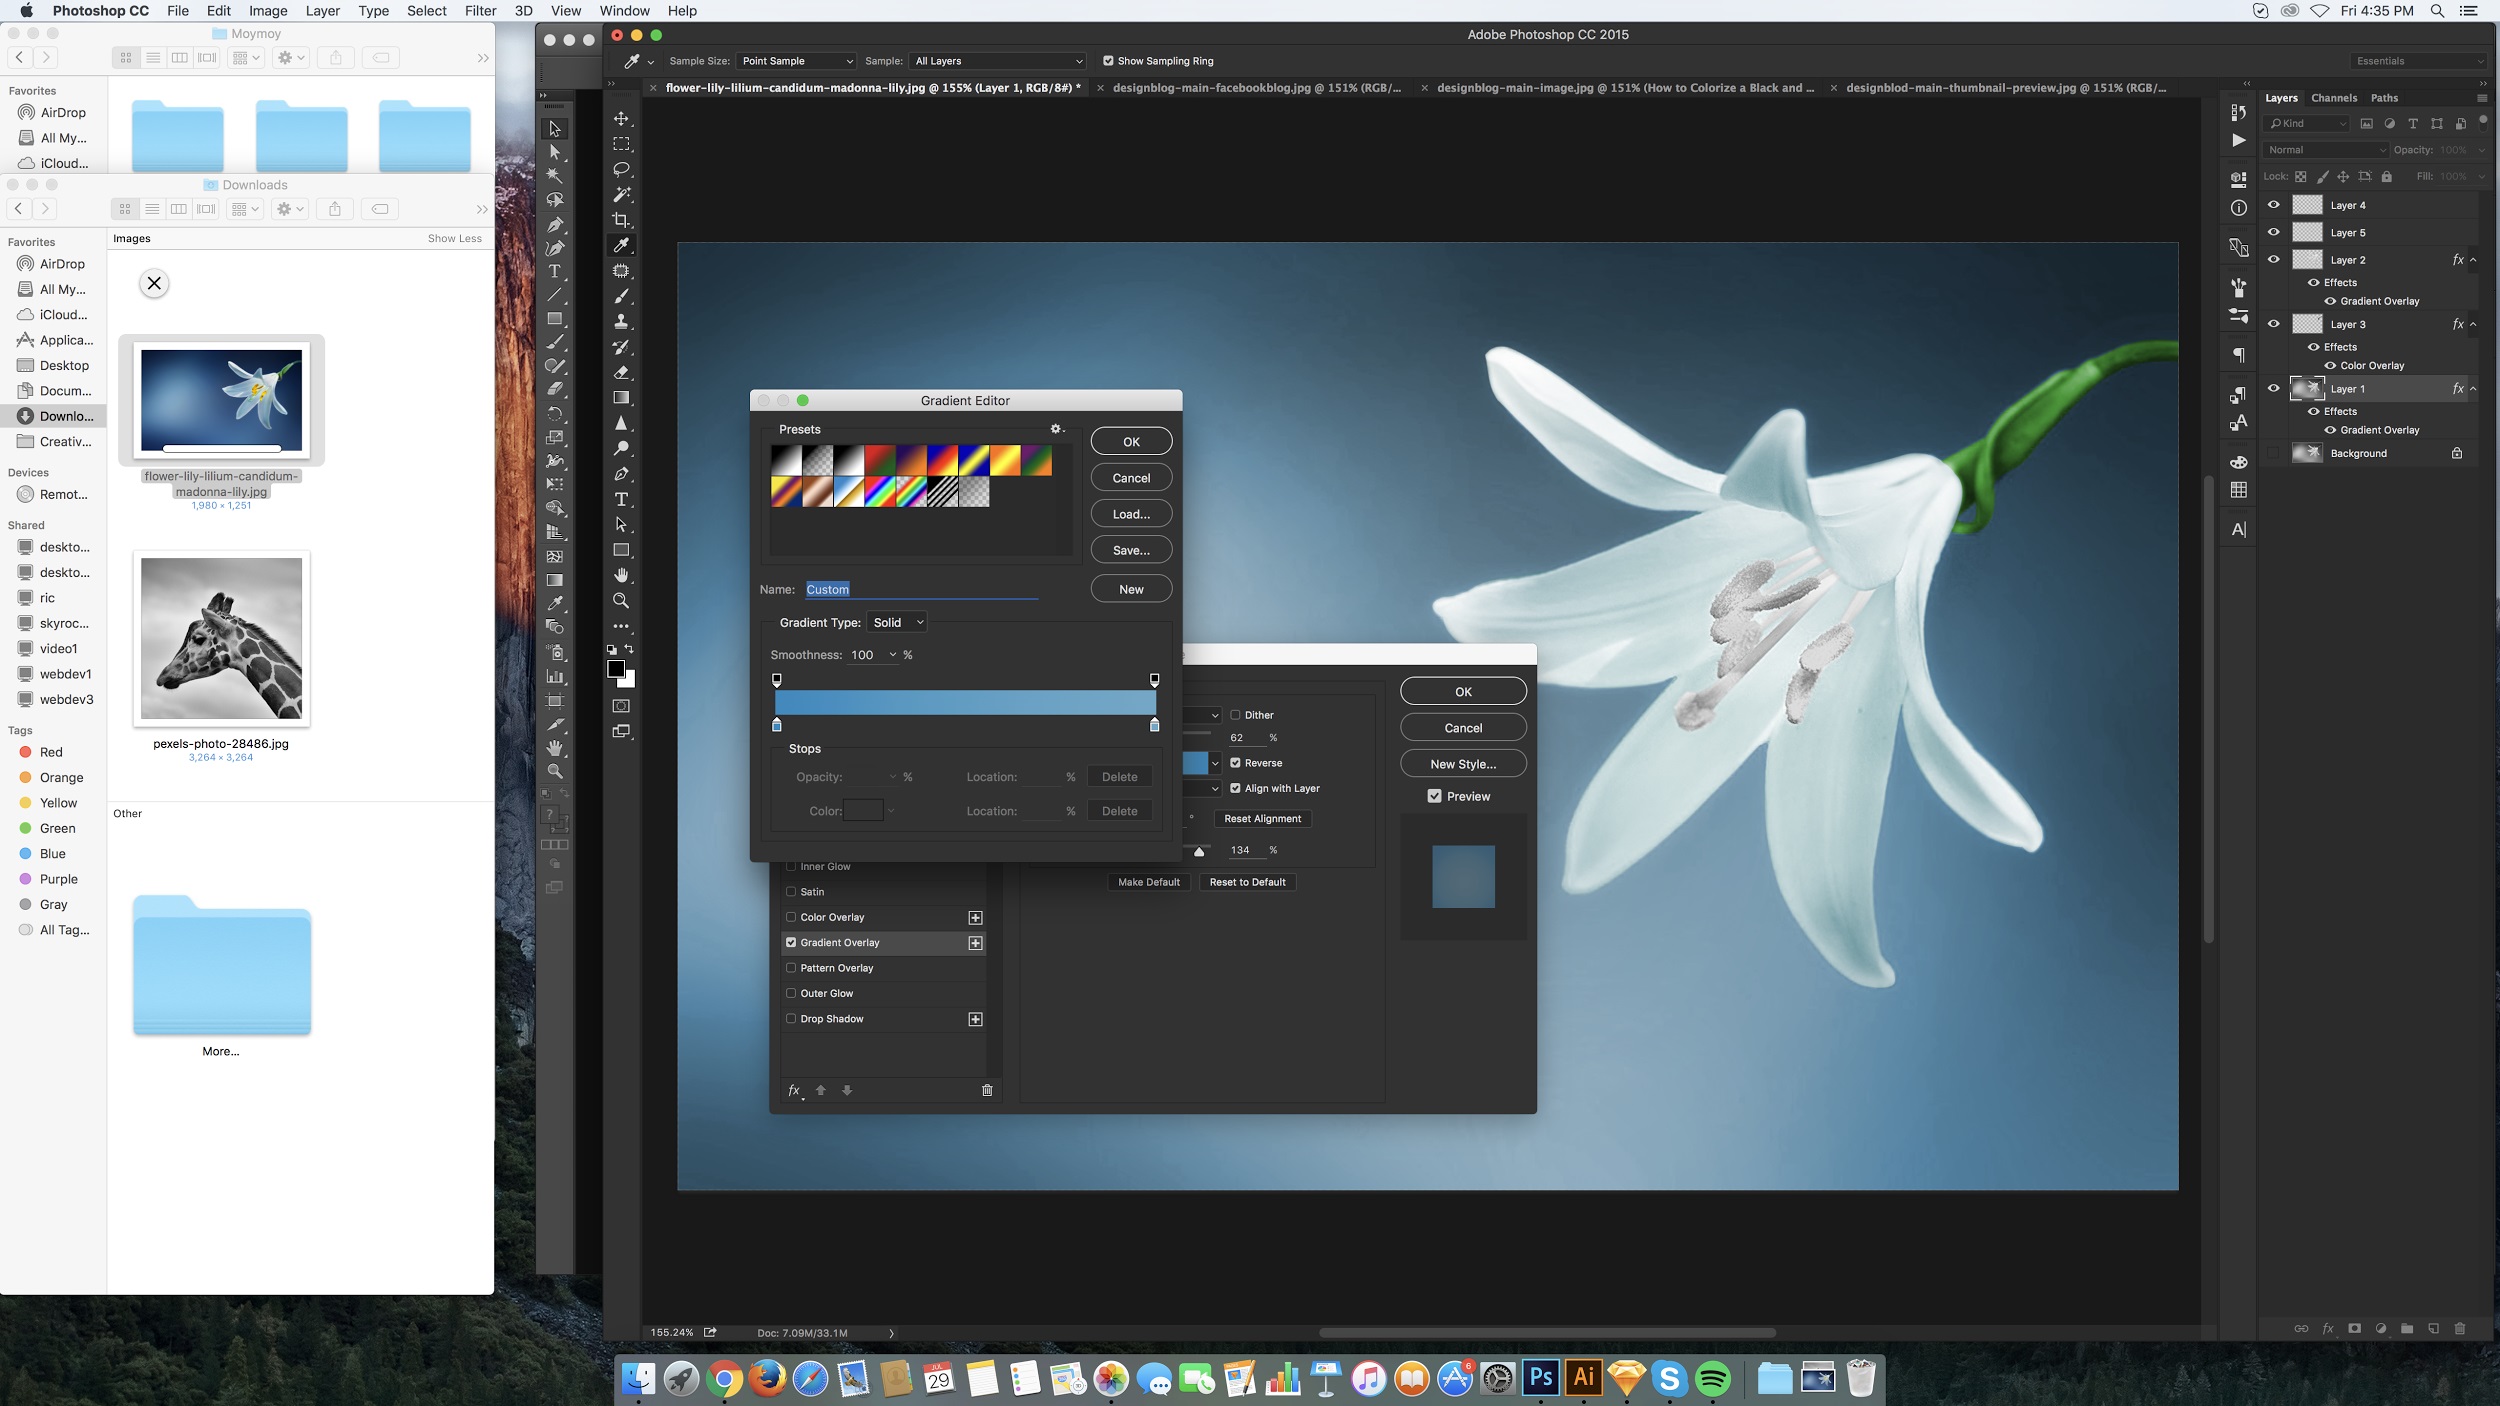
9. Now let’s color the Background. Select the Background Layer and right-click Blending Options. On Gradient Overlay, set Blend Mode to Overlay (Gradient Blue) and Opacity at 62%.
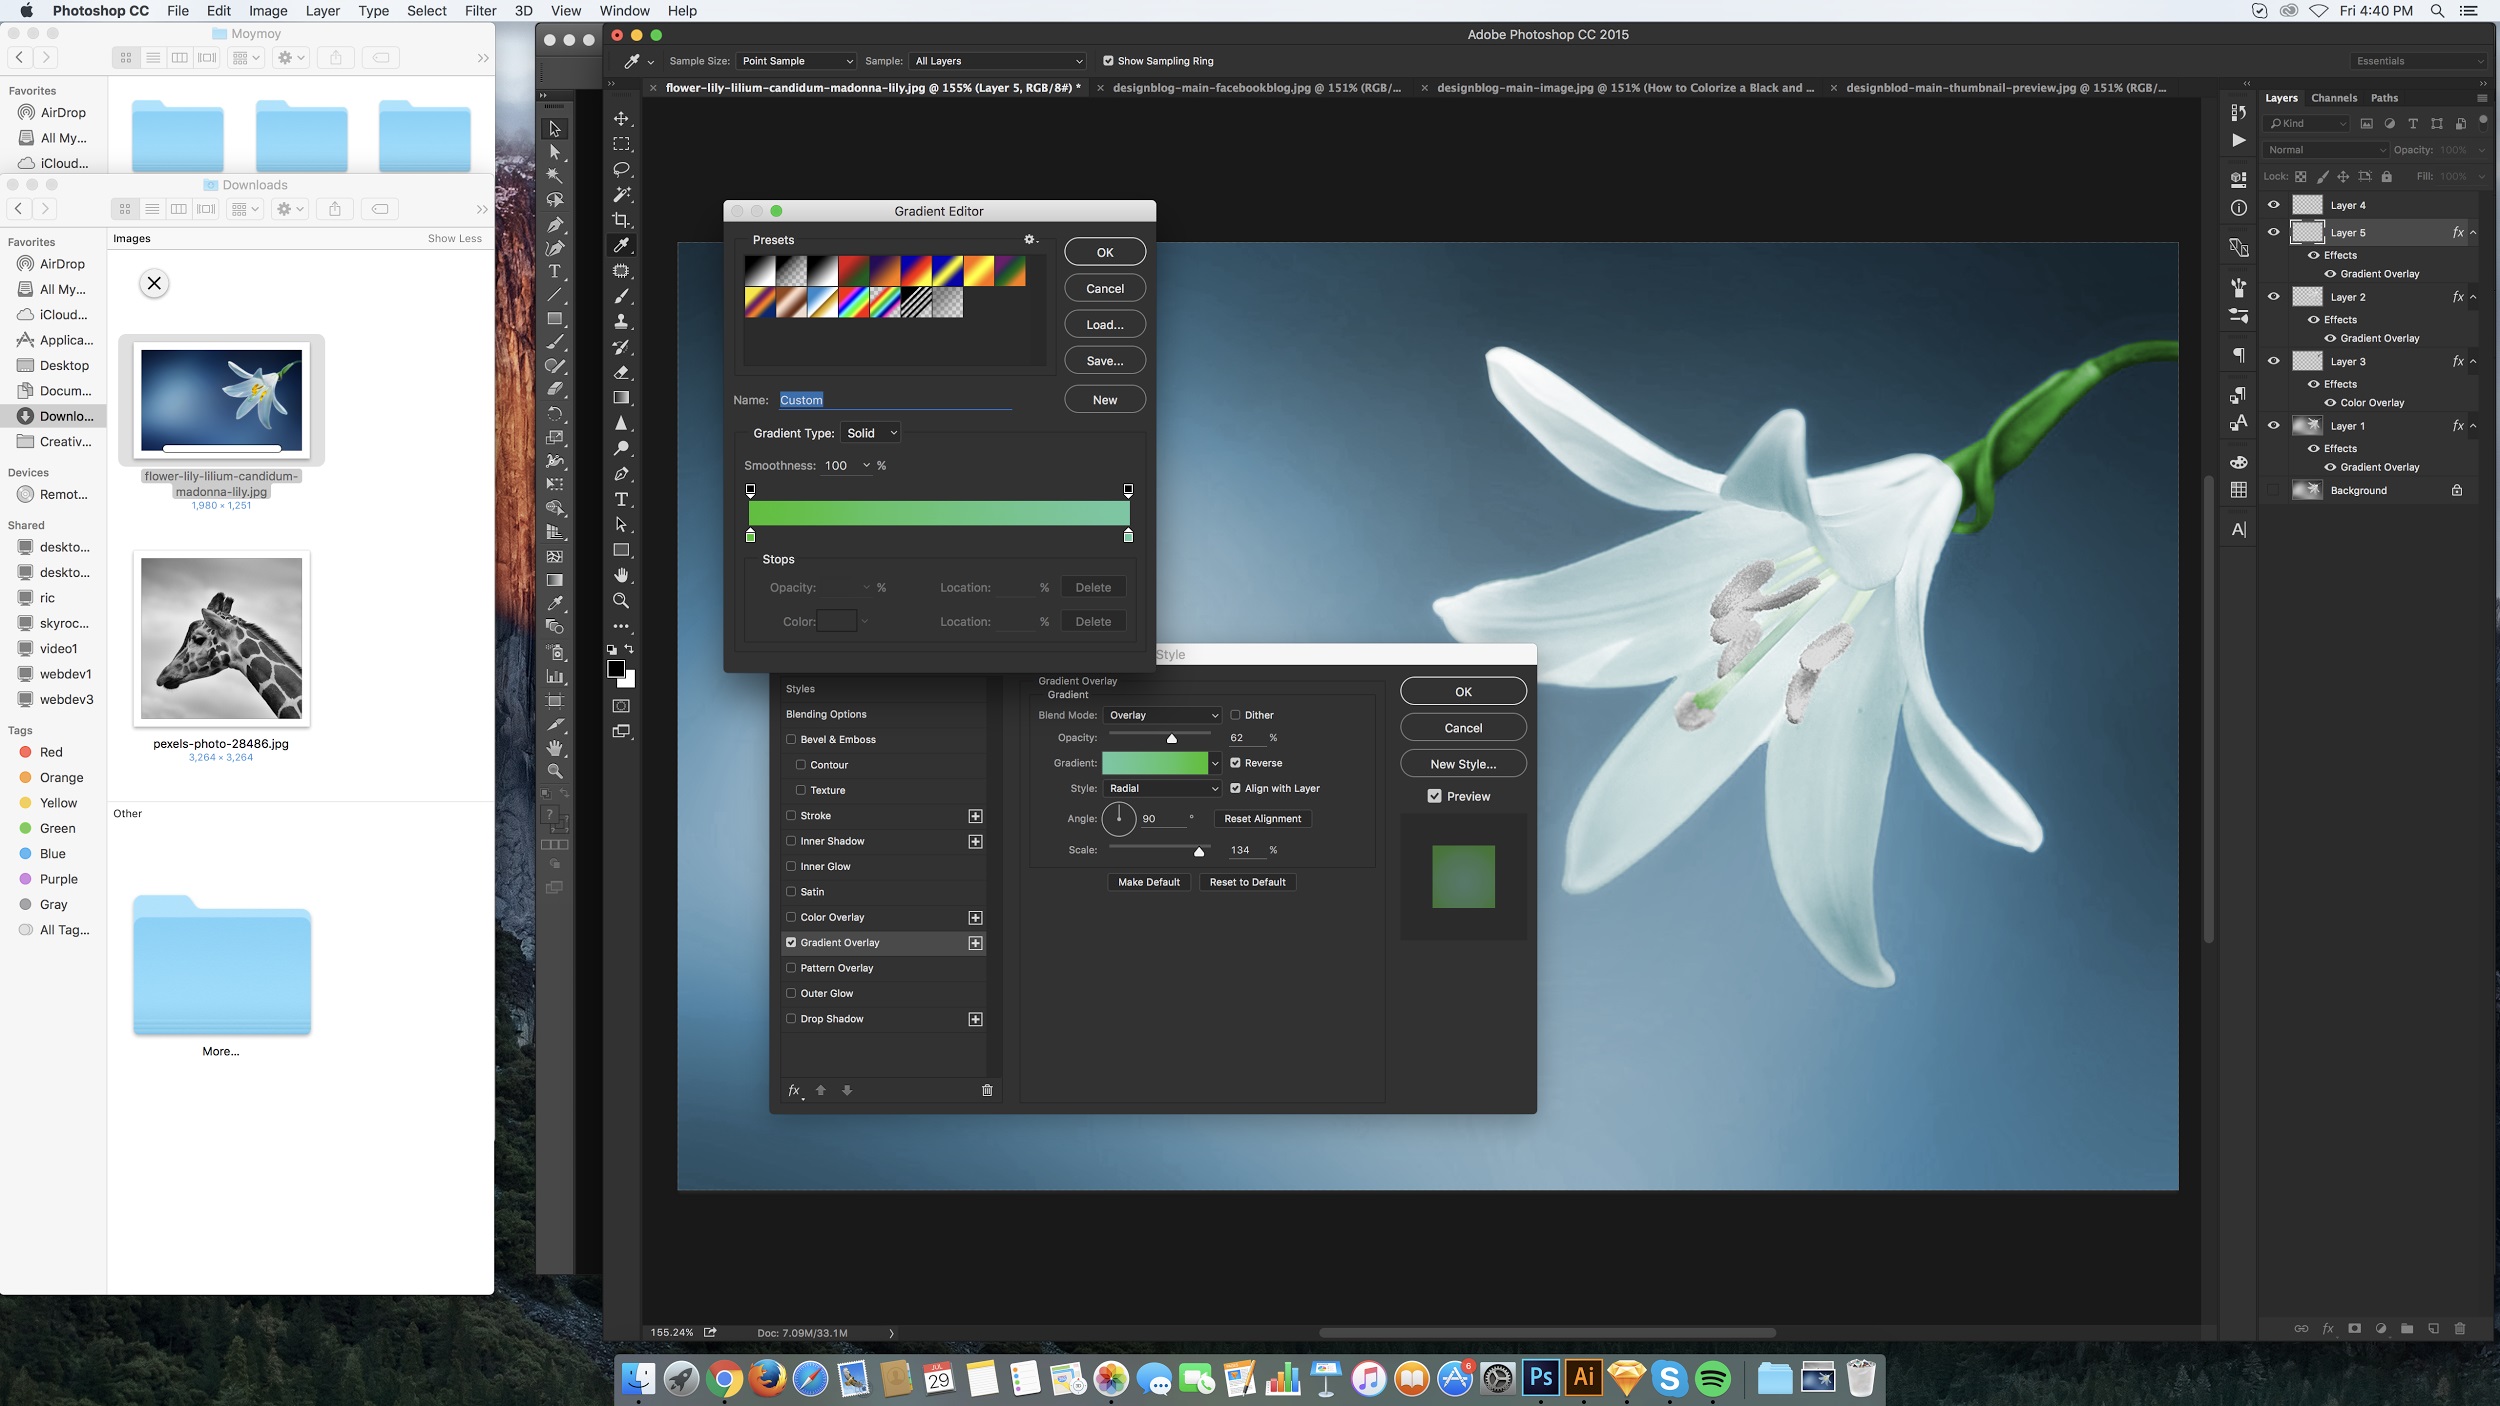
10. Let’s also colorize the Pollen Stem. Right-click on its layer in the Layers Panel and select Blending Options ? Gradient Overlay. Set Blend Mode to Overlay (Gradient Green) and Opacity at 62%.

11. Let’s not forget the Pollens too. Right-click on its layer in the Layers Panel and convert it to a Smart Object.
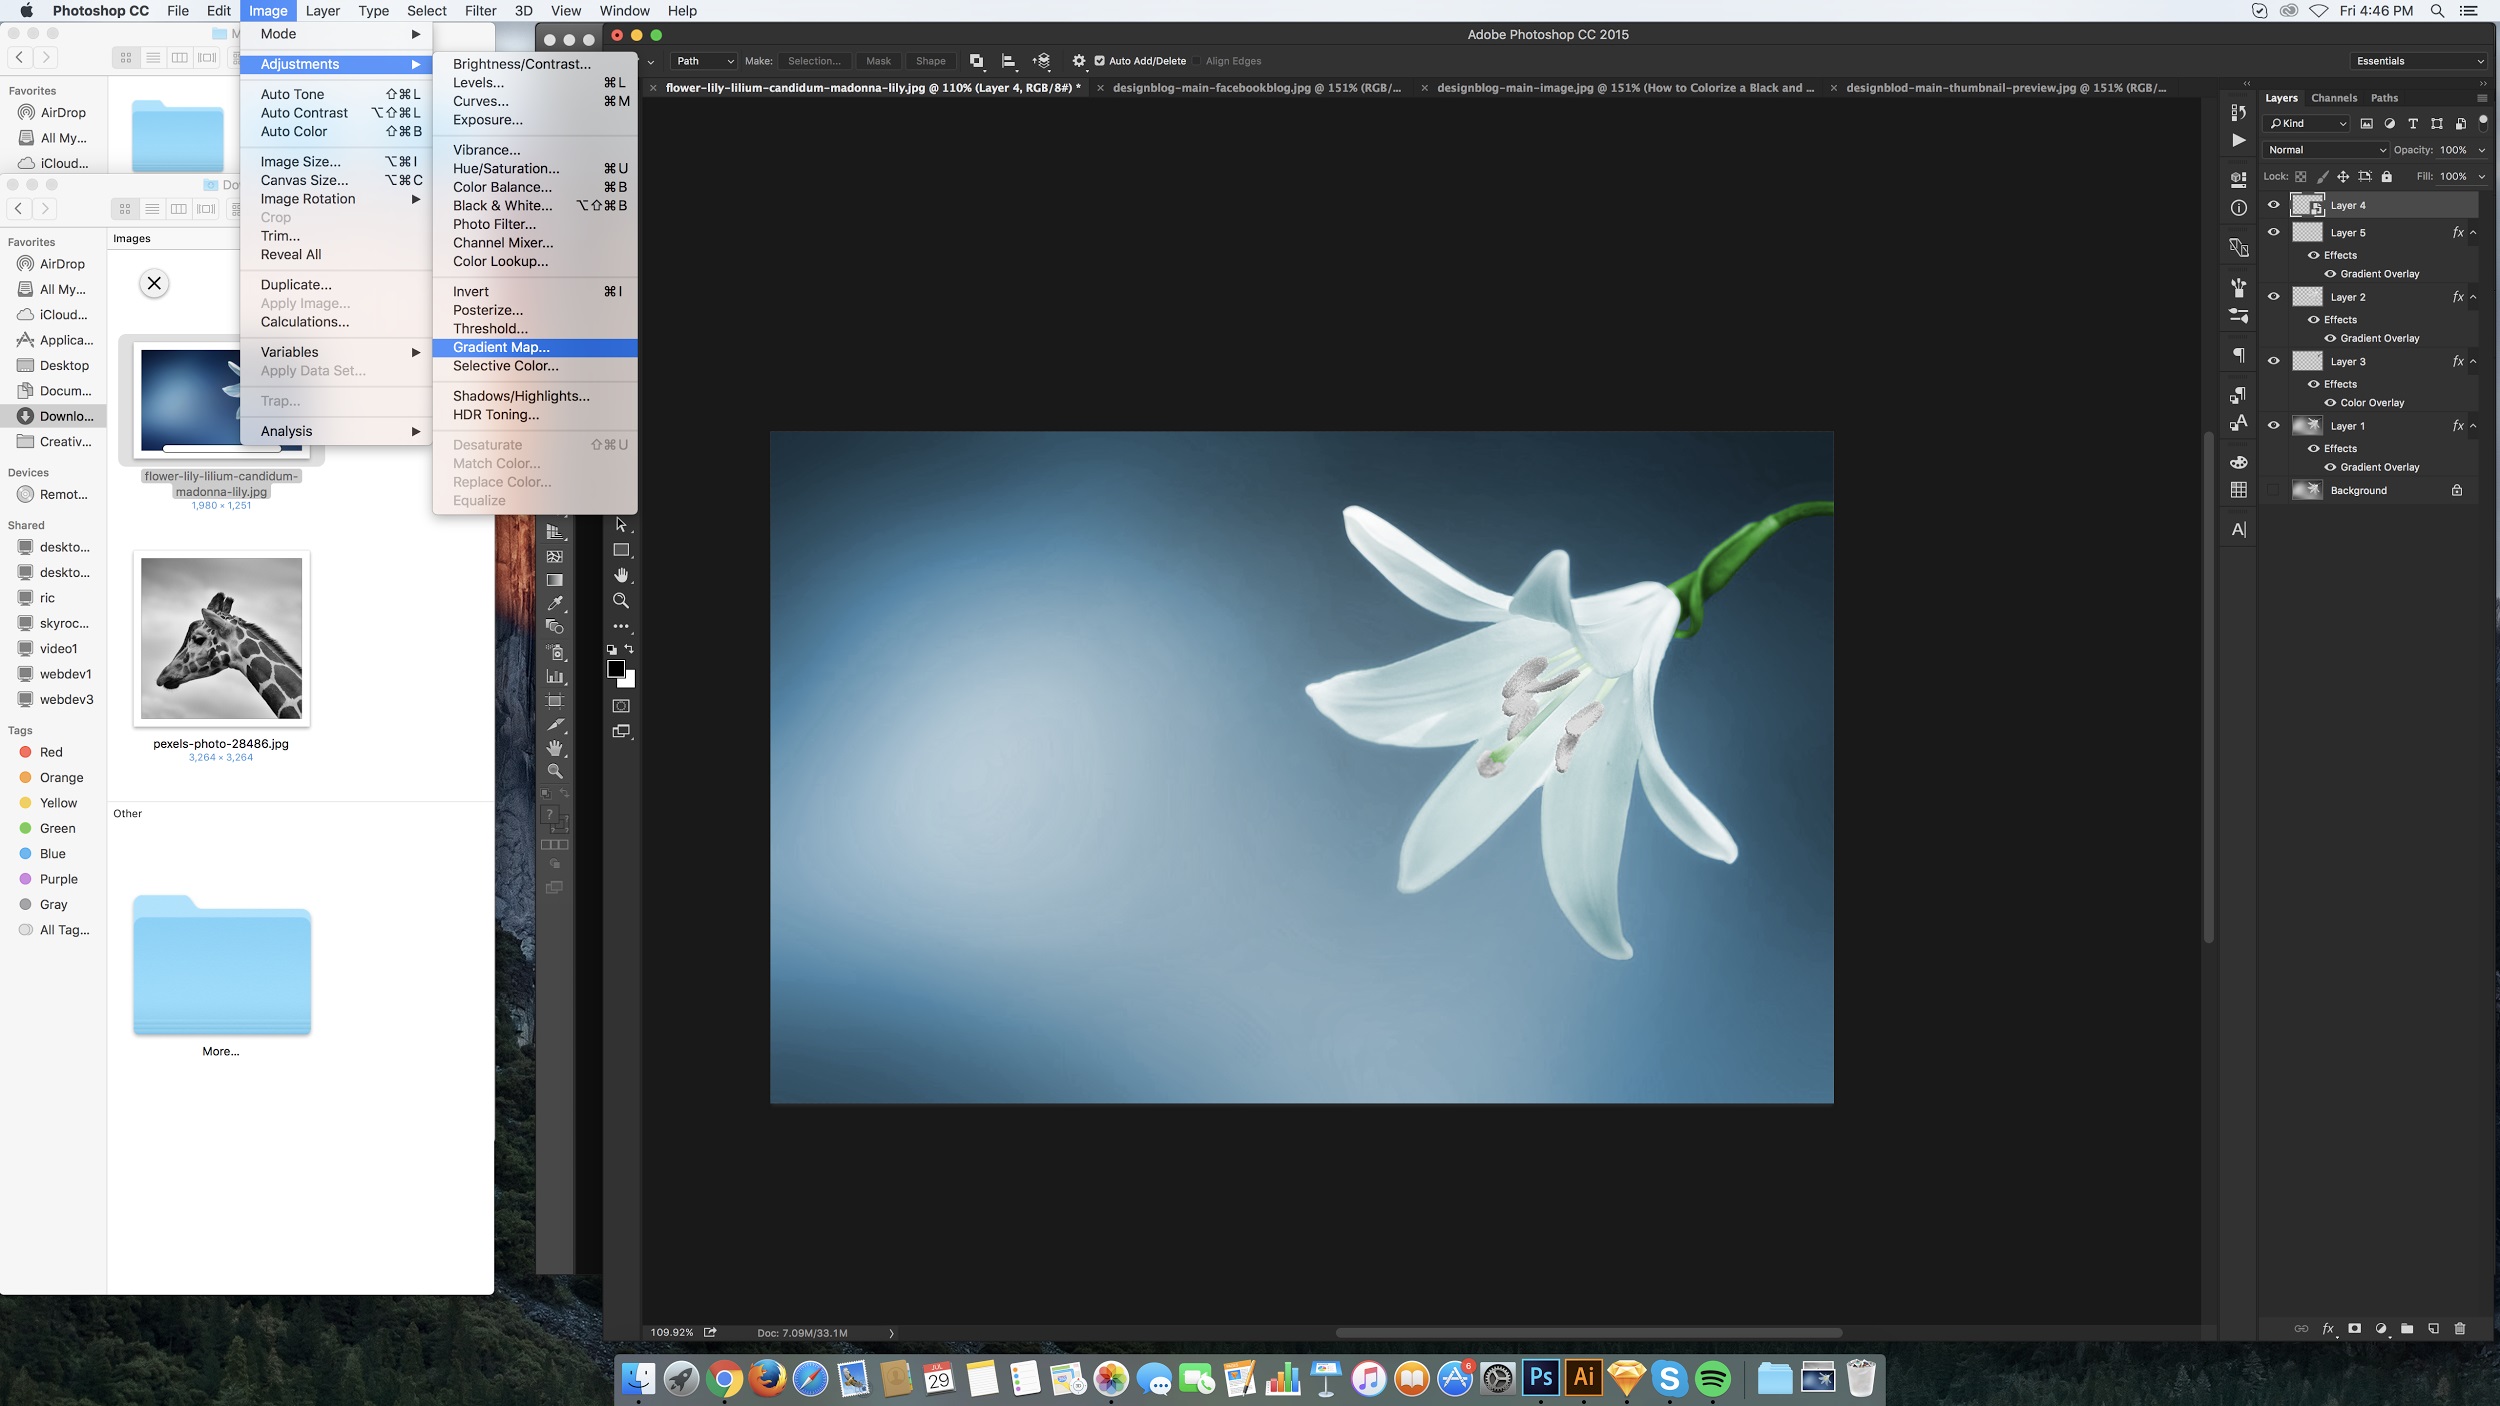
12. While its layer is still selected, go to Menu / Image / Adjustment / Gradient Map.
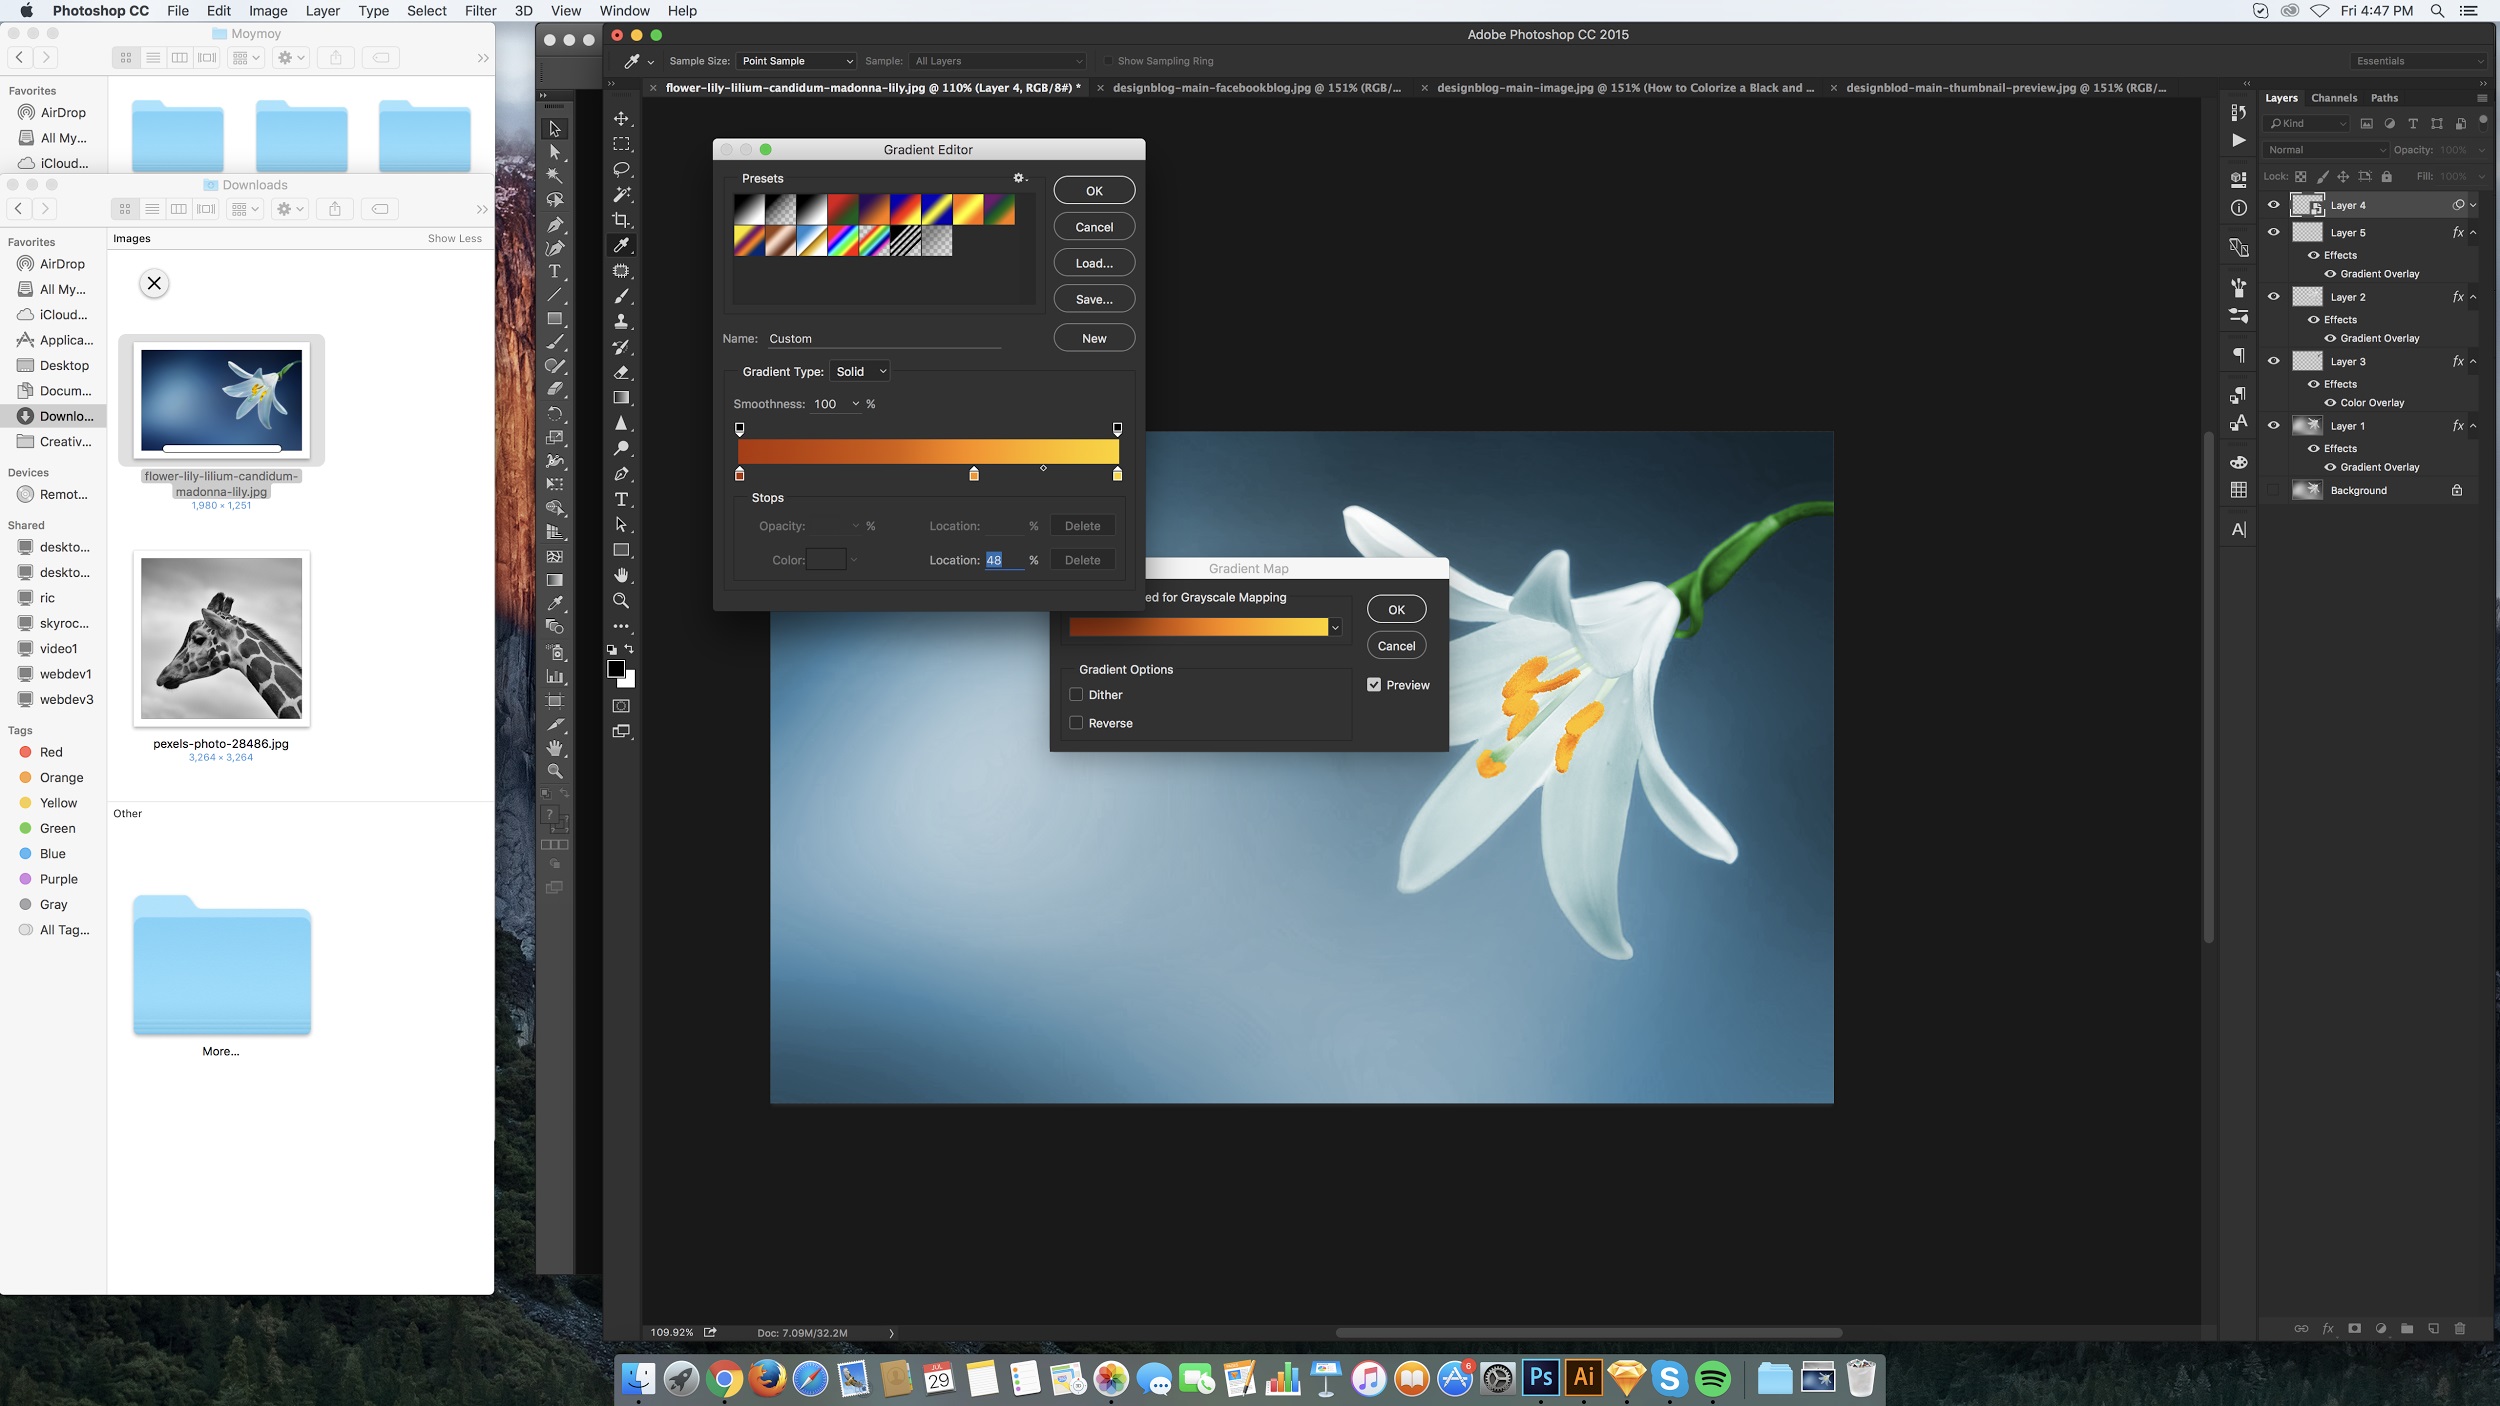
13. Select your desired colors accordingly.
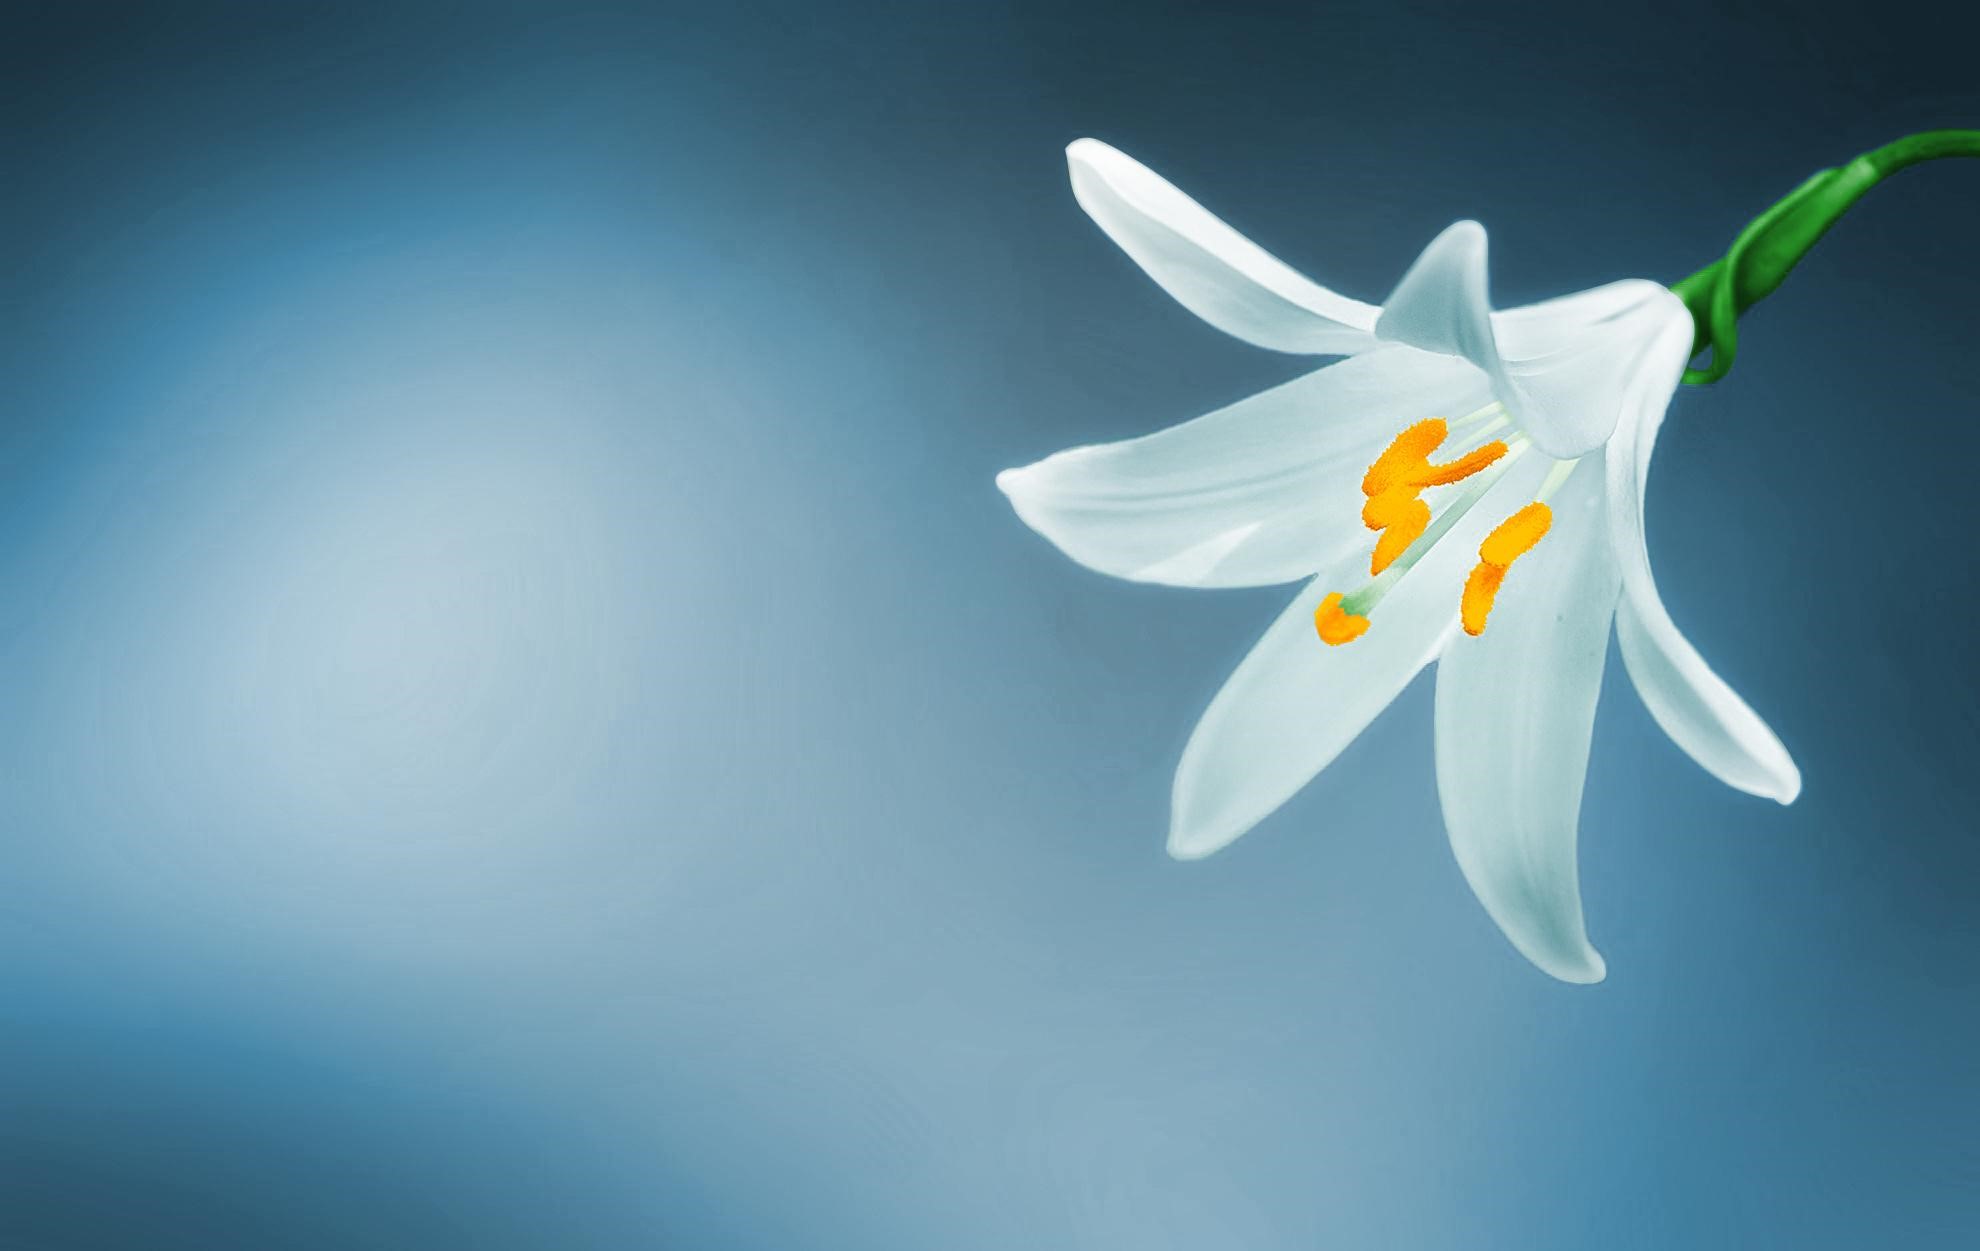
And there you have it! You now have a colorized image!


Add Comment