Header plays an important role in ecommerce website as most usability experts say that first impression is the last impression for visitors. The businessmen spend lots of money on online advertisement, SEO & Offline advertisement to get visitors on their ecommerce website. But it can prove waste of money if visitor not willing to stay on website.
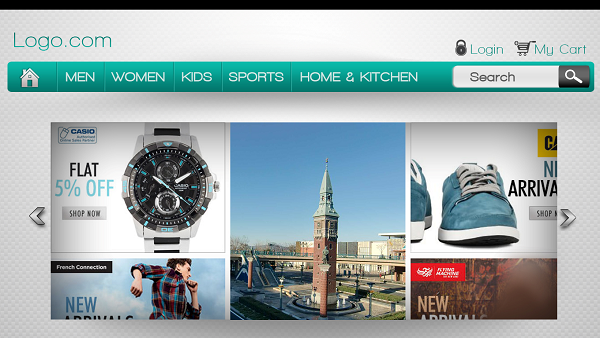
Designing an impressive ecommerce header in a Photoshop is not easy task. But, with the below mentioned steps, web designers get a little bit relief in making it comfortably in less time. Let’s have a look on the steps to make the header comfortably.
Step 1: Create the New File
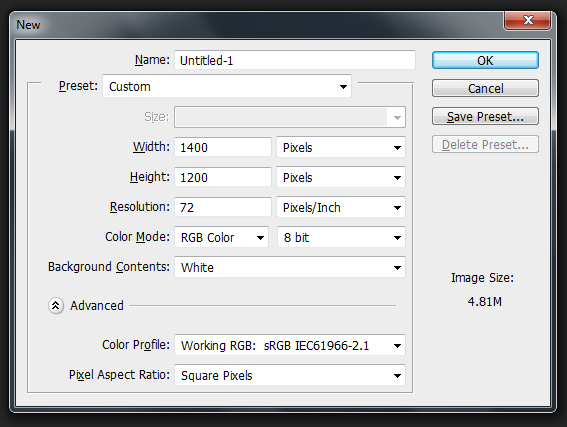
Go to File –> New and create a new file that is 1400 px wide and 1200 px high.
Step 2: The Background
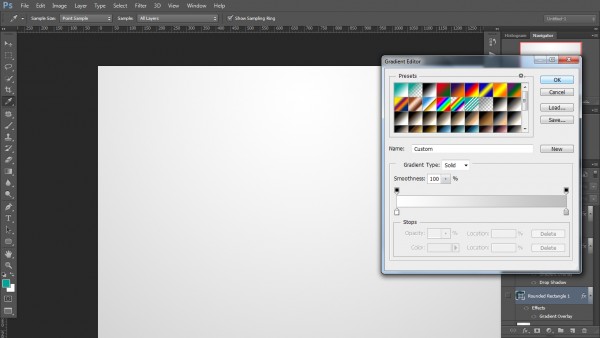
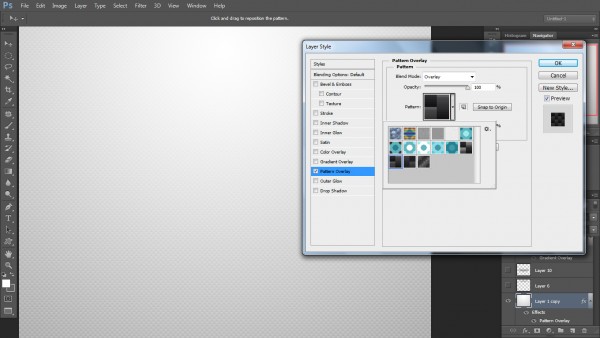
Choose Background with a white gradient effect and pattern overlay.
blend mode : overlay
scale :165
Step 3: The Header
We’ll start with the featured area using the rounded rectangle tool. Set the radius to 10 px. Select the featured area fill this selected area with any color
Set the foreground color to #05756band the background color to # 0cbcac. Double click on the shape layer in the layers palette to bring up the layer style options.
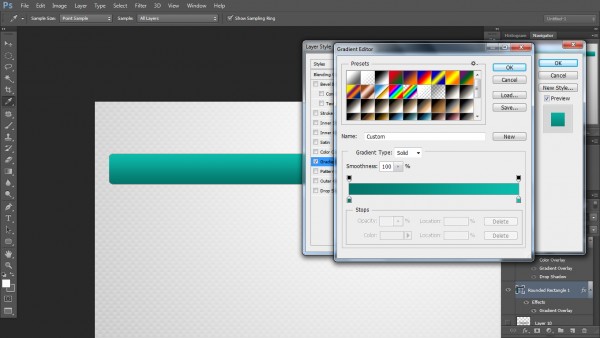
Click on “gradient overlay” and select the gradient that fades from the foreground color to the background color and check the “reverse” box so that the lighter shade is at the top.
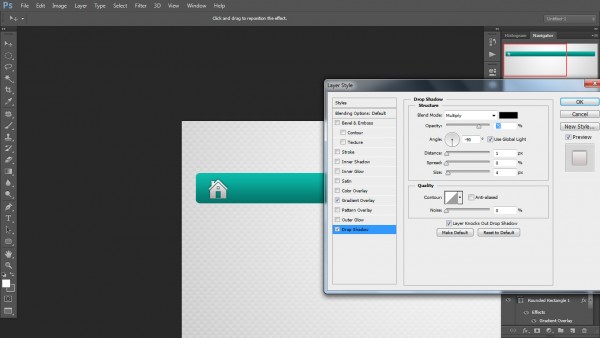
To create Home button: open the home icon to make home button, press ctl + T to transform (resize home icon) than go to layer style clik on dropshadow .
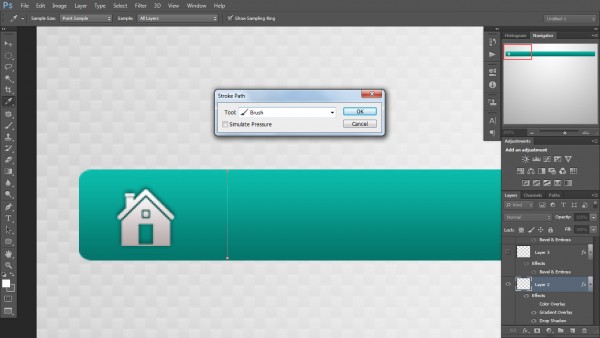
Step 4: The Navigation Menu
We decide to show 5 navigation links. Now we divide navigation bar into 5 equal parts. Now we pick pen tool & draw a border. Now click on right side of mouse & choose Stroke Path option. Choose brush & click on Ok button
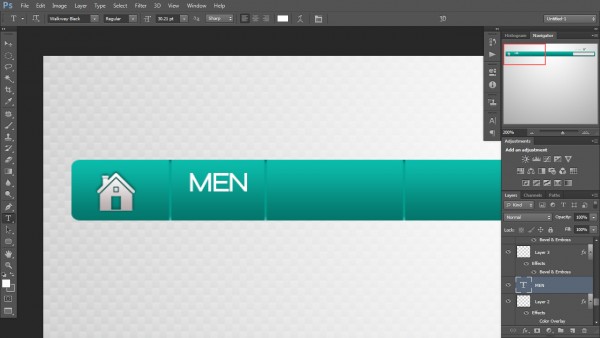
Add text for the navigation links.
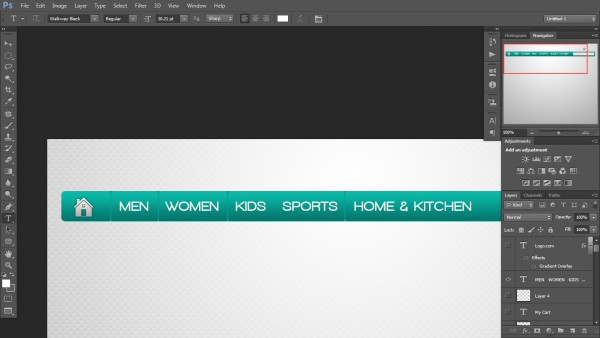
That completes the navigation menu, and here we have the results with us.
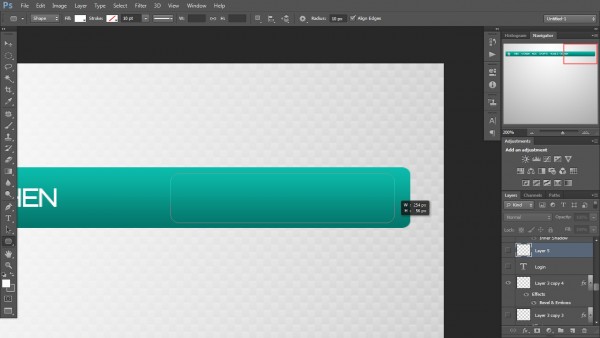
Right next to the search button we’ll create one field Use rounded rectangle tool to create this box field and fill it with color.
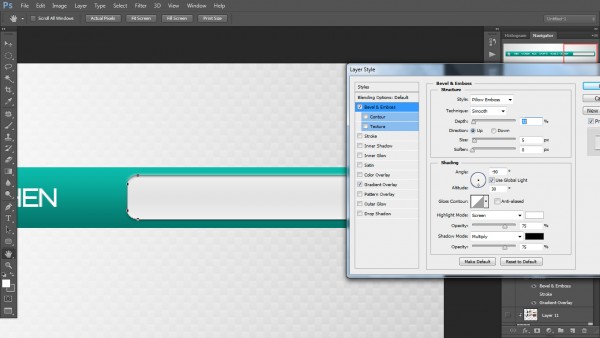
Then go to layer style click on Bevel & Emboss
Style = pillow emboss
Depth = 32
Size = 5
Now click on ok.
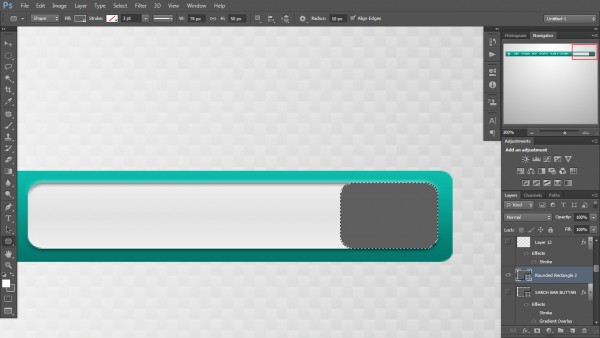
Now to make Search button, open the Search icon and resize it
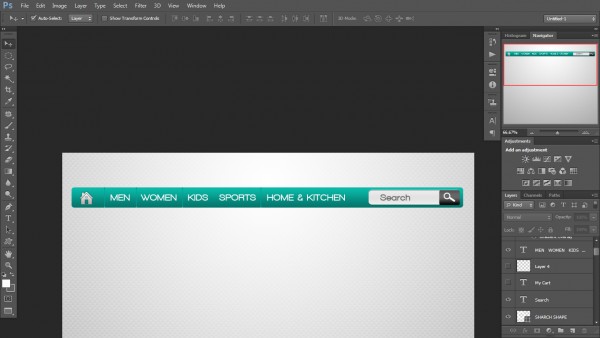
Here is what we are waiting for.

Now we will make shadow: Take ellipse tool and draw an ellipse fill it to gray Color.
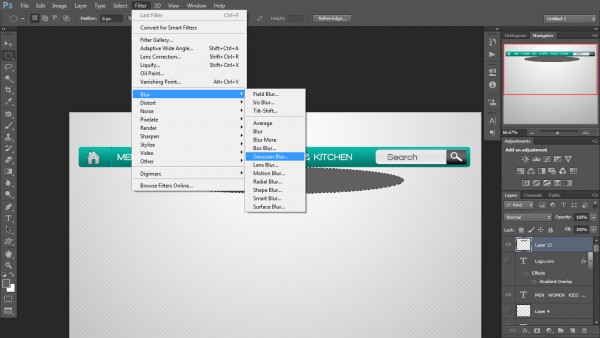
Then go to filter –> blur –> Gaussian blur
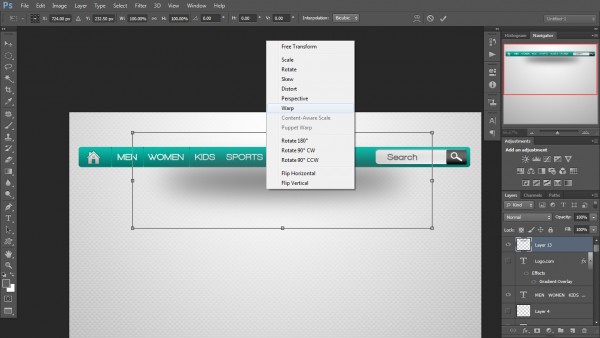
Now to Transform it, select shadow layer and press ctl + T. Right Click on Mouse & select warp from panel option.
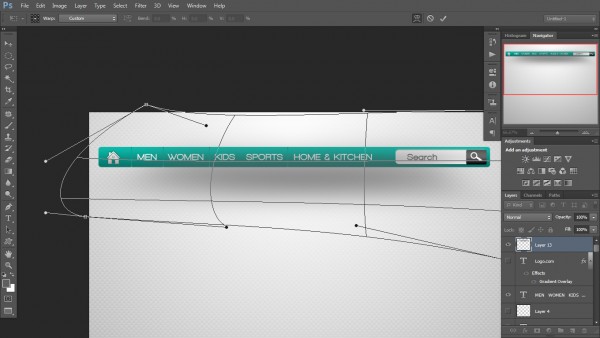
Set shape of shadow with the help of warp handles.
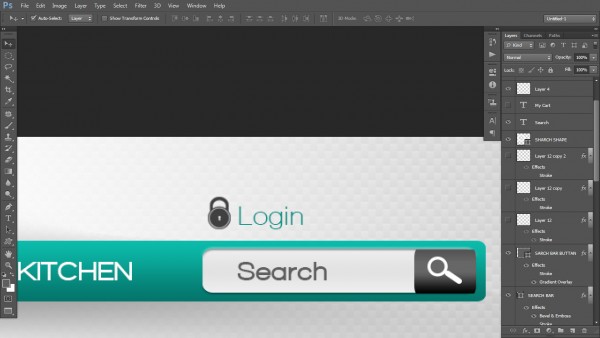
To make login link, open text tool by typing T. Write Login text (as show in above icon) .Import Login Icon adjacent to it. Resize it. Apply same steps to design My Cart Button.
Now make banner take banner image and place it in our file now give it artificial Shadow take ellipse tool and draw a ellipse fill it to gray Color
Go to filter –> blur –> Gaussian blur
Transform it select shadow layer and press ctl + T select warp
Reset shape with the help of warp handles.
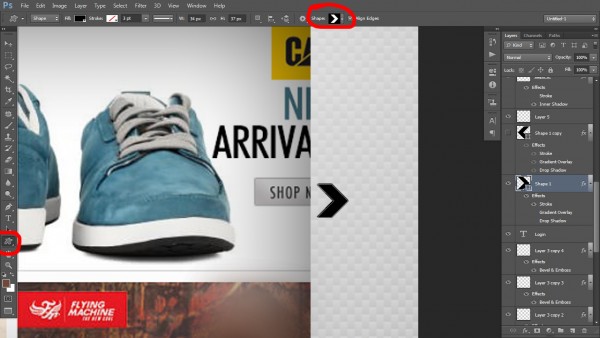
Take shape tool -> custom shape tool select arrow shape and draw.
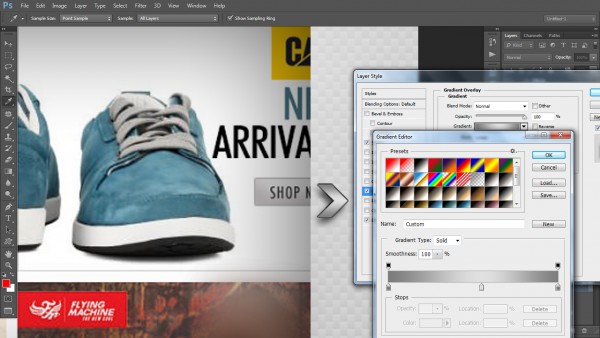
Click on layer style check gradient overlay and set gradient. We set 3
Color gradient left and right fill #7c7c7c and center color is #e0e0e0.
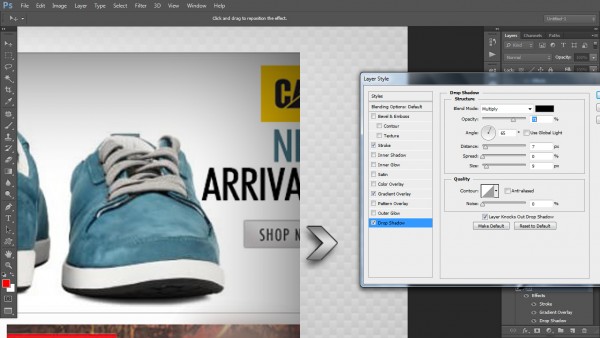
Then check Drop shadow option and give it shadow
Opacity = 70
Angle = 65
Size = 9
Distance = 7
And uncheck use global light.

Conclusion
These steps help the designer to prepare an attractive and successful header. The eye-catching look of the header will keep the visitors stay on the page and explore the website brilliantly. You can experience the fact by exploring the nicely designed eCommerce header on excellent website.
Author Bio
For last 4 years, William Pritchard is working as a Sen. website designer into Toronto’s leading website design company (Sonitek.ca). His responsibilities are to develop unique, attractive website including responsive website design using advance technologies including Flex, jQuery, Ajax, open source framework. She also loves to write graphic design tutorials during her free time.



Add Comment